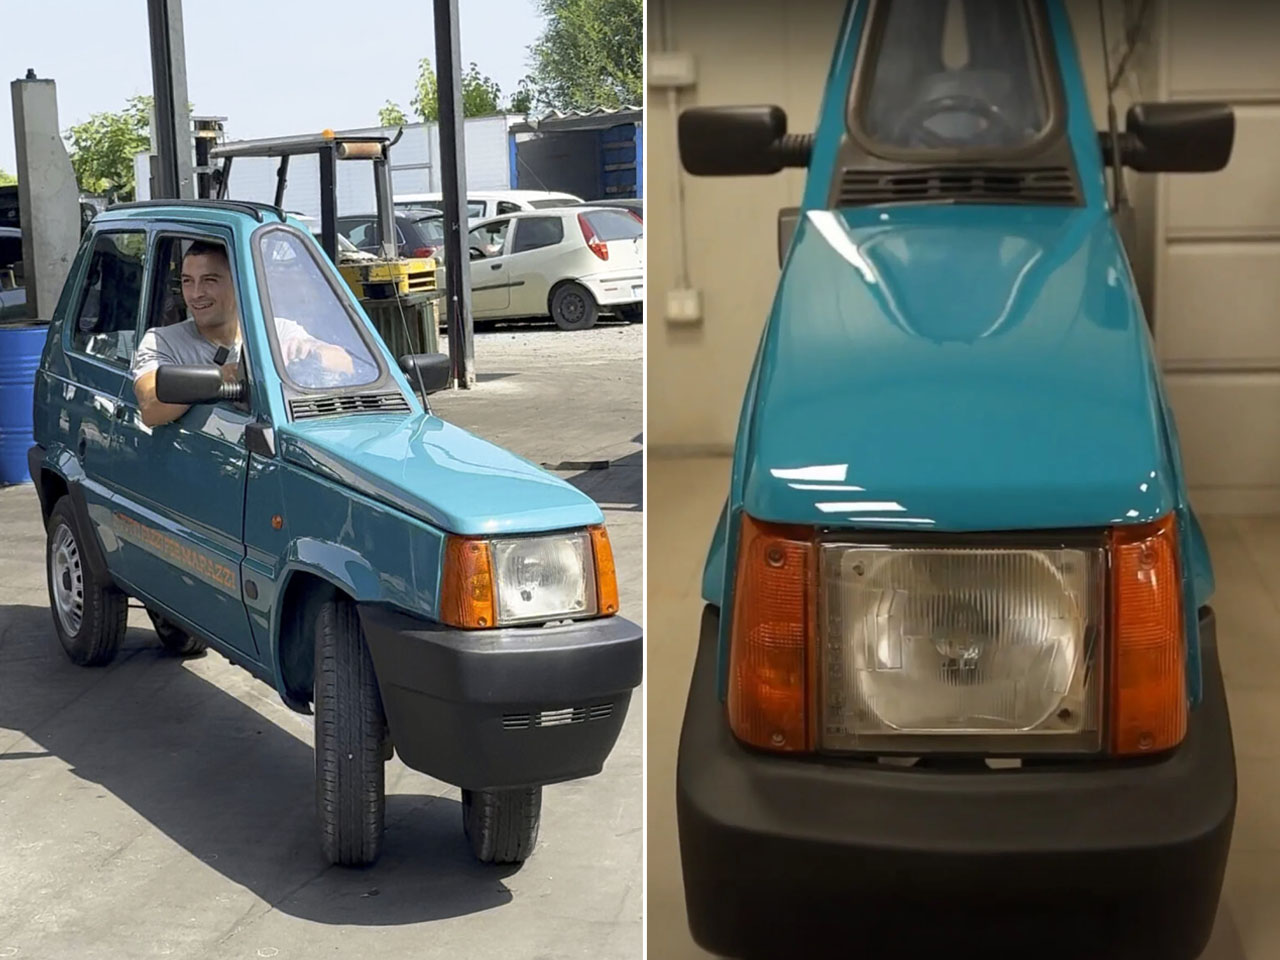
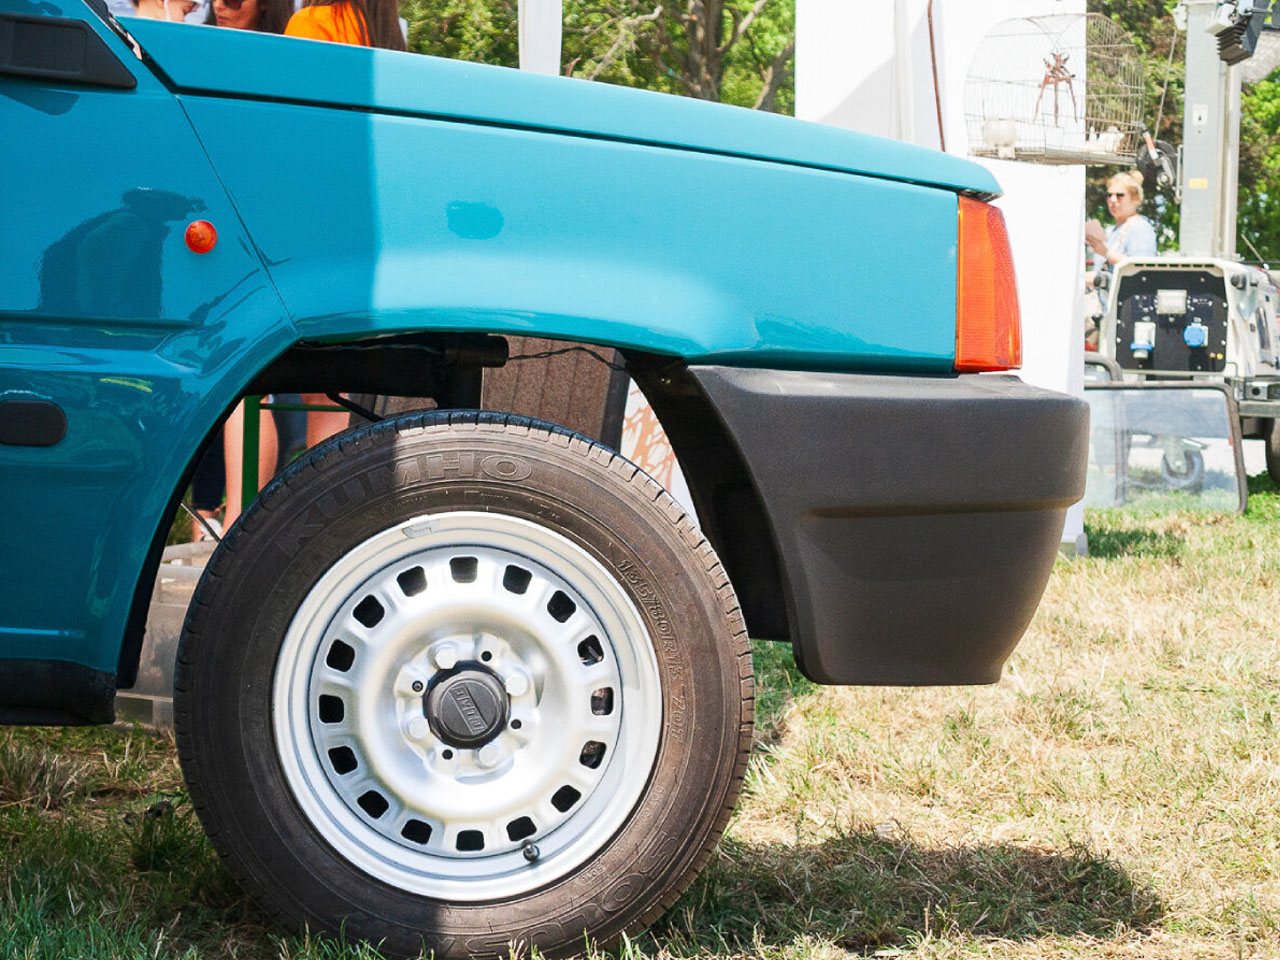
Classic cars often become platforms for bold customization, but few reimaginings are as visually striking (or ugly, I have to admit) as this one. Italian mechanic Andrea Marazzi has transformed a 1993 Fiat Panda into what is now being described as the world’s narrowest functioning car. At just 19.6 inches wide, the one-seater electric vehicle looks more like a cartoon sketch brought to life than a road-ready hatchback. Yet it can move, steer, stop, and drive like any other car. That said, I would never imagine myself driving this one-eyed Cyclops in this lifetime.
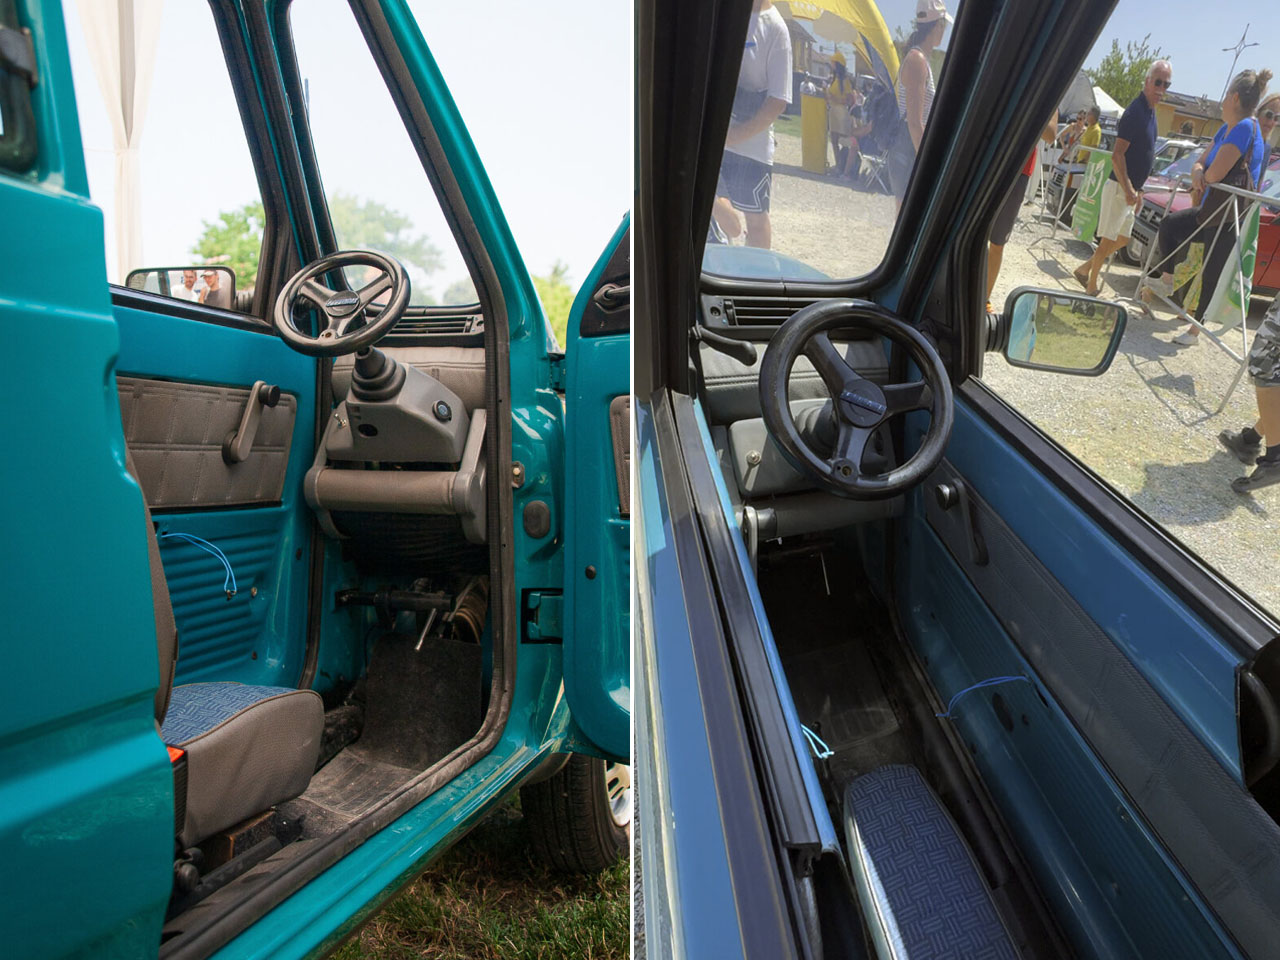
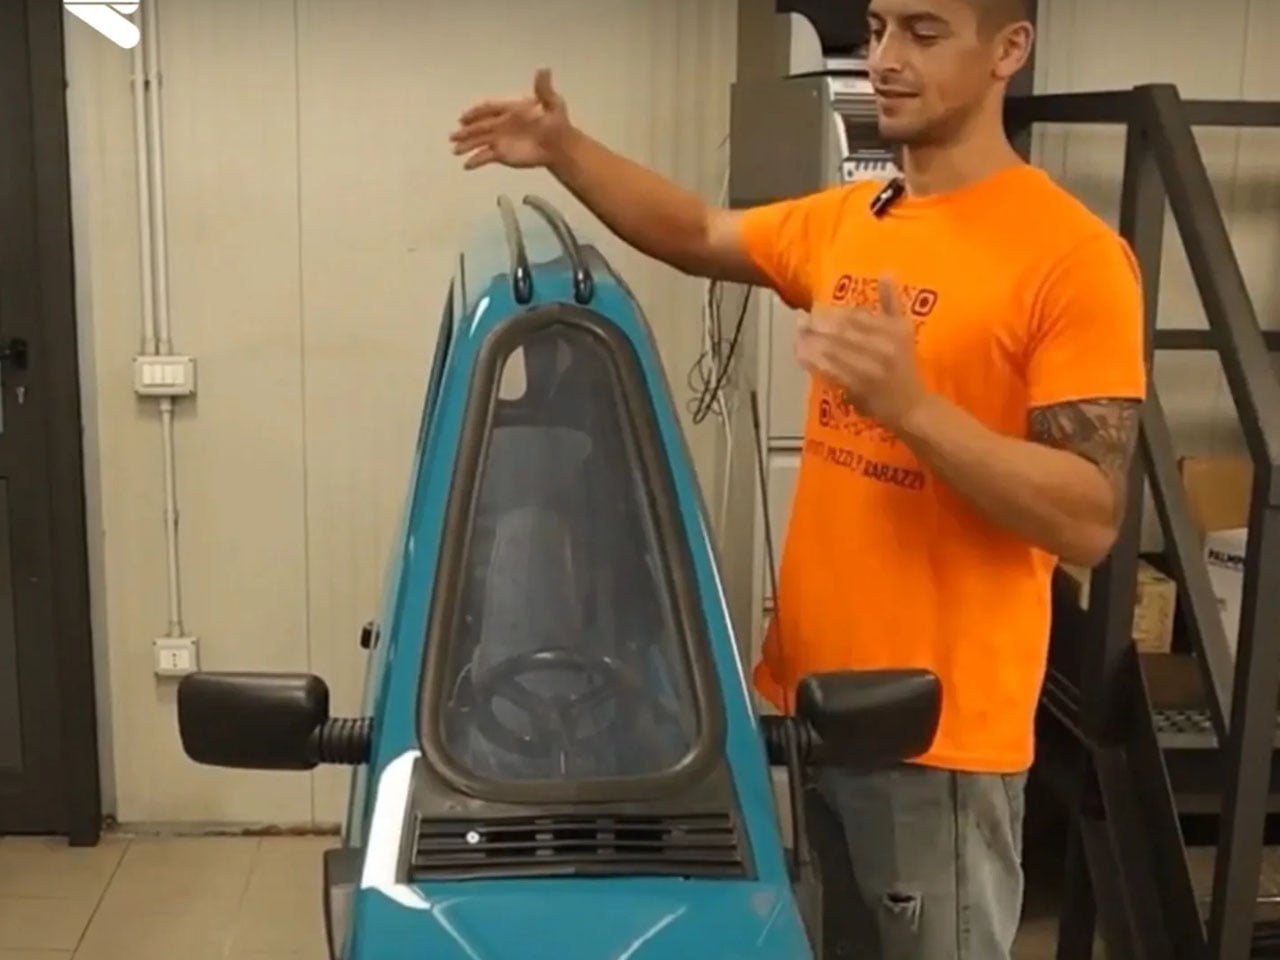
Marazzi, who works at his family’s scrapyard and mechanical workshop in Bagnolo Cremasco, spent over a year building the vehicle as a tribute to the original Fiat Panda. Nearly every original part of the 1993 car has been reused in the process—doors, lights, roof, and wheels—but the body has been split vertically and rebuilt to shrink the vehicle’s width down to a comically slim profile. What was once a compact city car is now a sculptural slice of steel with just enough room to accommodate a single person, seated at the exact center.
Powering this narrow Panda is a small electric motor borrowed from an e-scooter, paired with a 24V battery that gives the car a modest top speed of about 15 kilometers per hour and a driving range of approximately 25 kilometers. It’s not built for real-world commuting, nor is it legally road-registered. But it functions exactly as a basic car should: offering forward and reverse drive, braking, turning, and a working headlight and turn signals. While Marazzi originally created it as a showpiece, the vehicle is fully operational and was recently driven in public at an enthusiast gathering in Pandino, Italy.
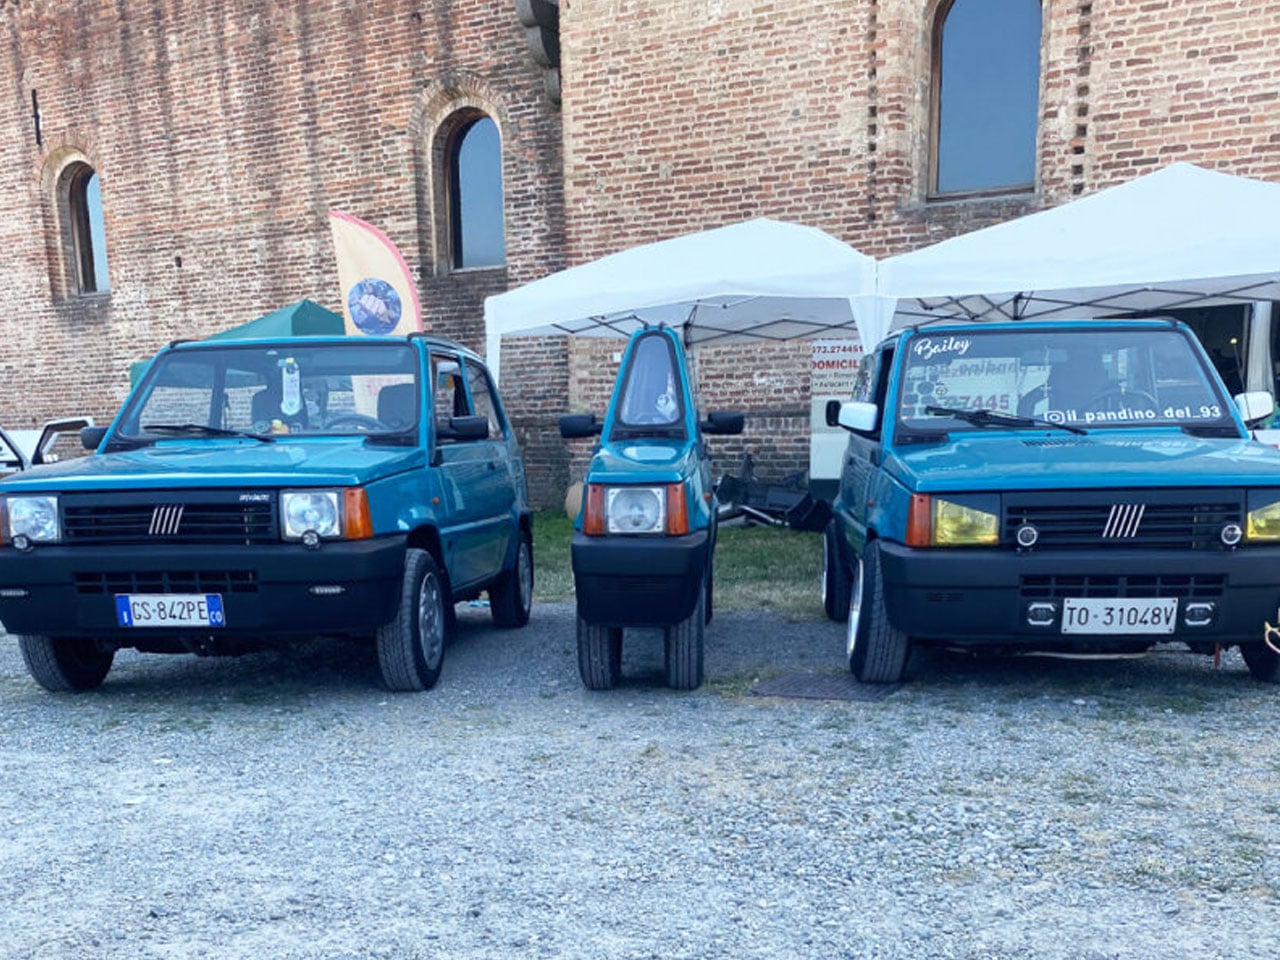
The car made its debut at “Panda a Pandino,” a festival celebrating 45 years of the Fiat Panda. Surrounded by thousands of conventionally sized Pandas, Marazzi’s single-seater stood out immediately. Videos and images from the event quickly went viral online, leaving viewers fascinated by its proportions and mobility. Many were amused by how the Panda looks almost flattened, as if it had been squeezed into a 2D shape while retaining its ability to move. Others praised the engineering behind it, describing it as a brilliant blend of creativity, nostalgia, and humor.
Though it’s not street-legal, Marazzi is in the process of submitting the car for a Guinness World Record as the slimmest functioning vehicle ever made. At just a third of the width of the original Fiat Panda, it’s an extreme but fascinating reinterpretation of automotive form. More art installation than transport solution, the narrow Panda invites viewers to rethink proportions, functionality, and playfulness in mechanical design. It’s a rolling experiment—part engineering challenge, part tribute, and part public spectacle.
Most good projects die by a rough cut. You print a crisp lattice, reach for the hobby knife, and five seconds later, there is a gouge exactly on the outer surface – a part that’s easily visible. That small heartbreak is what HOZO Design set out to delete with NeoBlade, a cordless cutter that trades brute force for forty-thousand-times-per-second ultrasonic finesse. The idea is simple: let vibration slice through projects with the perfection of a knife through room-temperature butter.
NeoBlade looks and feels like a chunky marker that fits perfectly into your grip. Battery clicks into the tail, blade peeks from the nose, and the whole tool tips the scale at 6.4 ounces, so even a long session of trimming support material will not sprain a wrist. Press the trigger gently, and Precision mode fires in quick bursts, perfect for knocking a single nub off a resin mini. Pull past the detent, and Continuous mode hums until you let go, turning foam board or acrylic sheet into respectful, silent ribbons. A perfect gizmo for finishing touches on all your projects.
Forty kilohertz of motion means the edge never drags long enough to melt plastic or splinter wood. Instead, it slips forward under light pressure, one microscopic slice after another, leaving a glassy face that looks almost molded. A smart driver reads resistance on the fly and feeds anywhere from nine to forty watts to the actuator, so switching from soft PLA to stubborn ABS feels seamless. There is no temperature dial to chase, no speed knob, no guesswork.
Keeping the tip cool is the job of a tiny turbofan buried in the barrel. Air enters through side vents, slides across the metal core, and exits behind your hand, dropping blade temperature far below the scorch line of common filaments. The handle stays comfortable, the cut stays clean, and warping never starts. Two bright LEDs flank the blade to fill shadows that magnify mistakes, a small but welcome nod to late-night builds.
HOZO ships six blade profiles in snap-forward cartridges. A 30-degree spear handles everyday trimming, a longer spear dives deeper stock, a curved slice glides through vinyl and leather, a twin-edge scores parallel grooves, and two chisel tips tackle carving and cleanup. Used blades press into a one-way slot on the cartridge, so they retire safely instead of migrating to a drawer where future you will forget they exist. The tool cap hides a stubby driver and a magnet that holds the fresh blade steady while you line up the tang, a little UX grace that feels earned on a cluttered bench.
Changing the Battery
The NeoBlade Creator Combo includes the TurboDock, an extra Battery Pack, and a set of trial blades
Cordless convenience lives or dies by downtime, so NeoBlade ships with an optional TurboDock that charges the handle and a spare cell in about thirty minutes. Slide one battery out, slide the other in, twist, and you are back to slicing before the printer’s next layer cures. Makers on a tighter budget can rely on the USB-C port in the grip, though that route parks the cutter for an hour or more. Early Kickstarter pledges locked in the full kit for $99 USD, a tidy slice off the planned $149 retail tag. The Creator Combo (priced at a discounted $149) packs the NeoBlade, a TurboDock, an extra battery, and a spare blade trial kit with 6 blades.
But don’t confuse this with one of those cheap cutters on Amazon or that soldering iron that you also use to burn off imperfections in 3D prints. Because the edge oscillates instead of tearing, you avoid the fuzzy bead that hot-wire cutters leave in foam and the ragged fringe delivered by abrasive wheels. Clean edges mean less post-processing, which in turn means more time for tuning the slicer profile or experimenting with paint. Model makers, cosplay armor builders, prop shops, even electronics hobbyists who need to notch an enclosure without filling the room with ABS dust will notice the difference on day one.
NeoBlade lands at a sweet spot between pocketable craft knives and industrial ultrasonic stations that never leave a lab. It gives hobbyists, cosplay armor fabricators, prop builders, and small-batch product designers a push-button guarantee of clean edges and repeatable results. By making ultrasonic cutting as casual as clicking a pen, HOZO turns the most stressful step of fabrication into the easiest. Projects move forward, sanding blocks stay clean, and the next big idea arrives sooner because the last one didn’t stall at the trimming stage.
If you’re a fan of quirky collectibles, retro games, or hands-on engineering, there’s something delightfully charming about bringing digital icons into the real world. That’s exactly what happened when a creative maker decided to pay homage to the infamously addictive Flappy Bird by building a mechanical, fully playable version. Flappy Bird took the mobile gaming world by storm in the early 2010s, captivating players with its deceptively simple gameplay and pixelated charm. When the game disappeared from app stores, it became even more of a legend as we remembered it with as part nostalgia, part challenge, and, for some, a collector’s holy grail.
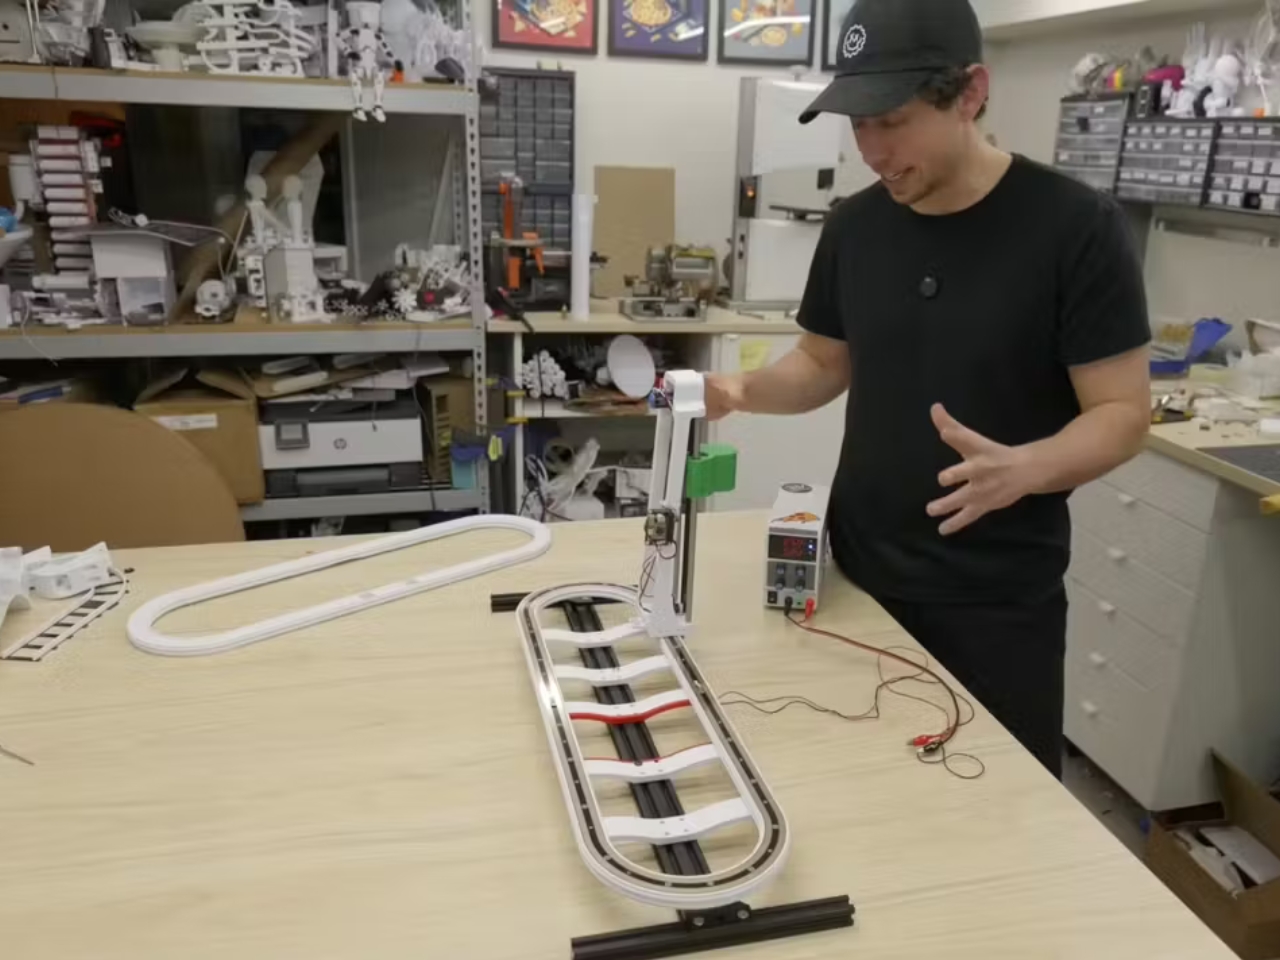
Since a lot of things that were hugely popular back “in the day” are now considered cool and retro, it’s not a surprise that some people would try to bring it back in some form or another. Some would probably just be content with re-creating the app and bringing it back to the digital world but there are some creative people out there that would rather bring it up to another level. If you look at Engineezy’s YouTube channel, you’ll see a lot of truly creative and detailed builds so it’s no wonder he came up with something like this.
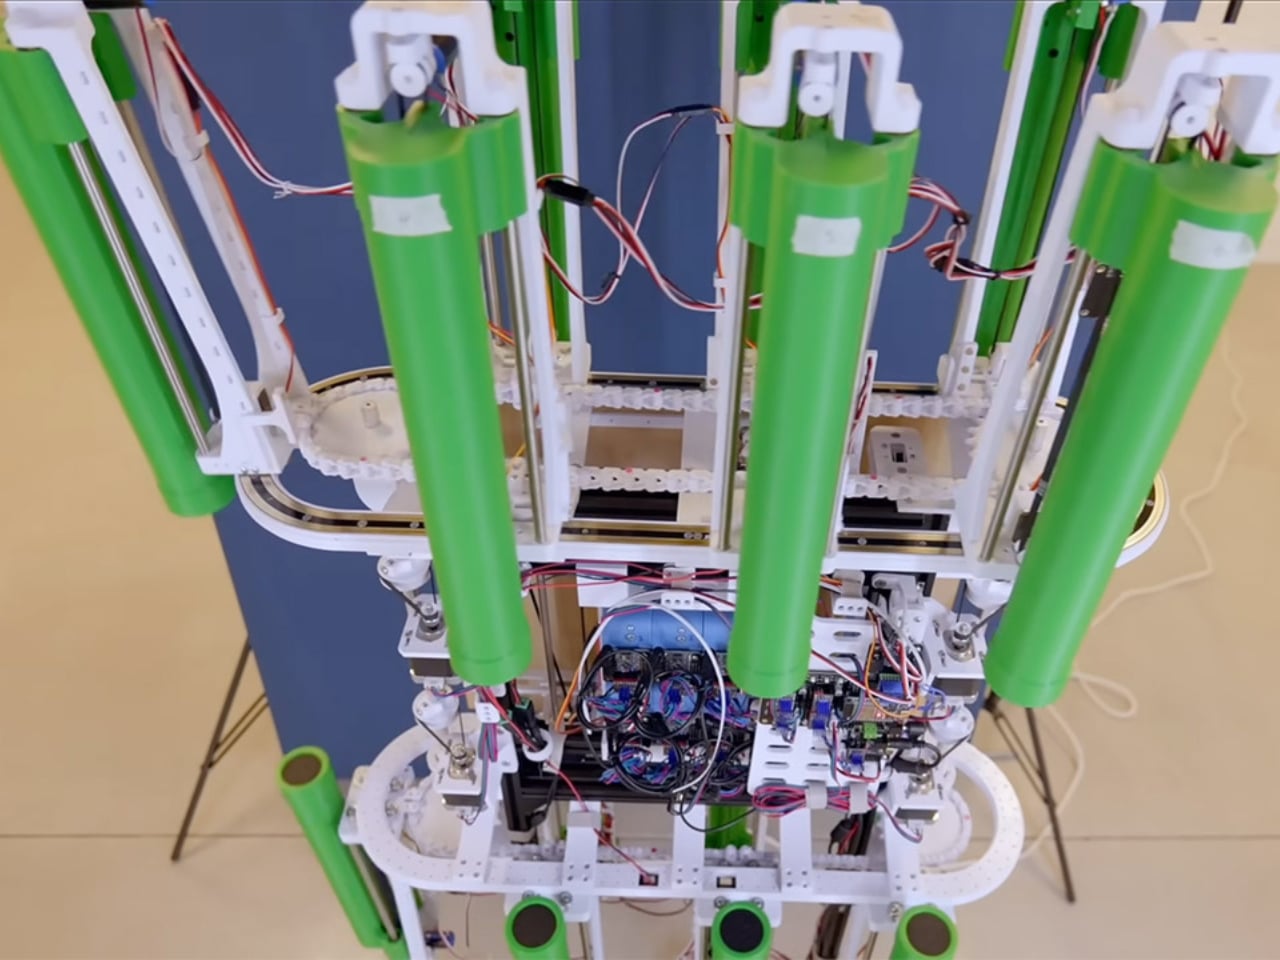
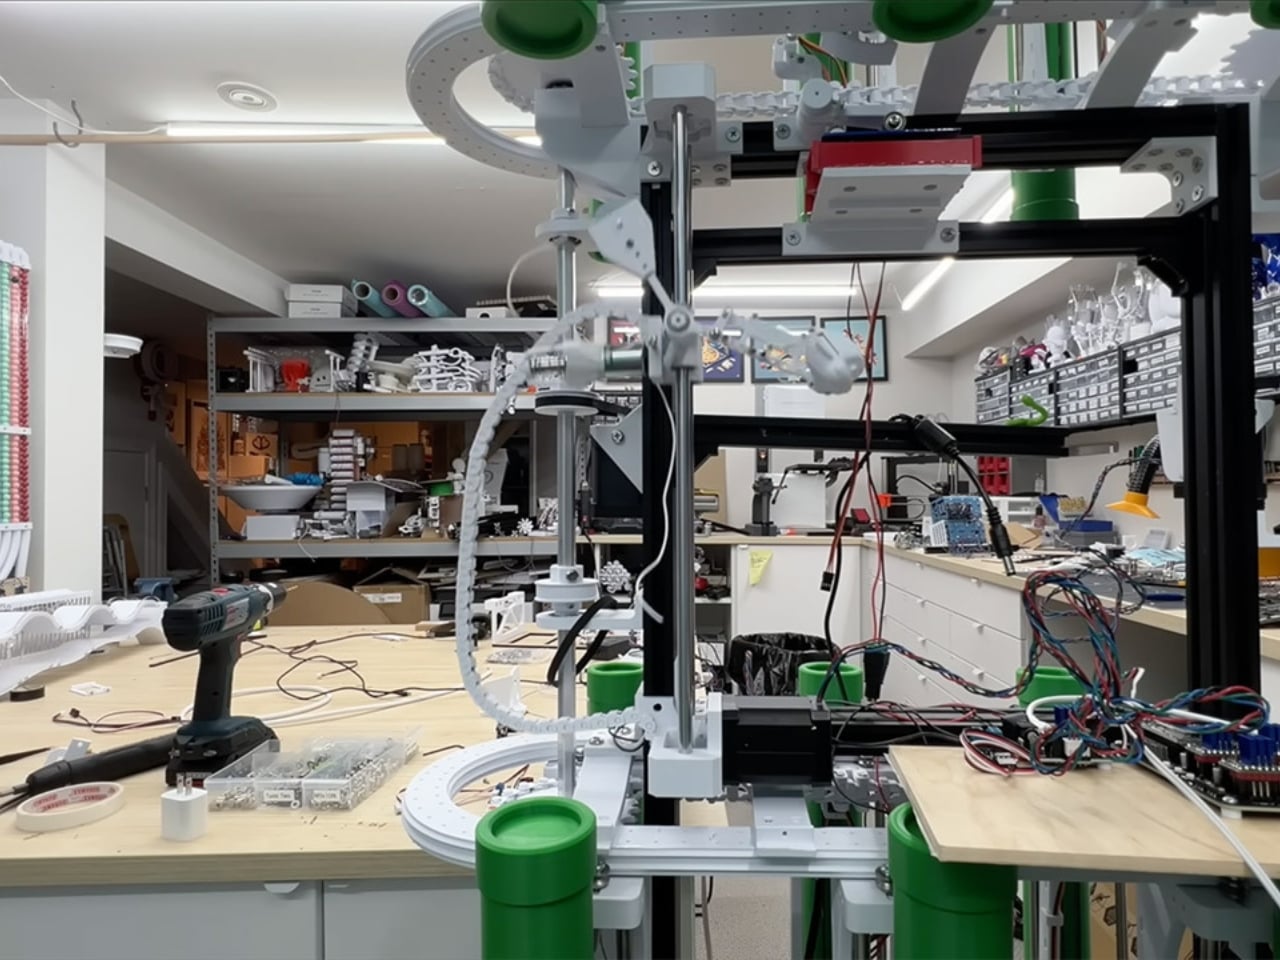
So what if you could play Flappy Bird without a screen? That’s where the mechanical version swoops in. This project reimagines Flappy Bird as a physical arcade game, ensuring that the fun and eventual frustration never have to vanish into digital obscurity. This isn’t just a static display or a cute homage. The mechanical Flappy Bird game is completely playable. Instead of tapping a screen, you mash a real button to keep your bird aloft. The “pipes” you need to dodge are 3D-printed and mounted on a rotating conveyor system, which randomly adjusts their height, just like in the original game. The moving obstacles and the bird’s flapping action are all brought to life with motors and clever mechanical design, capturing the spirit of early electromechanical arcade games.
For collectors and makers, the use of 3D printing, custom electronics, and physical craftsmanship gives this project a unique, tactile appeal. It’s not just memorabilia but is more interactive art. Imagine having this on your shelf, ready to challenge friends or just to marvel at the ingenuity. Flappy Bird’s legacy is part of gaming folklore, and owning a piece of it, especially in such a novel form, connects us to that history. Whether you’re hosting a game night or showing off your collection, a mechanical Flappy Bird is sure to get guests talking. If you’re always hunting for something different to add to your collection, or if you love the blend of art, technology, and nostalgia, this project offers all three in one charming package.
To say that the Discworld series by Terry Pratchett has a cult following is one of the biggest understatements in book world. It’s a pretty long series but for the fans, it isn’t just a fantasy series. It’s a universe, brimming with wit, wisdom, and unforgettable characters. The thought of having every Discworld book at your fingertips is a collector’s fantasy of course. For Martina of the Nerdforge YouTube channel, she went one step further in terms of treasuring this beloved book series.
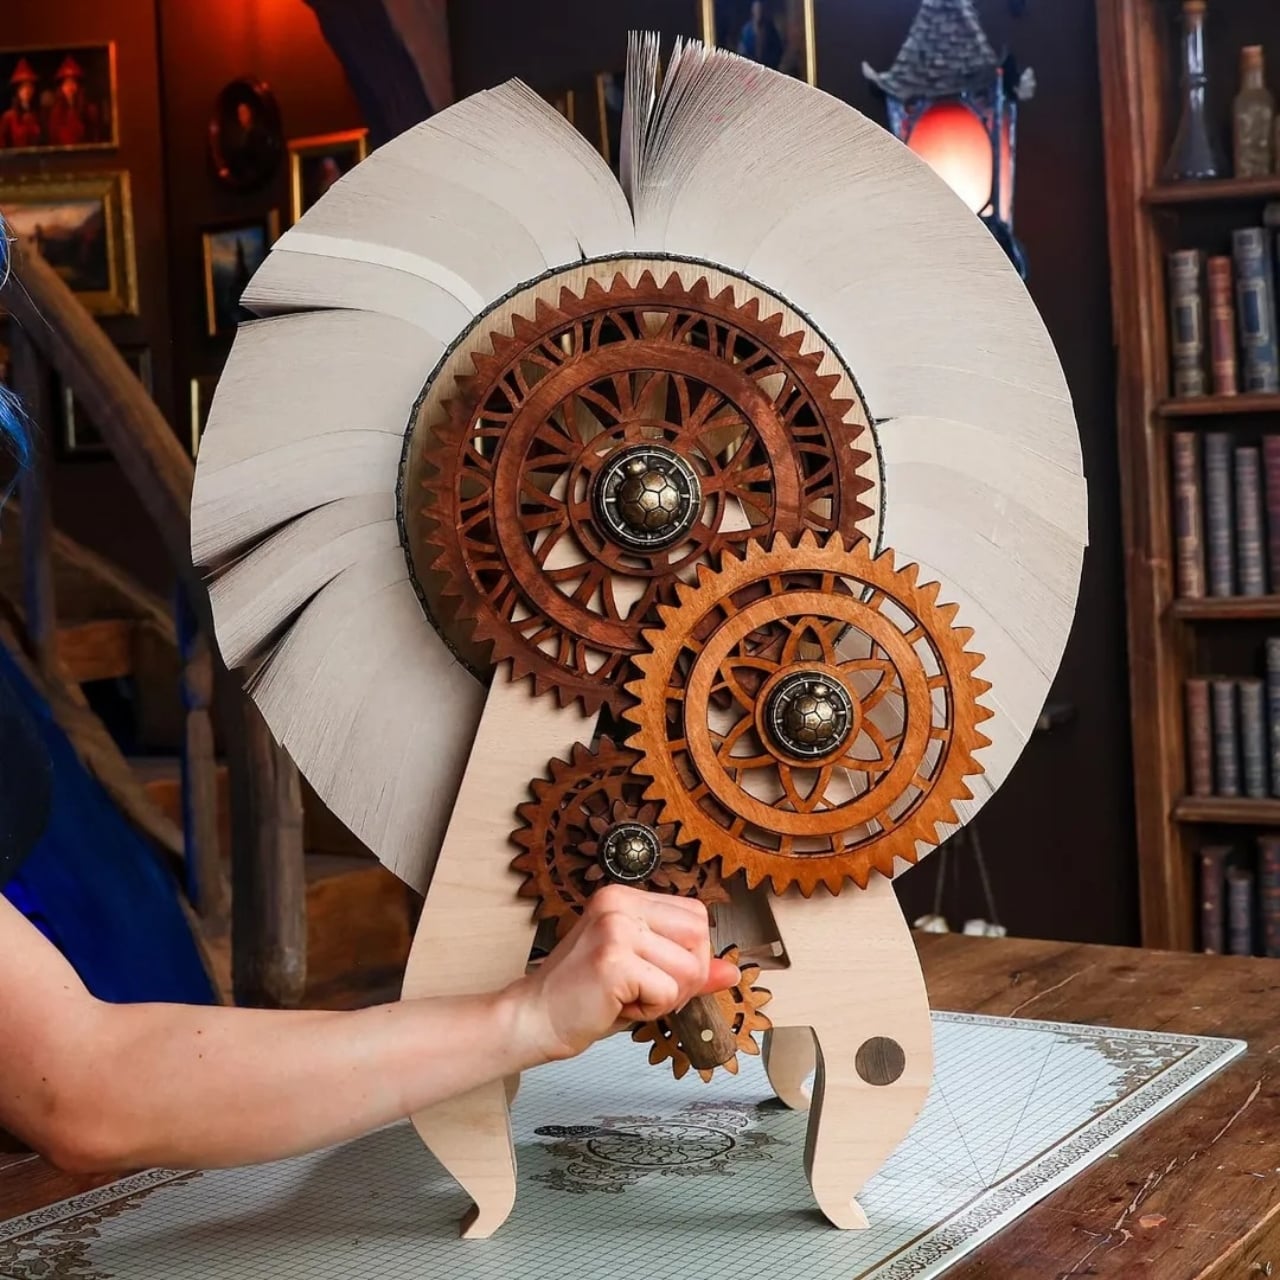
The Nerdforge channel is a blackhole when it comes to nerdy and book-related projects. Martina has completed her most audacious build yet: transforming all 40 of Terry Pratchett’s beloved Discworld novels into a single, awe-inspiring, rotating book wheel. After collecting the entire series, she literally bound them together, creating a unique piece of bookish art that’s both a tribute and a conversation starter.
Martina, who has a passion for bookbinding and DIY, decided to take on this mammoth project as her very first mechanical build. Her idea was both whimsical and practical in the most Nerdforge way: she would bind all 40 Discworld books and arrange them around a massive wooden wheel. With a hand crank, the entire collection could rotate, displaying each novel in turn like a carousel of literary delight. The final creation is almost comically large—boasting about 14,000 pages!
Each book is individually bound, then carefully attached to the wheel in a circle. The result is a functional, if not exactly “practical,” rotating book that is as much a sculptural object as it is a reading tool. Martina said that if she could do it all over again, she would have wanted to create something that you could actually use to read the massive collection. But for now, it’s a beautiful testament to what you can create if you just let your imagination run wild.
The video of the build is a treat for anyone curious about how such a wild idea comes together. Martina shares the entire process: selecting and preparing the books, crafting the wooden wheel, and meticulously binding each volume into place. There’s sanding, gluing, problem-solving, and plenty of moments where things could have gone awry but Martina’s joy and determination shine through. The final product? A rotating wheel, bristling with colorful Discworld spines, that you can turn by hand. It’s quirky, it’s massive, and it’s a true testament to loving what you do.
Vous pensiez que votre imprimante 3D était le summum de la technologie ? Et bien Dr. Engine vient de vous prouver le contraire avec sa factory LEGO qui transforme de la pâte à modeler en produits manufacturés. Et franchement, c’est pas mal foutu du tout !
Cette machine automatisée combine laminoir motorisé, convoyeur à bande et guillotine de précision pour traiter de la modeling clay (comprenez de la pâte à modeler style Play-Doh) avec un sérieux qui ferait pâlir d’envie certaines chaînes de production industrielles.
Quand j’étais jeune, j’ai eu la chance d’avoir une Game Boy originale et au fil des années, j’avais accumulé pas mal de jeux. Malheureusement un jour, un membre malfaisant de ma famille a quasiment tout volé pour les revendre à je ne sais qui, mais j’ai quand même réussi à sauver ma GB d’origine et surtout Tetris qui est, encore aujourd’hui, mon jeu préféré.
Je n’y joue pas souvent, mais je sais que si un jour elle tombe en panne, grâce à ce projet, je pourrais la réparer sans souci et même avoir de nouvelles fonctionnalités super cools. D’ailleurs qui n’a jamais rêvé de pimper sa bonne vieille Game Boy tout en conservant son look d’origine indémodable ?
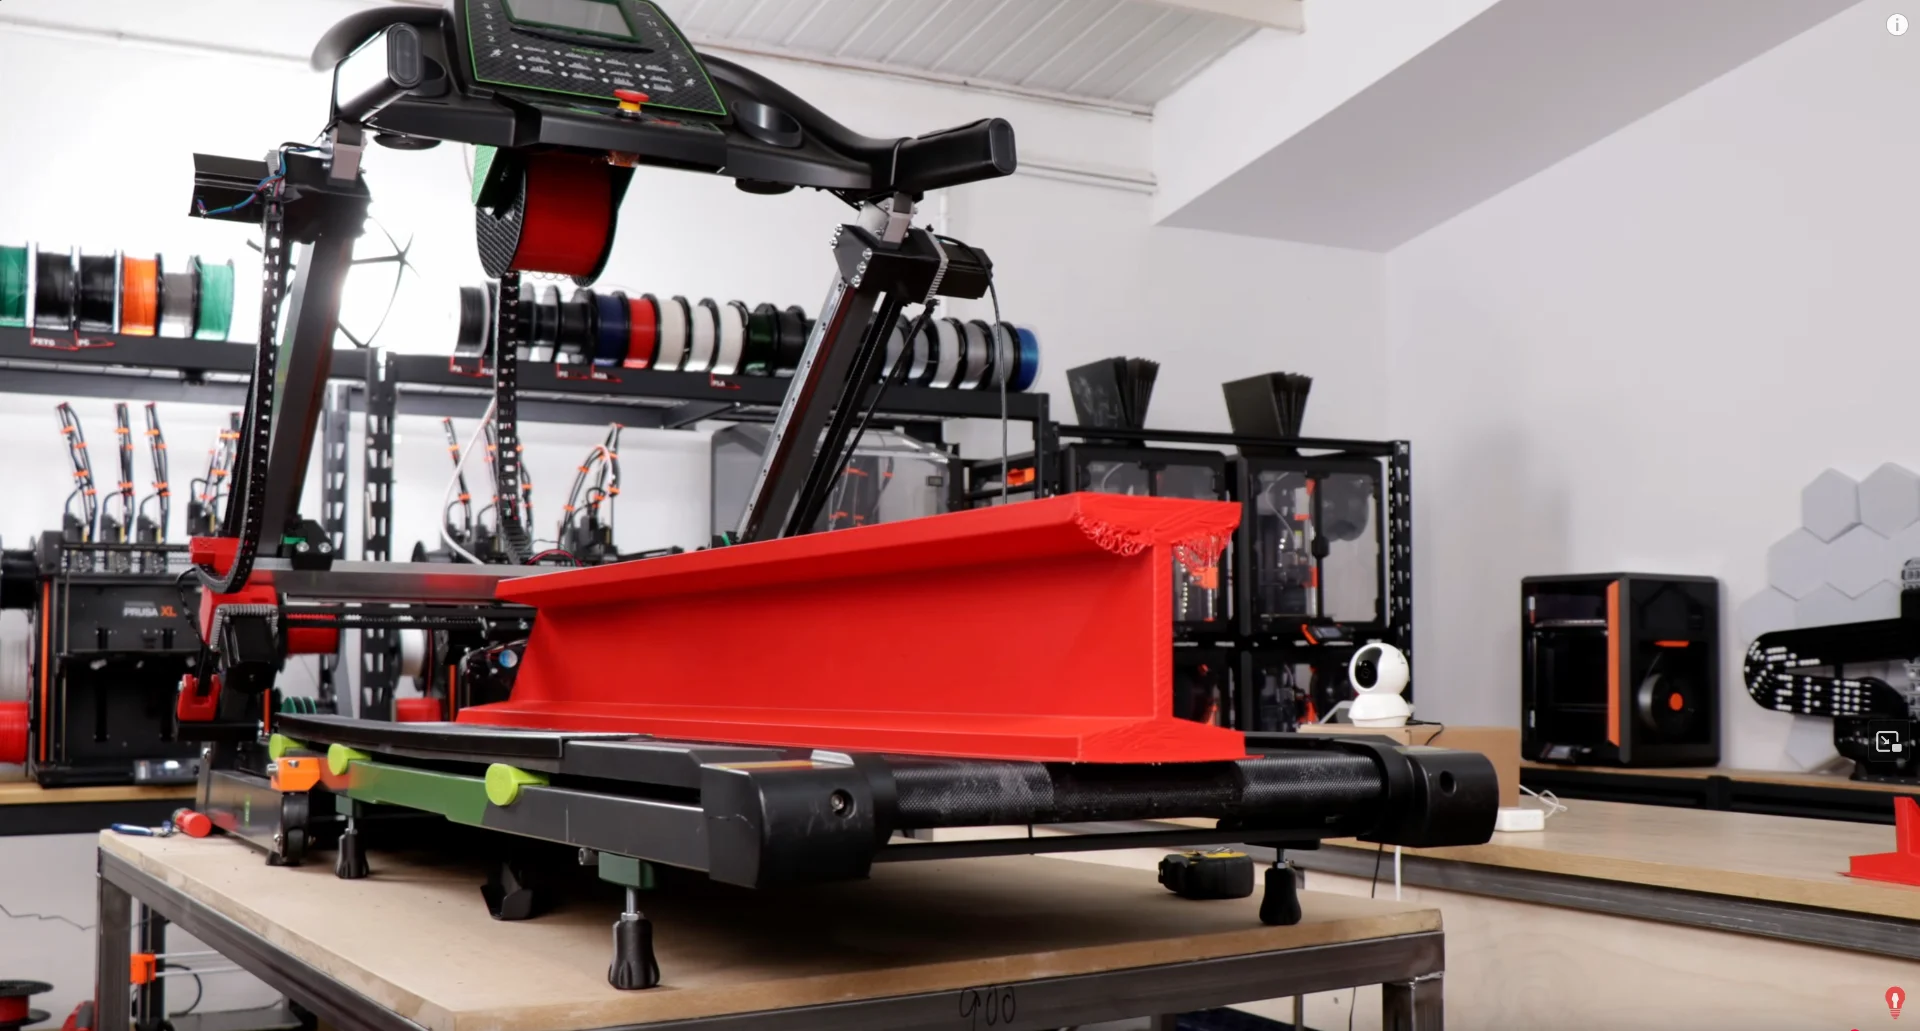
Je ne suis pas nerd de l’impression 3D même si j’adore ma Bambulab parce qu’elle fonctionne à tous les coups sans me demander 3h de réglages. Et je sais aussi reconnaitre quand une idée est cool et c’est le cas ici avec cette imprimante 3D qui utilise un tapis de course comme plateau, ce qui lui permet d’imprimer de longues pièces.
On appelle ça une imprimante à bande et dans le commerce c’est vendu par exemple par Creality pour un peu plus de mille euros… Mais la faire soi-même avec du matériel de sport, c’est quand même plus cool. Surtout quand on trouve des tapis de course sur Leboncoin à 50 balles, abandonnés par leurs propriétaires après trois sessions de cardio et une prise de conscience que Netflix et les M&M’s c’est quand même bien plus sympa que de transpirer.
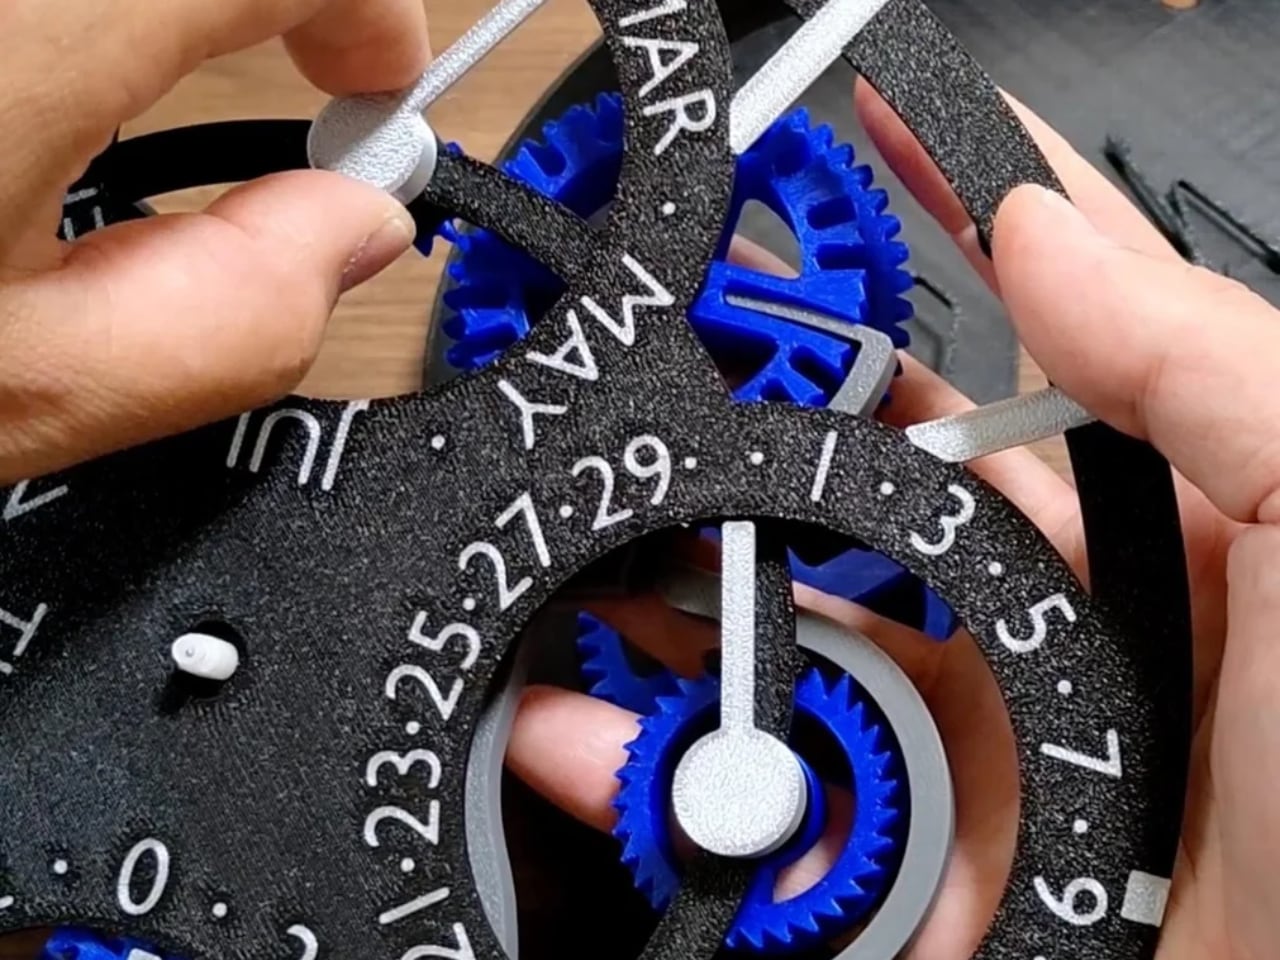
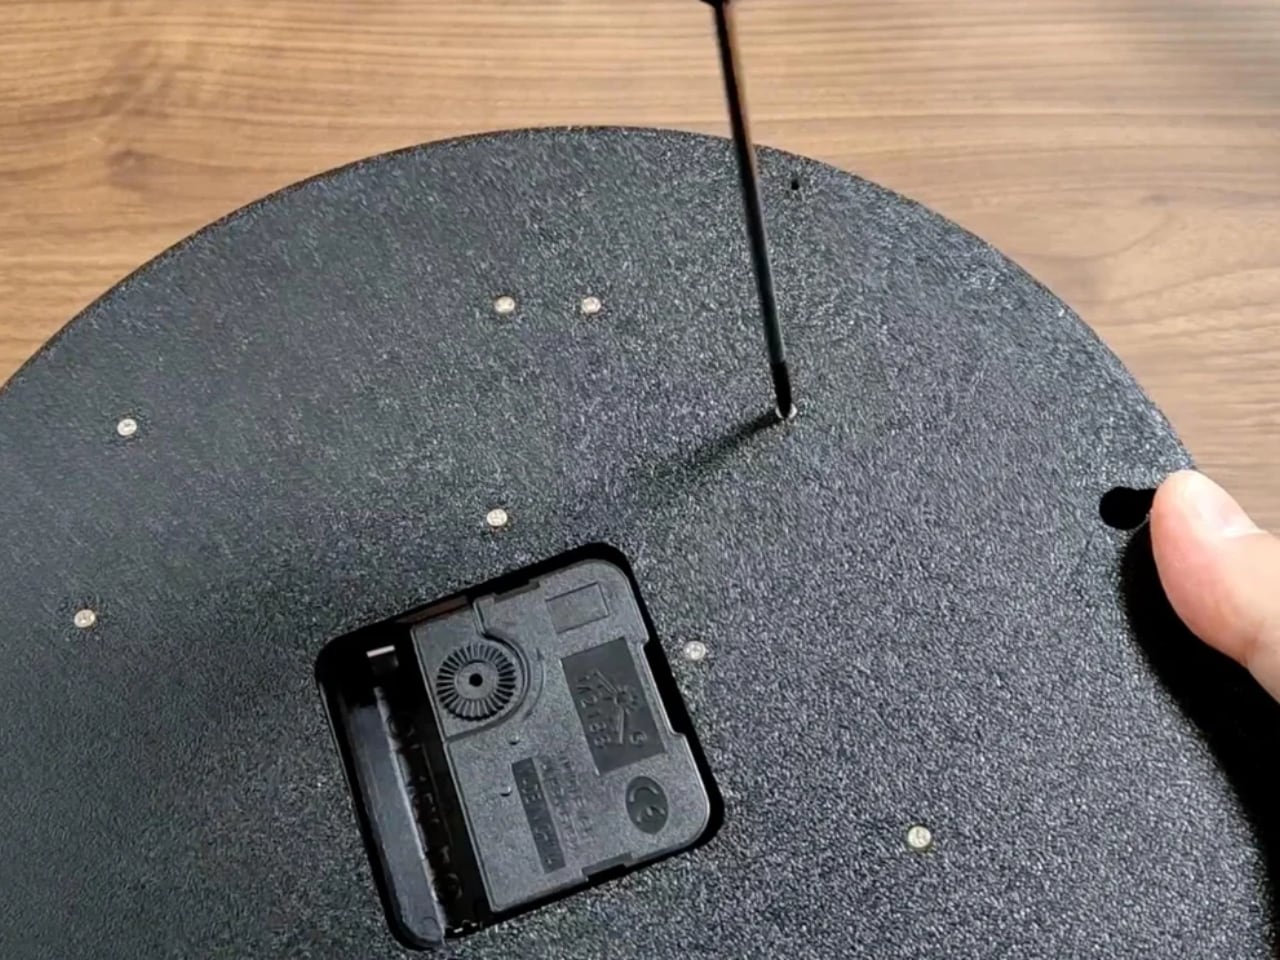
Forget sync apps and smart displays. This 3D-printed perpetual calendar clock keeps perfect time until March 2100—with no help, no updates, and no nonsense. A quartz-powered mechanical marvel, it wears its gear-driven logic on its face, literally. The skeleton design reveals the intricate dance of gears and mechanisms that most clocks keep hidden behind closed doors. There’s something captivating about watching the perpetual calendar mechanism in action, a complex system that accurately handles all month lengths, including February in leap years. Yet despite this complexity, it runs on nothing more than a standard quartz clock movement with limited torque.
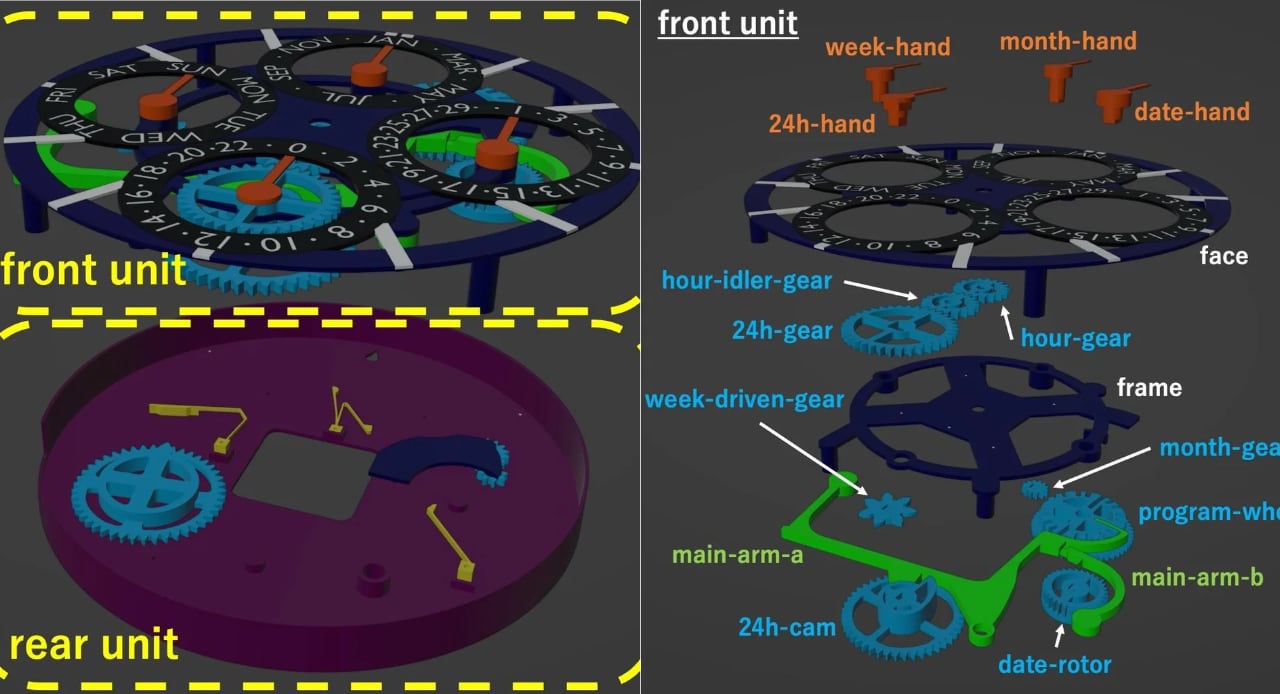
The creator has poured considerable thought into both form and function. Every component serves a purpose while contributing to the clock’s visual appeal. The drive gear train connecting the hour hand to the main cam sits concealed behind the front panel, minimizing the gap between clock hands and index markings. This creates a cleaner reading experience from any angle.
A perpetual calendar automatically adjusts for varying month lengths and leap years. The system accommodates the quirks of our calendar, including 30-day and 31-day months, as well as February’s variable length during leap years. This mechanical intelligence operates on minimal torque from a standard quartz movement.
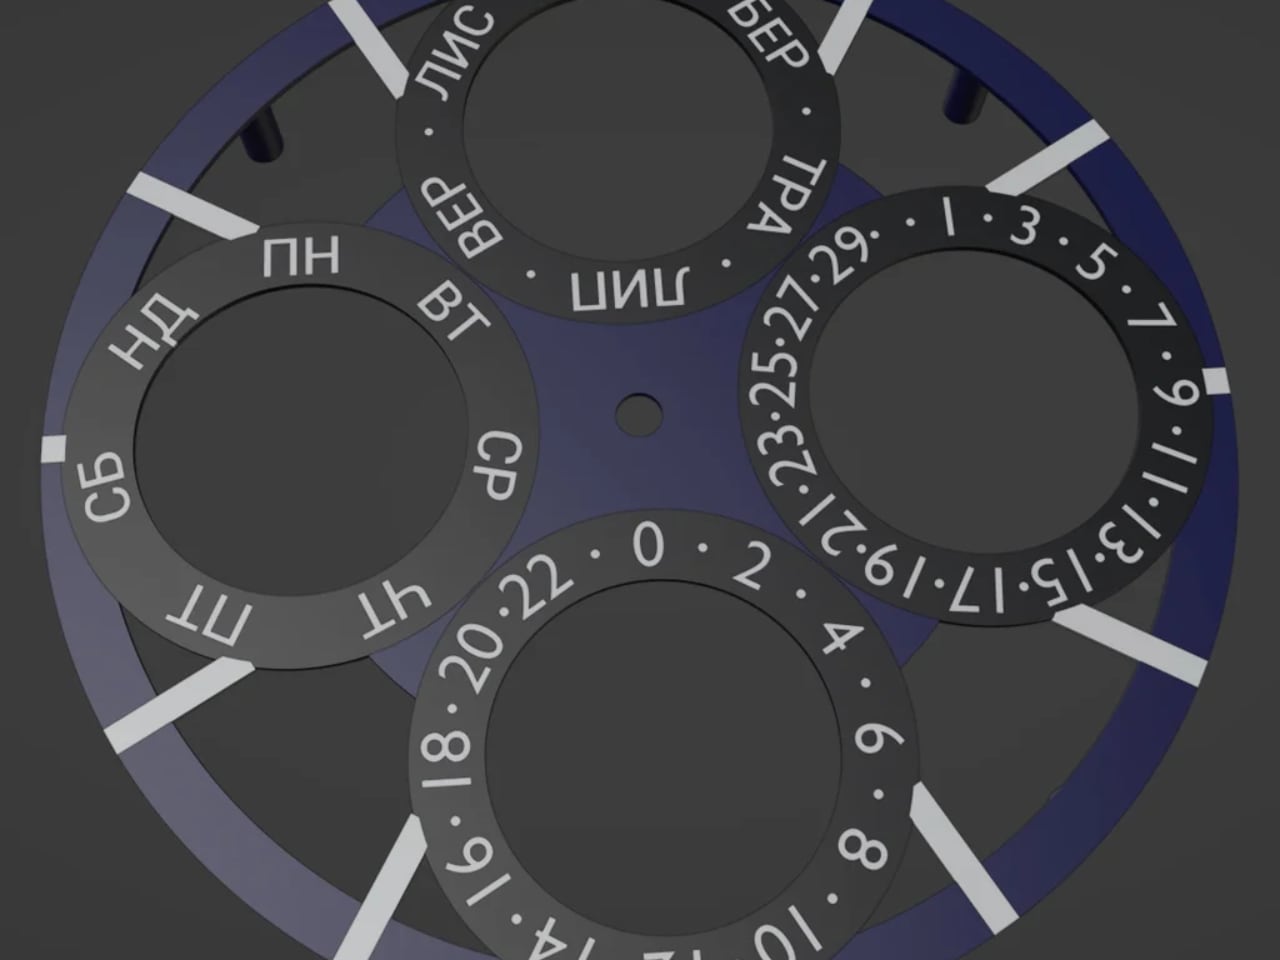
The calendar sub-dial hands for day, month, weekday, and 24-hour time all align perfectly with the front panel, preventing visual offset when viewed from different positions. Even the main clock hands sit close to the front panel, maintaining visual harmony.
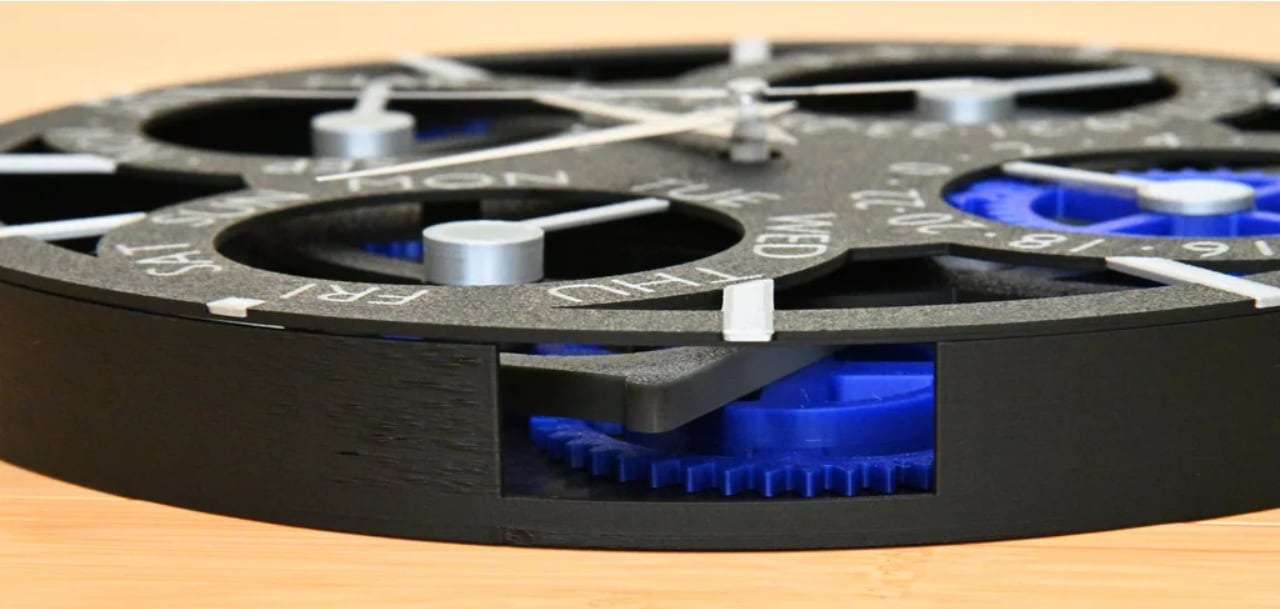
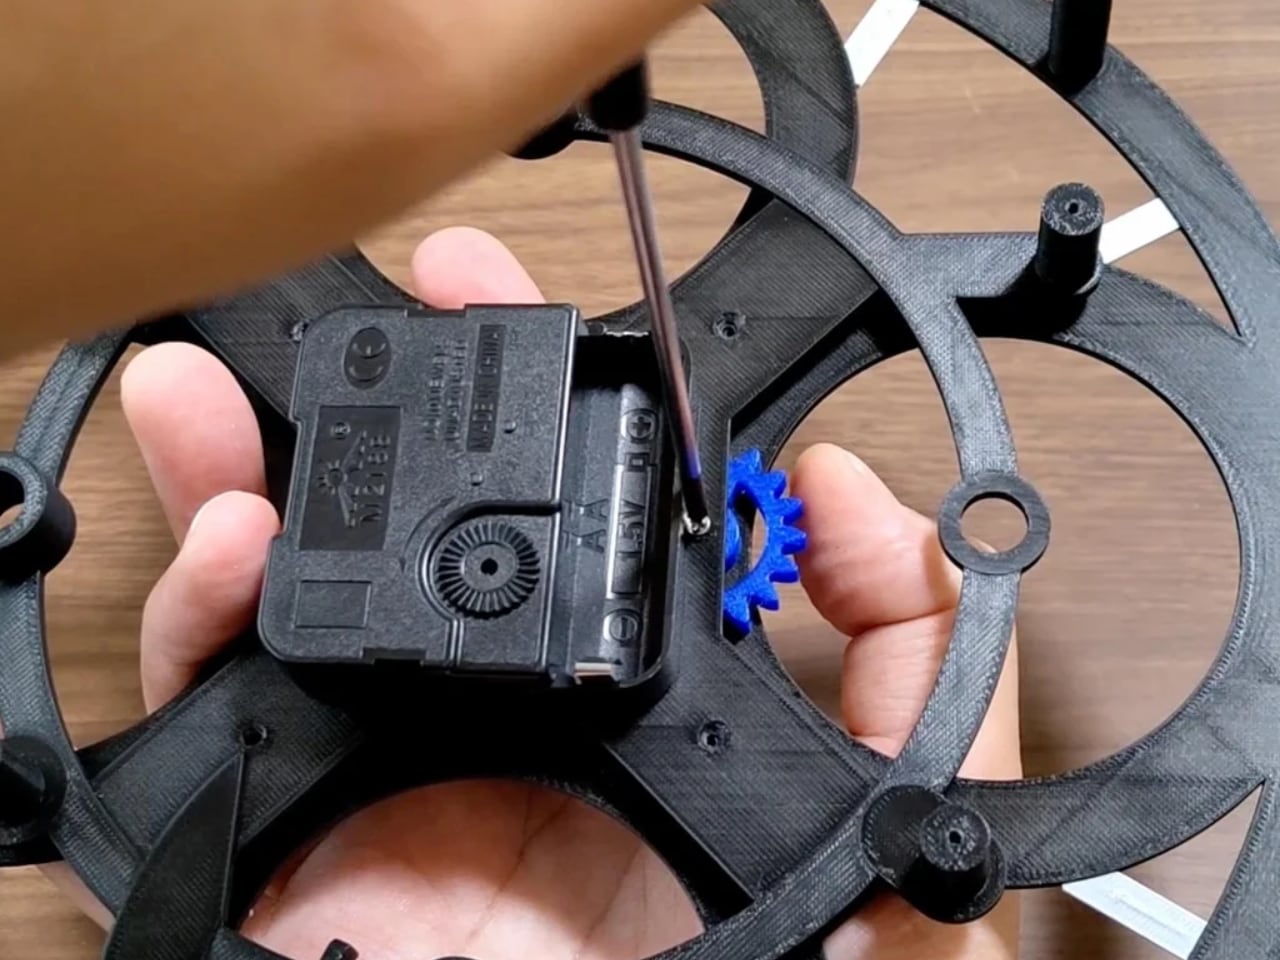
The skeleton design serves multiple purposes – it reveals the mechanical workings while making assembly more straightforward. You can watch time progress through the movement of gears and levers, adding a visual dimension to timekeeping that is typically hidden in traditional clocks.
Designed for Longevity
The calendar advances automatically until March 2100. Powered by a commercially available battery-operated quartz movement, it runs for extended periods without external power. The design also addresses practical concerns – a flat rear surface allows it to hang flush against a wall, creating a clean silhouette from any angle.
No visible screw heads on the front contribute to its professional appearance. The calendar functions can be adjusted by manually rotating the clock hands, making setup and occasional corrections straightforward.
The mechanism handles the calendar’s complexities automatically, eliminating the monthly ritual of advancing calendar displays. This balance of complex function with minimal maintenance demonstrates thoughtful design.
Maker-Friendly Construction
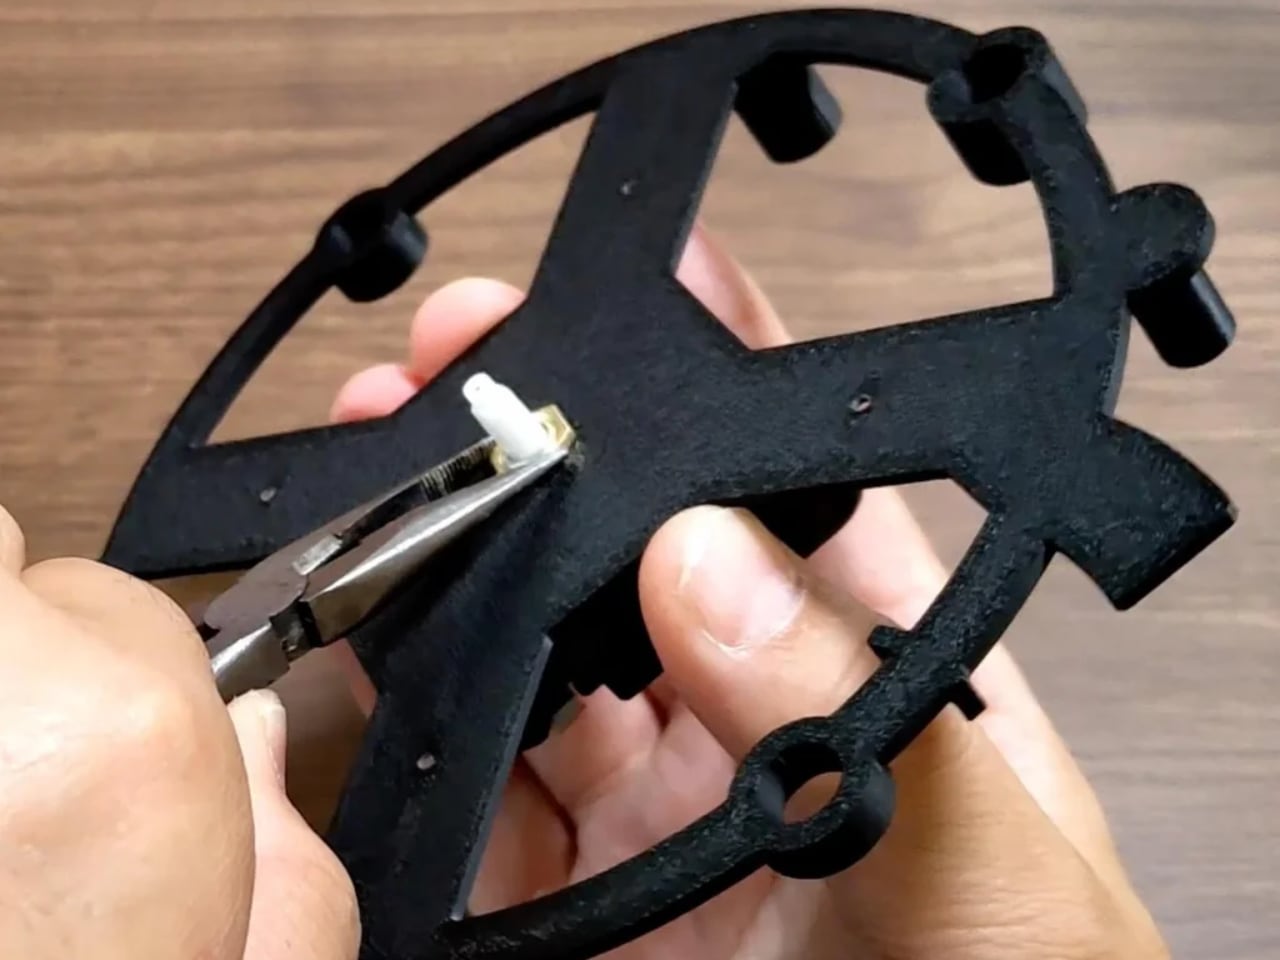
All parts are optimized for 3D printing without support structures, eliminating one of the most frustrating aspects of 3D printing projects. The design works within the limitations of home 3D printing technology rather than fighting against them.
Assembly follows a logical progression that respects the delicate nature of the mechanism. The instructions emphasize careful removal of blobs and debris on gears, crucial since the entire system operates on minimal torque.
The quartz movement requires modification: shortening the mounting thread with a hacksaw and shaving the hour hand shaft to create flat sides for secure gear engagement. These precise adjustments ensure reliable operation.
Multi-material printing options enable the creation of stunning, multi-colored faceplates. Using systems like Prusa MMU or Bambu Lab AMS creates a visual distinction between the face, dial, and index markings, enhancing both aesthetics and readability.
For those with single-material printers, the design accommodates filament changes during printing to achieve similar visual effects, maintaining accessibility without sacrificing appearance.
Global Design Considerations
The creator offers faceplates in Spanish, Catalan, Italian, Danish, Portuguese, German, and Ukrainian, with more languages available upon request. This global approach transforms a niche project into something with worldwide appeal.
Month abbreviations, day names, and text elements are carefully positioned and scaled to maintain visual harmony regardless of language. This attention to detail demonstrates how thoughtful design can transcend linguistic boundaries.
The multilingual support isn’t merely cosmetic – it’s fully integrated into the functional design, allowing the clock to serve as both a practical timepiece and cultural object in homes around the world.
Technical Ingenuity
The gear system requires precise assembly to ensure smooth operation. The perpetual calendar mechanism relies on specific interactions between components – a notch on the week-driven gear must align with the week hand, while a protrusion on the date rotor must position correctly relative to the date hand.
Springs provide just enough tension to advance the calendar displays at the appropriate times. Too much tension and the quartz movement lacks sufficient torque; too little and the calendar won’t advance reliably. This balance represents a core engineering challenge.
The design accommodates the limited torque available from a standard quartz movement through clever gearing and weight distribution. The main arm incorporates a steel M8 nut as a weight, utilizing gravity to assist with calendar advancement—a solution that works within physical constraints rather than requiring more powerful components.
Visual Communication Through Mechanics
The exposed mechanism does more than satisfy curiosity; it provides visual feedback on how time is tracked and measured. The interaction between gears, the positioning of the calendar indicators, and the movement of the hands all communicate function through form.
In an age of digital displays and smartwatches, this mechanical timepiece reveals the physical process of timekeeping. The skeleton design shows how simple components, arranged with precision, can track complex calendar patterns.
The visual logic extends to the interface; calendar adjustments occur through direct manipulation of the hands, rather than hidden buttons or digital menus. This transparency of function represents a design philosophy where understanding and usability merge.
A New Take on Traditional Timekeeping
This clock demonstrates how modern manufacturing techniques can breathe new life into traditional objects. The 3D-printed components achieve precision that would be difficult with conventional manufacturing at small scales, while the quartz movement provides reliability without sacrificing the mechanical calendar display.
The design strikes a balance between visibility and organization, revealing the mechanism without creating visual chaos. The careful arrangement of gears, hands, and indicators maintains readability while showcasing the engineering underneath.
For horological enthusiasts, 3D printing hobbyists, and design appreciators alike, this perpetual calendar clock offers both technical achievement and visual interest. It transforms timekeeping from a background utility to a focal point of mechanical design.
The clock exemplifies how digital fabrication can preserve and enhance traditional mechanical crafts rather than replacing them. By combining accessible manufacturing with clever mechanical design, it brings a once-exclusive complication into the realm of personal creation.
Practical Elegance
Beyond its technical achievements, the clock functions as a practical household object. The ease of wall mounting, clear readability, and automatic calendar advancement make it as functional as it is fascinating.
The design decisions prioritize both visual appeal and everyday use, from the alignment of hands to prevent parallax errors to the clean front face without visible fasteners. This attention to practical details elevates it from a mere demonstration piece to a fully realized product.
For makers looking to challenge themselves with a project that integrates mechanical engineering, aesthetics, and practical functionality, this clock provides both the process and the final result. The final product serves as both a timekeeper and a demonstration of creativity. It provides a daily reminder of how thoughtful design addresses complex problems with elegant mechanical solutions.
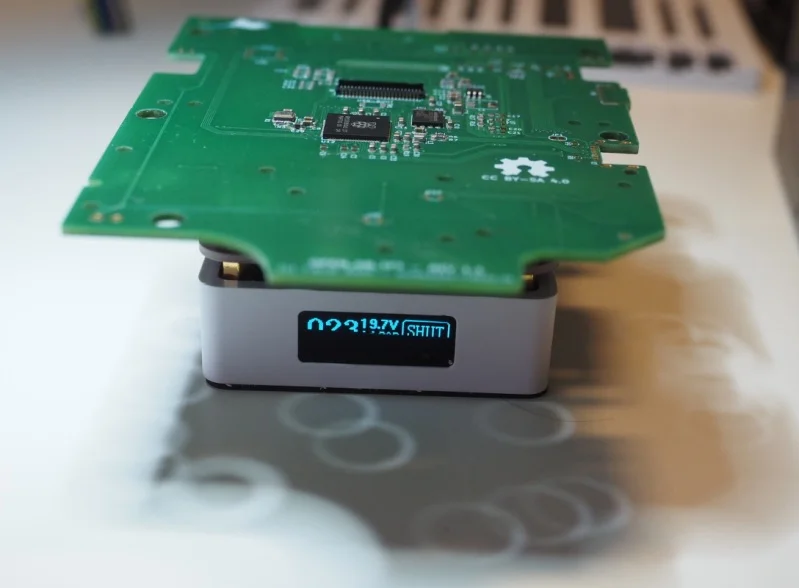
Robot vacuum cleaners are so advanced these days that some of them barely need human intervention. Of course, that wasn’t always the case in the earliest days of this market segment, with the first generations relying on some very basic technologies and software by today’s standards. Although its name has become synonymous with robot vacs, the Roomba has almost all but faded into that background.
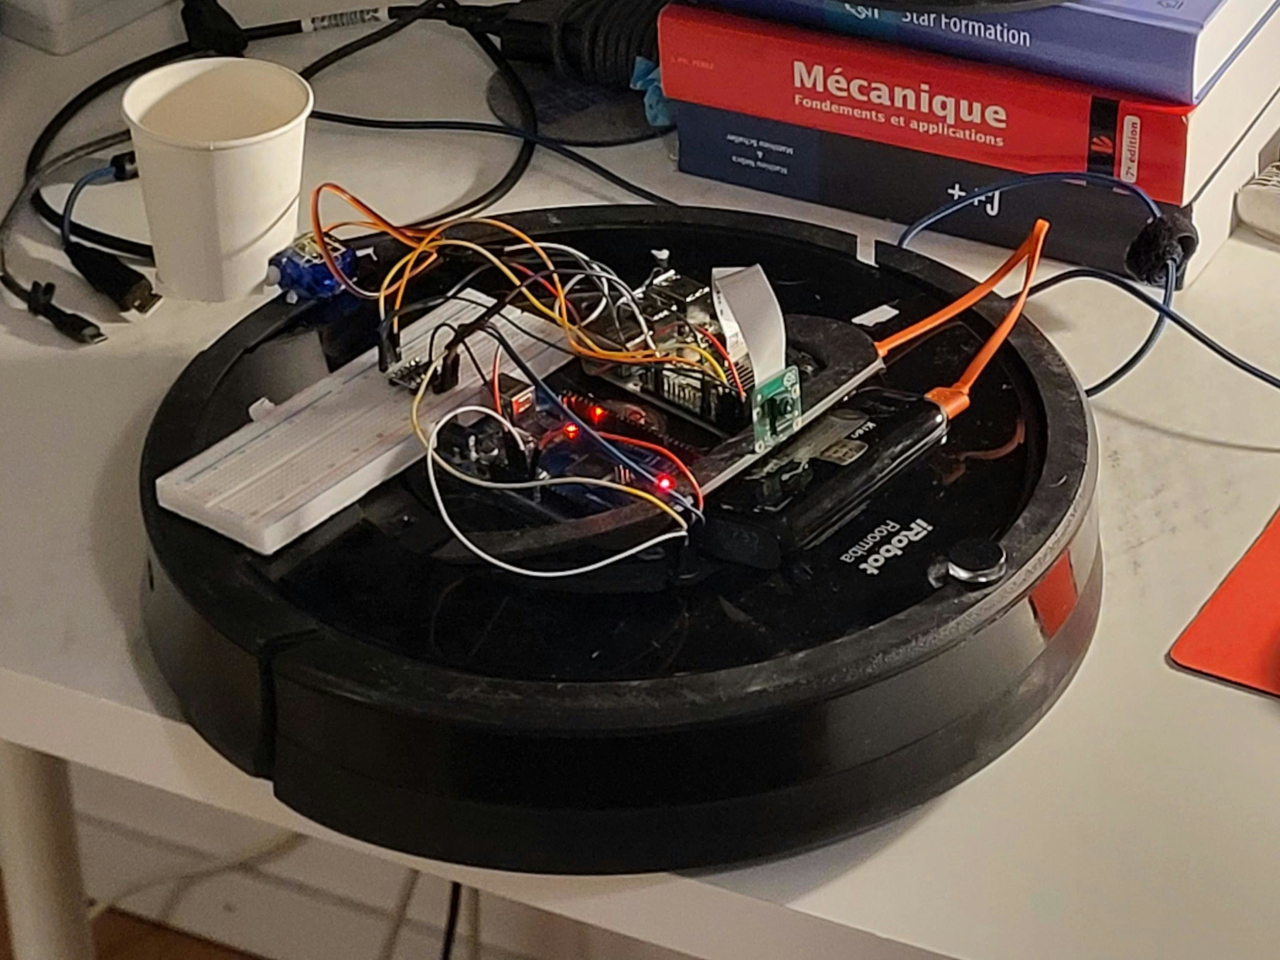
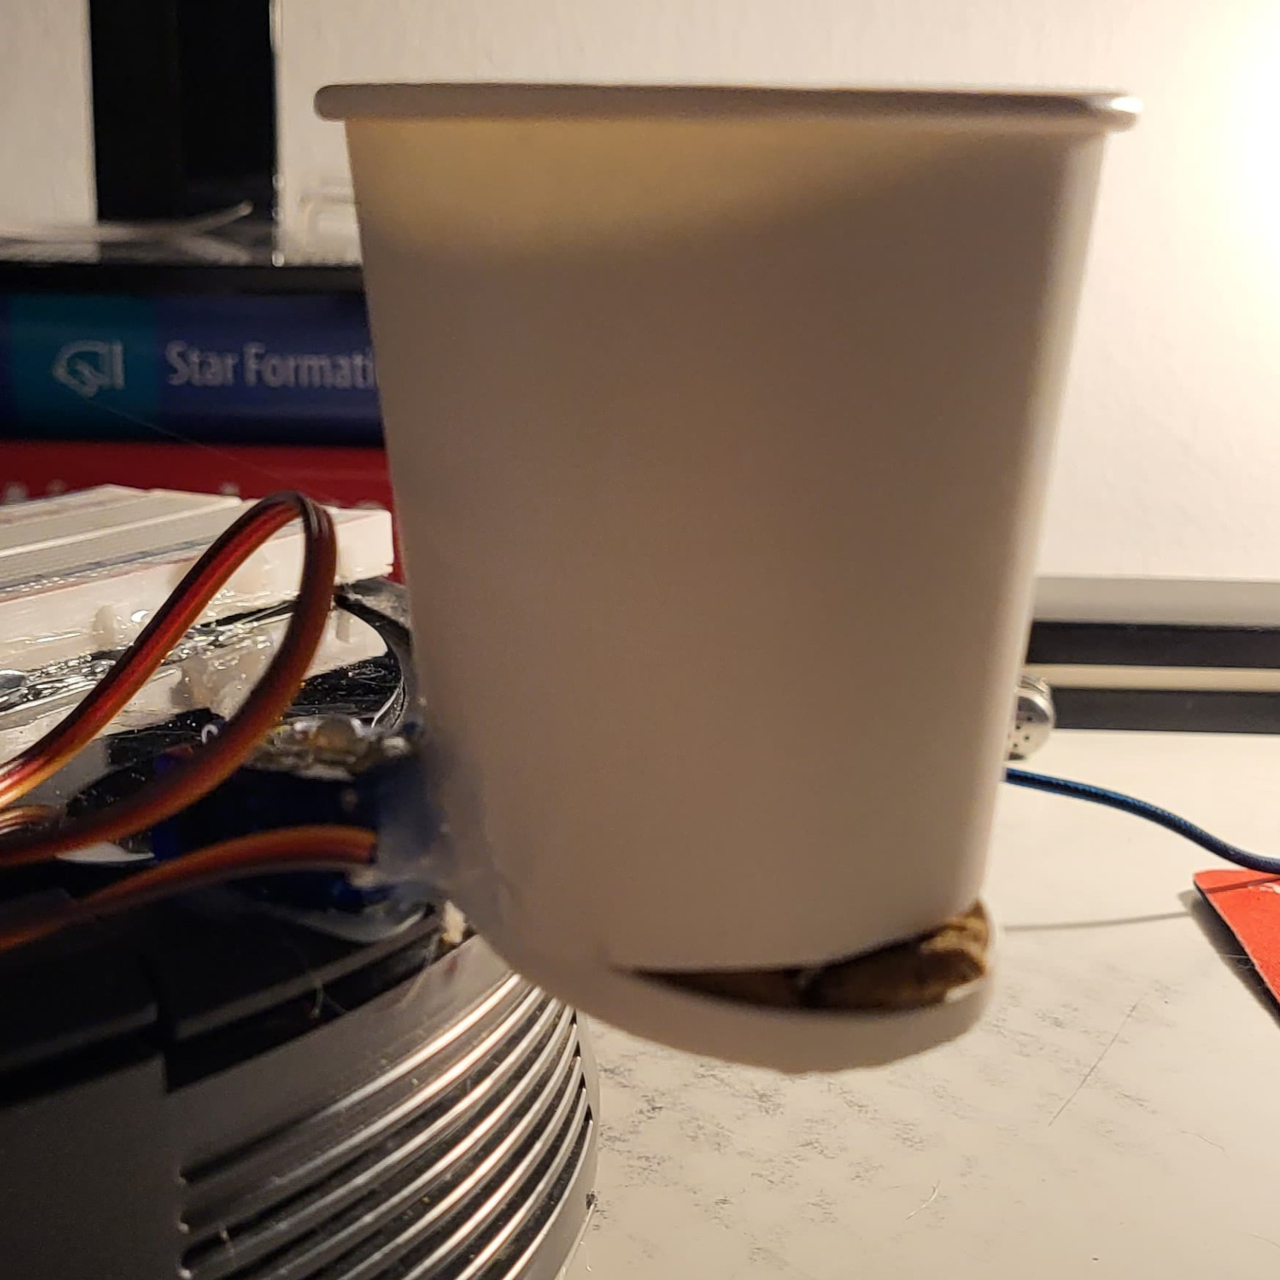
Some, however, have found some rather creative uses for older models, with a bit of hacking and ingenuity. Giving a very old rolling robot a better brain and literally space-grade software, this mod turns a cleaning machine into a mess-making one, albeit not by intention. Instead of picking up dirt or even clothes, the “Space Vacuum” will instead drop pieces of food for your canine companion to munch on when it’s near.
Most of us probably have a file of unused and abandoned electronics that are still a bit functional except for one broken or missing part. We don’t have much practical use for them, so they just end up gathering dust and taking up space, sometimes forgotten until the next Spring cleaning. A few people, however, have the fortunate skill to bring these machines back to life, though sometimes with a different function so different from the original.
This Roomba, for example, once cleaned up dirty floors in a previous lifetime. But with some clever use of off-the-shelf hardware like an Arduino and some skilled DIY electronics, it has been given a new lease on life as a dog food dispenser. Ironically, it now does the opposite of cleaning the floor and instead makes a mess, presuming the canine doesn’t gobble up the treats first.
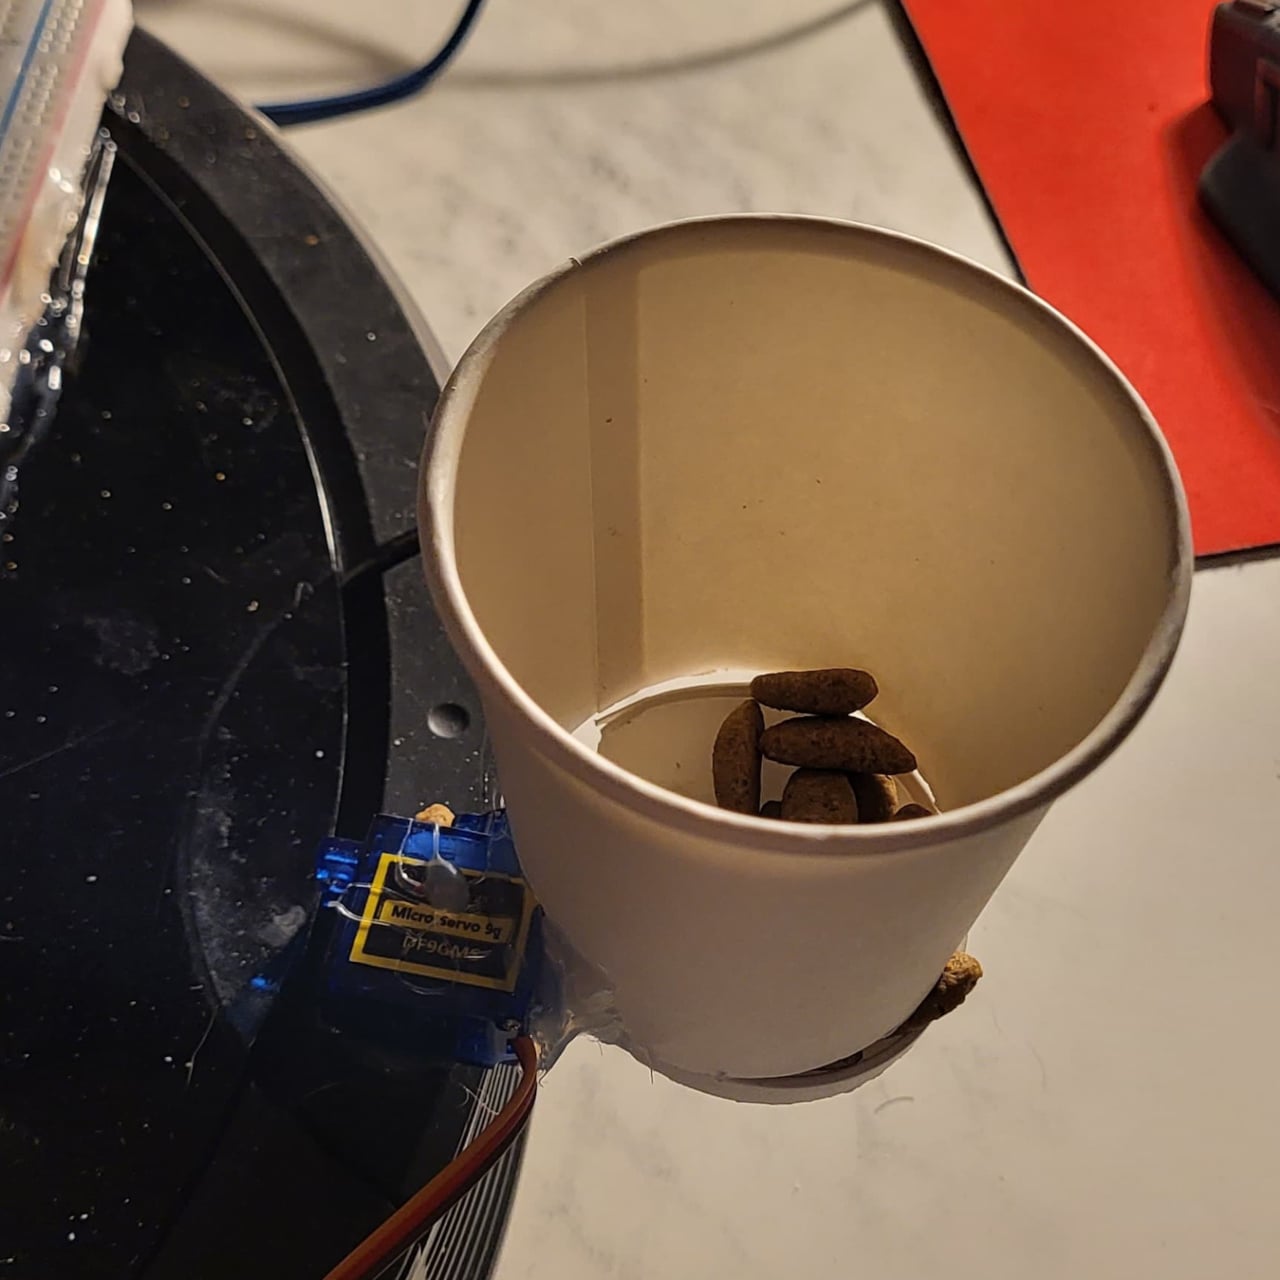
What the Space Vacuum basically does is detect the presence of a dog, while differentiating it from other living critters in the house, and drops dog food from a paper cup that has its bottom partially cut out. Curiously enough, the software used for this project is NASA Jet Propulsion Labs’s (JPL) Fprime flight software used for space missions and controlling drones, which sounds a bit overkill for a food-dispensing robot. That, however, gives it the right to call itself a “Space Vacuum,” though the vacuum part is in question.
It’s definitely not going to win any awards for aesthetics or practicality, but the project does spark curiosity and maybe inspire a few more experiments using these house robots. The rather odd clothes-picking Roborock vacuum at CES 2025 demonstrated what these machines are actually capable of, especially with their advanced sensors and AI-powered brains. All they need is a robot arm or a proper food dispenser, and they have the makings of a general-purpose robot that won’t take up too much floor space.
Apple has always been hailed as a trailblazer, breaking new ground in product design and services. Sometimes, however, some of the ideas it generates never materialize, especially if they seem too far ahead of their time. That dream may become a common thing decades later, as proven by one of Apple’s genre-defining products: the iPad.
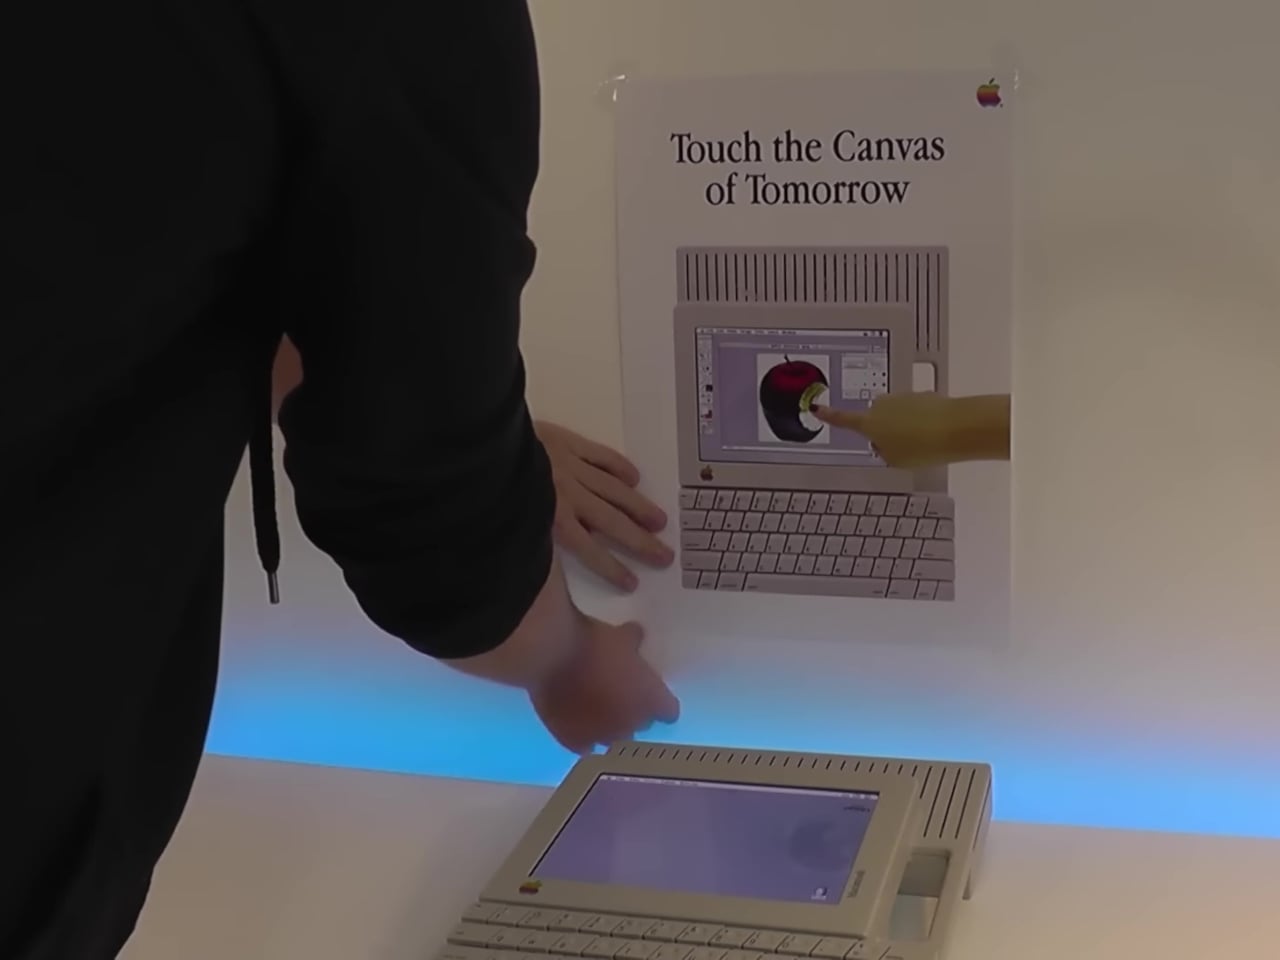
Although it may seem that it was patterned after the tablet PCs of its time, the Apple iPad actually had an older pedigree, one that never saw the light of day. Thanks to modern technologies like 3D printing and accessible electronics, it is now possible to give those ideas flesh, so to speak, making us wonder what could have been if this portable Macintosh actually made it to market.
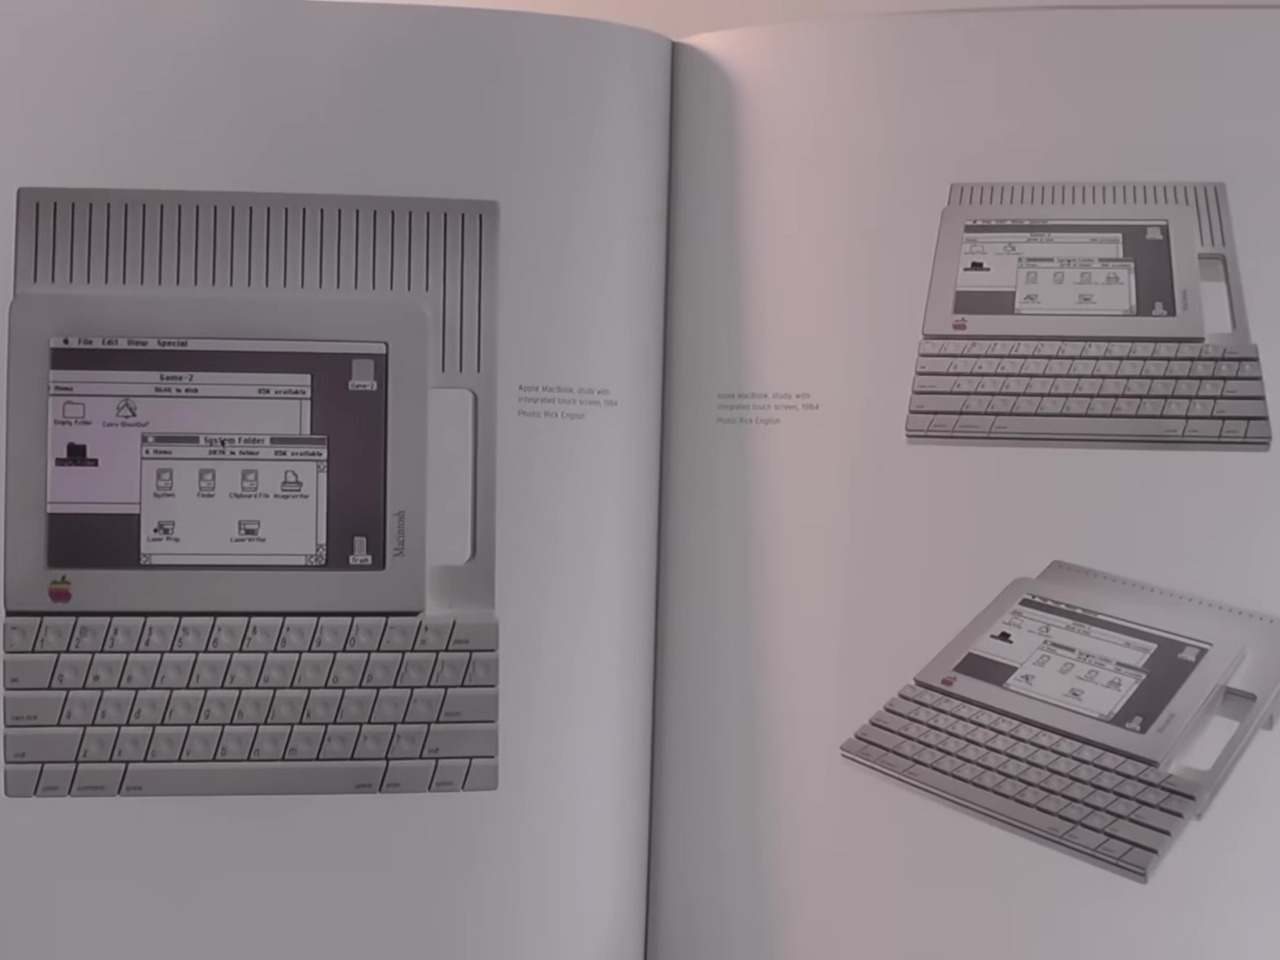
Designer: Kevin Noki (original Hartmut Esslingers)
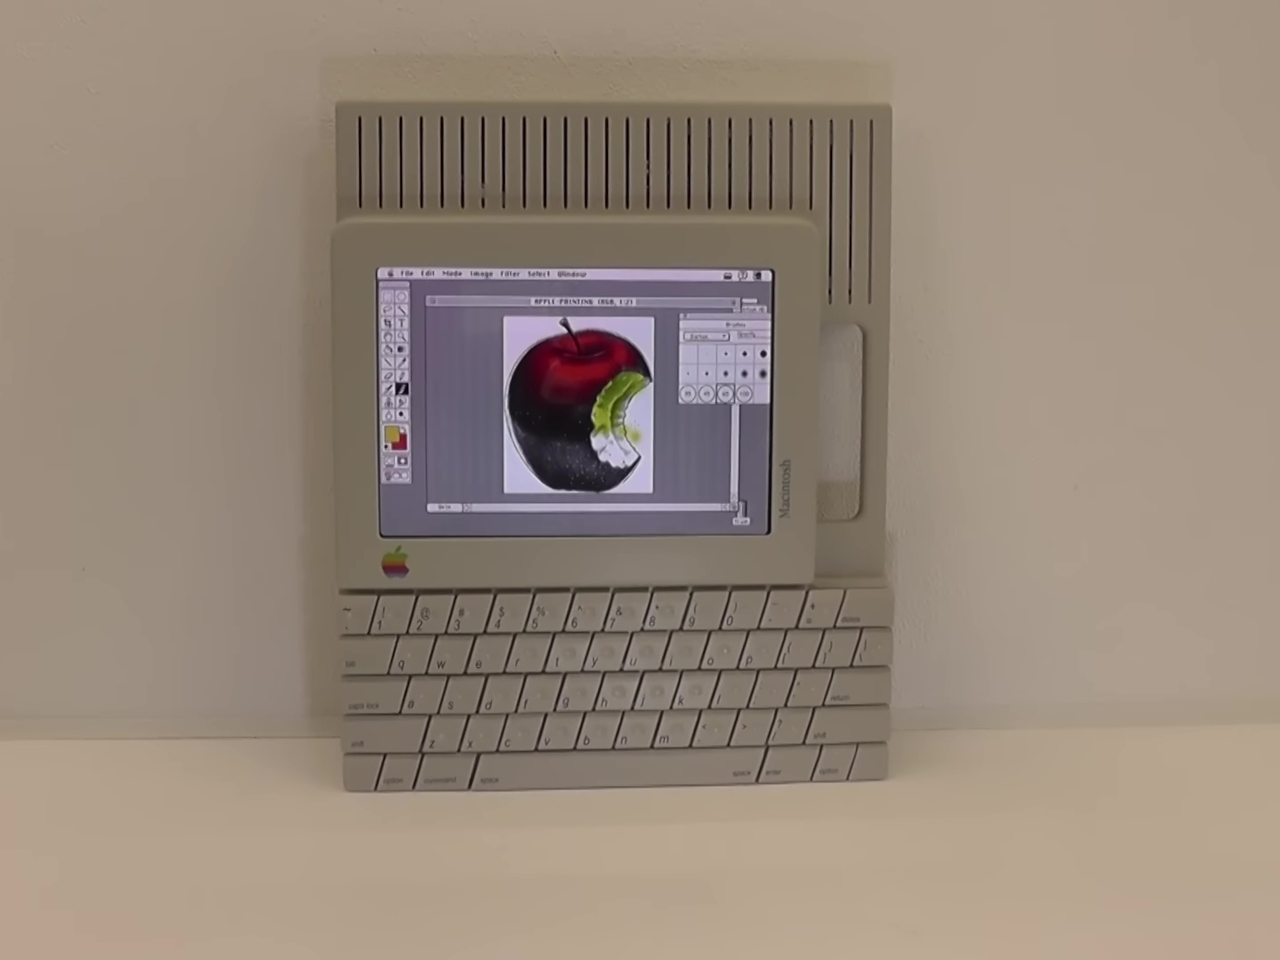
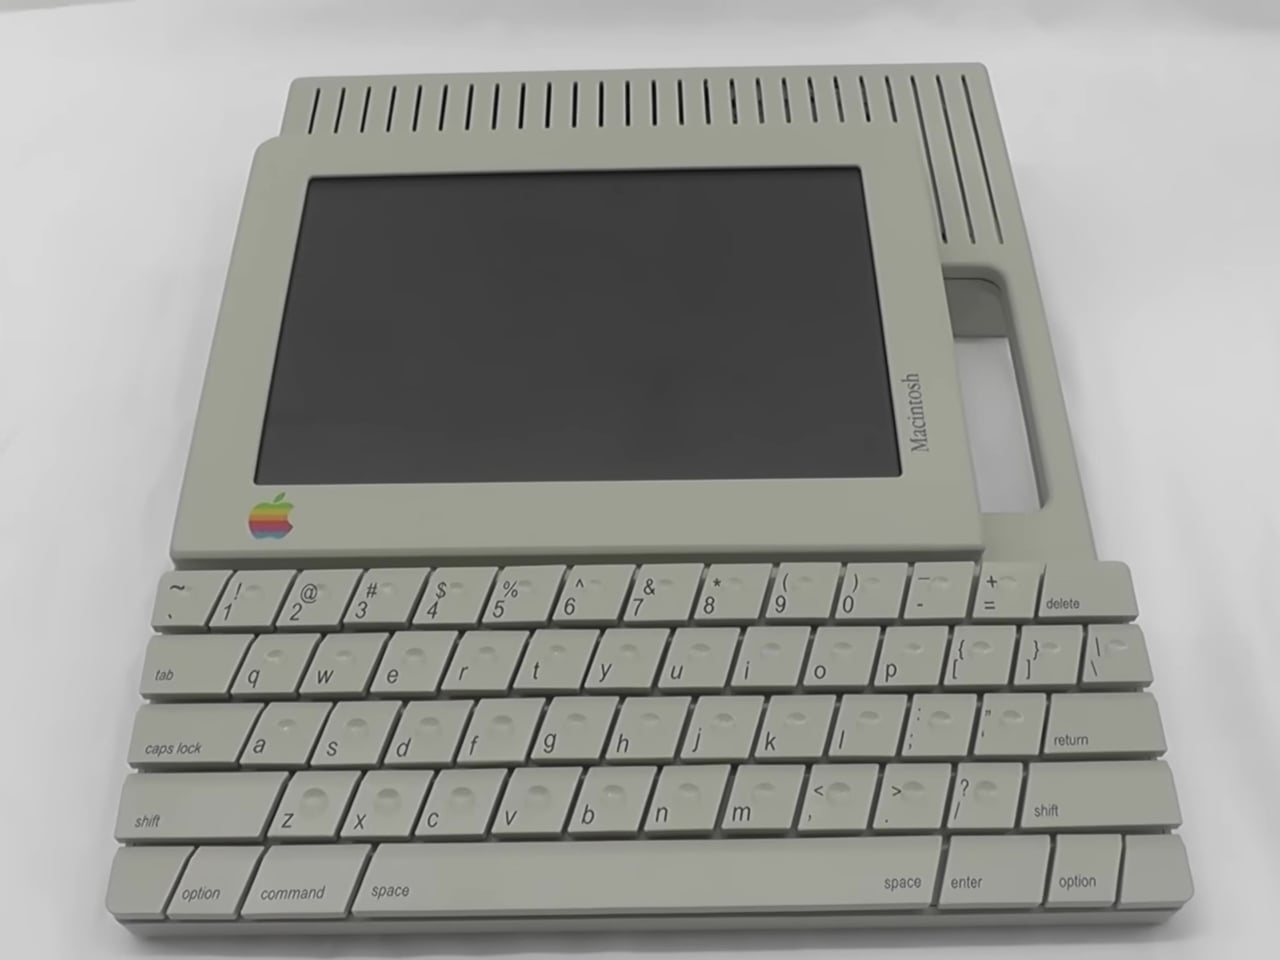
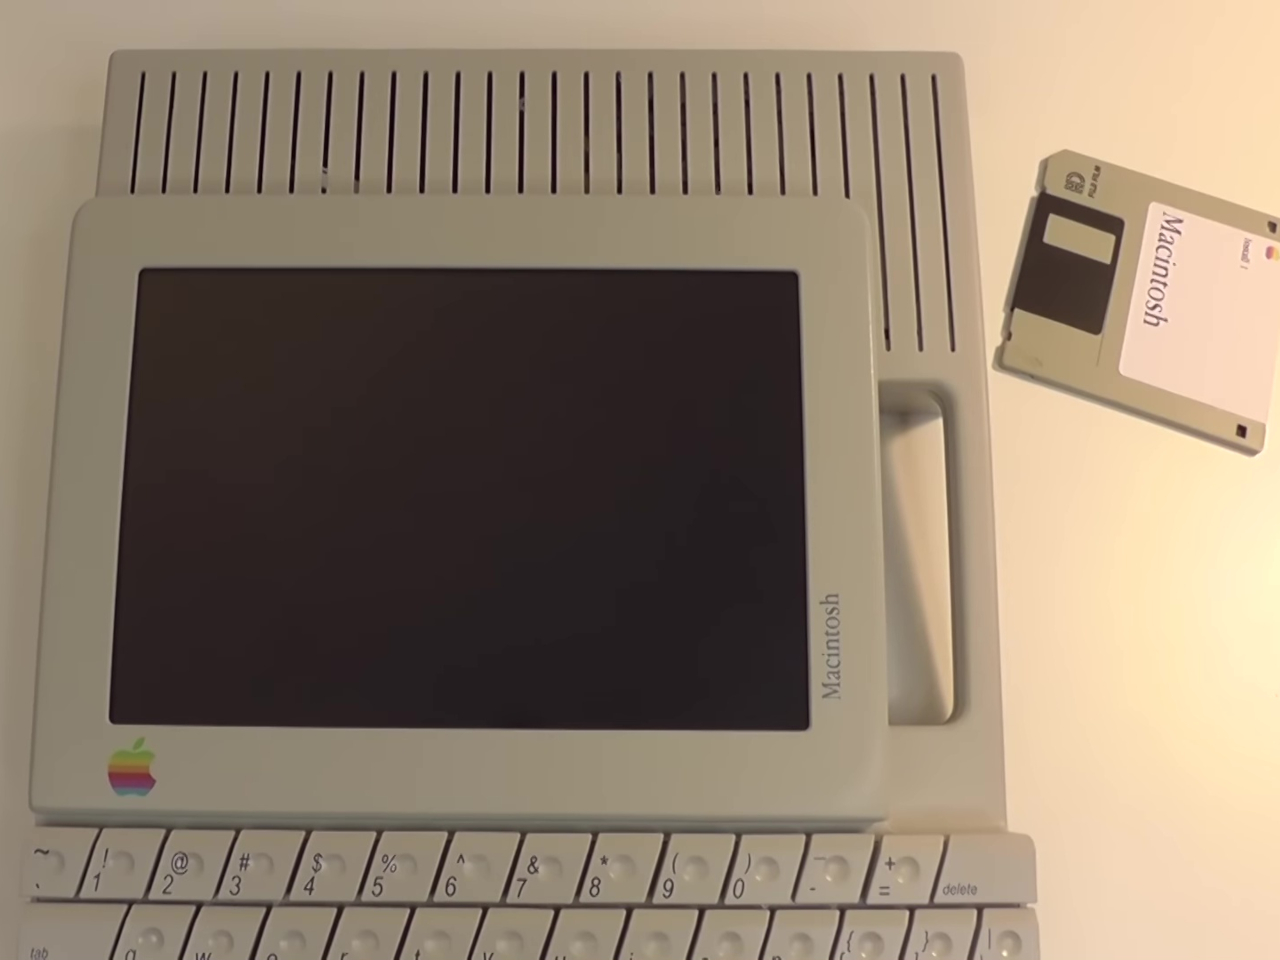
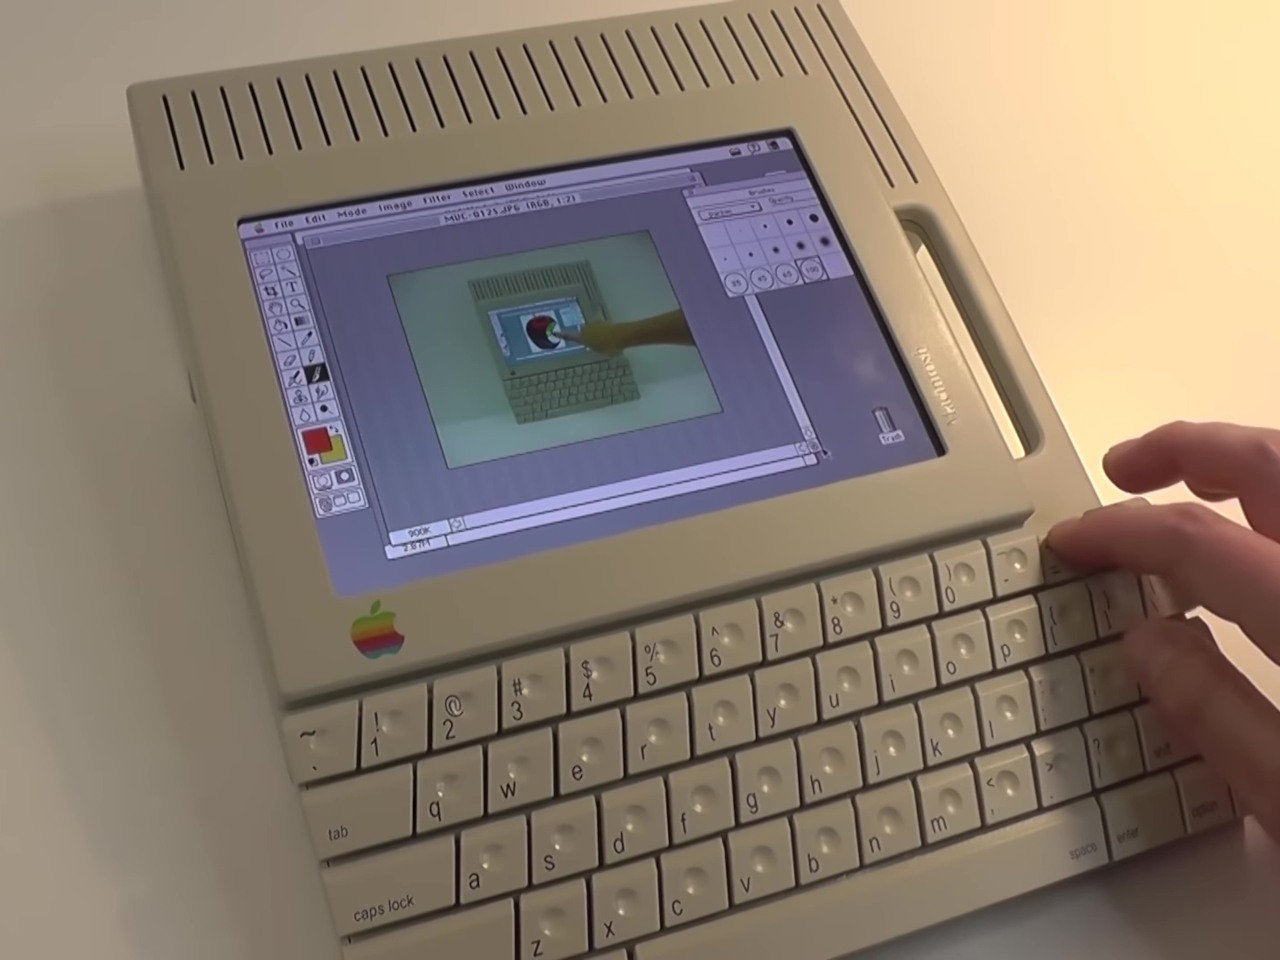
The so-called “FlatMac” was envisioned by industrial designer Hartmut Esslingers back in the 80s as part of his portfolio that gave birth to the Apple IIc, Macintosh SE, and even Steve Jobs’ NeXT Cube. This was a time when tablet computers were basically unheard of outside of science fiction, and computers that could fit in a briefcase were a luxury very few could afford. While the FlatMac’s design is definitely archaic by today’s standards, it’s also the perfect target for a nostalgic reimagining.
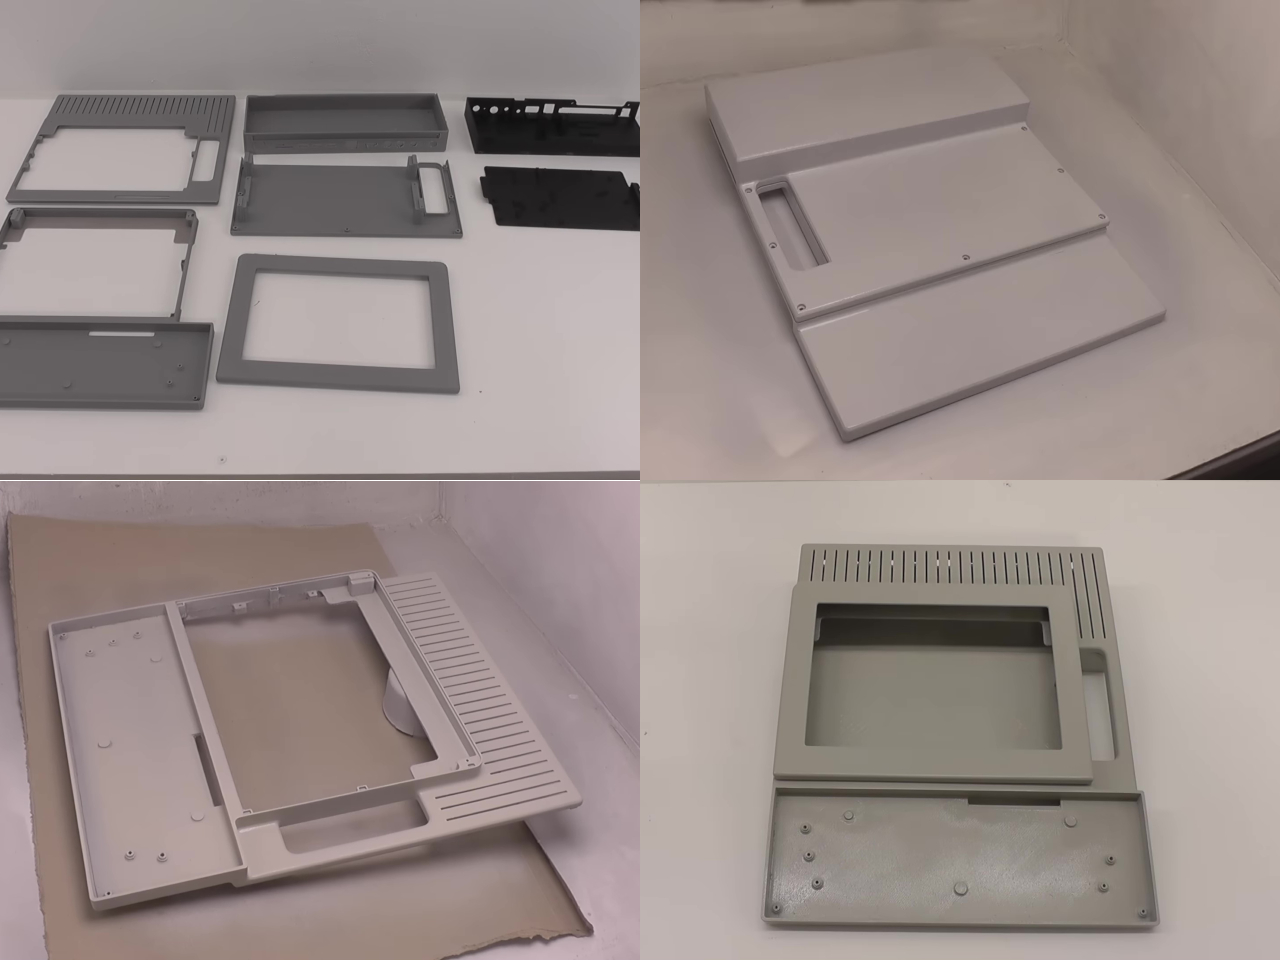
Thanks to the ubiquity of 3D printers and 3D printing services, designing and making the distinctive shell of this portable computer turned out to be the easiest part of the project. The video, however, shows just how much we’ve romanticized the process by skipping important but painstaking laborious parts like sanding 3D-printed pieces down repeatedly. There’s definitely a considerable amount of manual labor involved, and that’s not yet getting to the electronics.
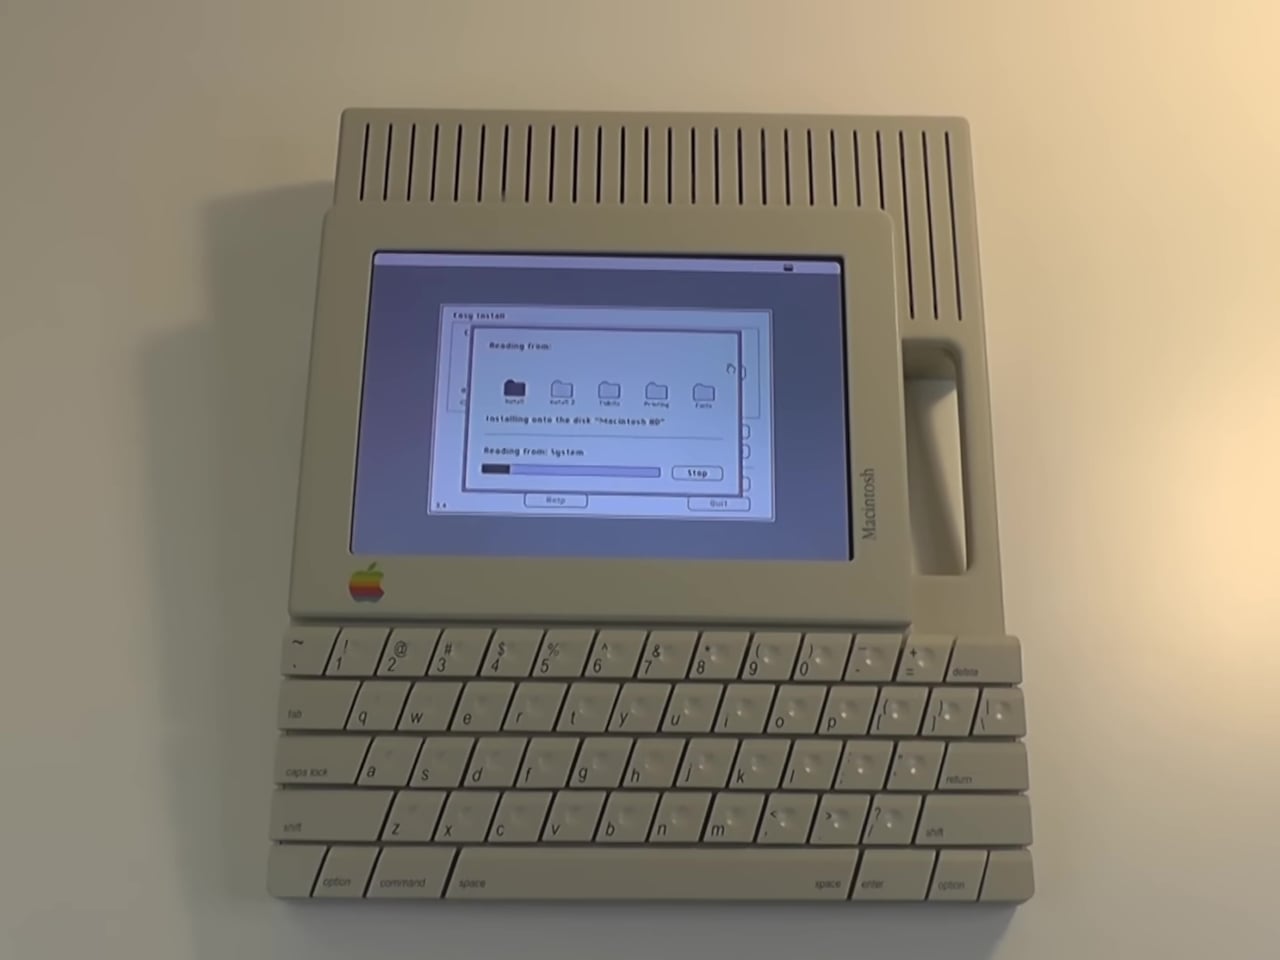
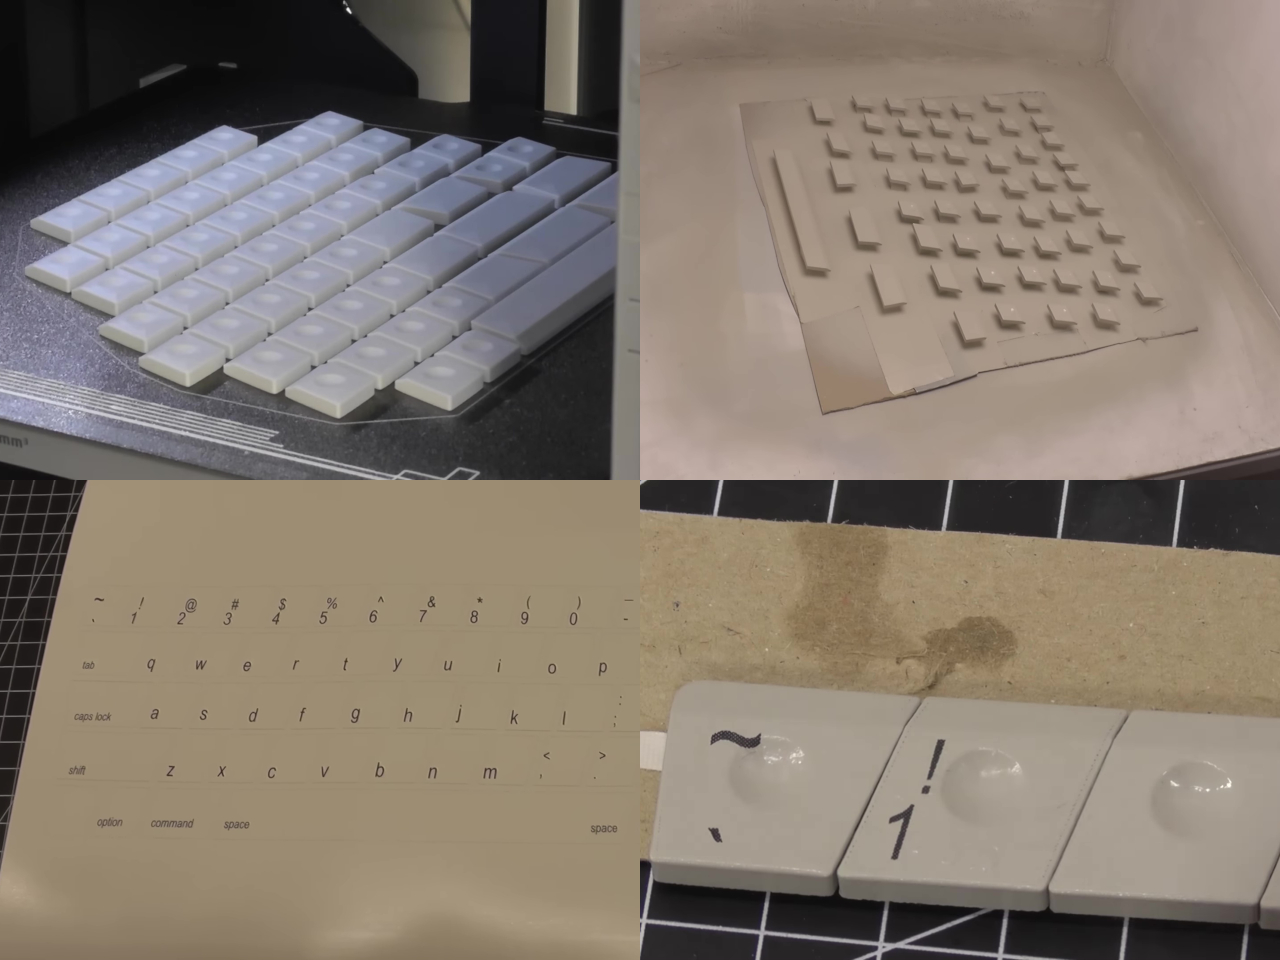
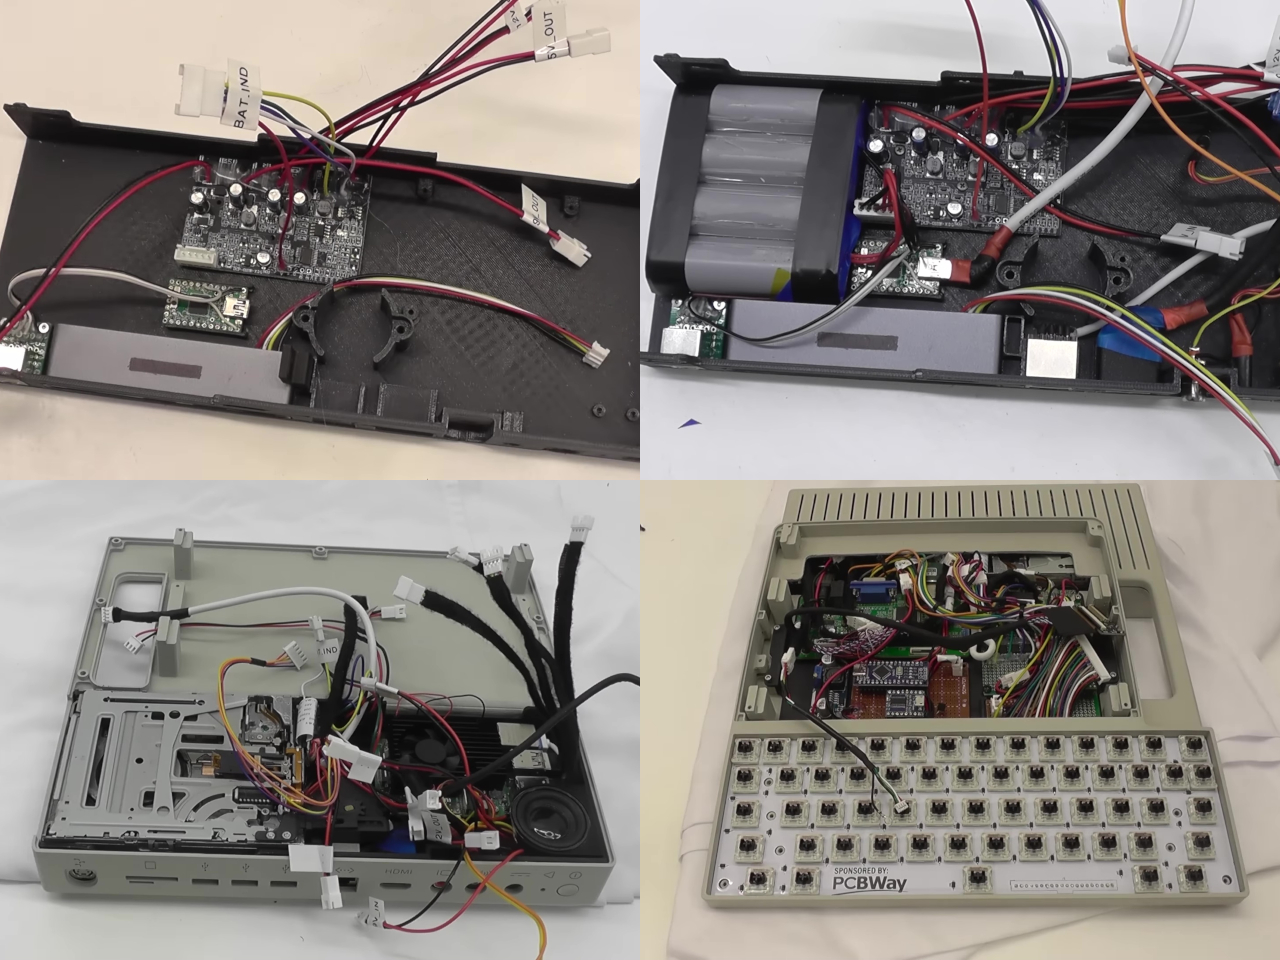
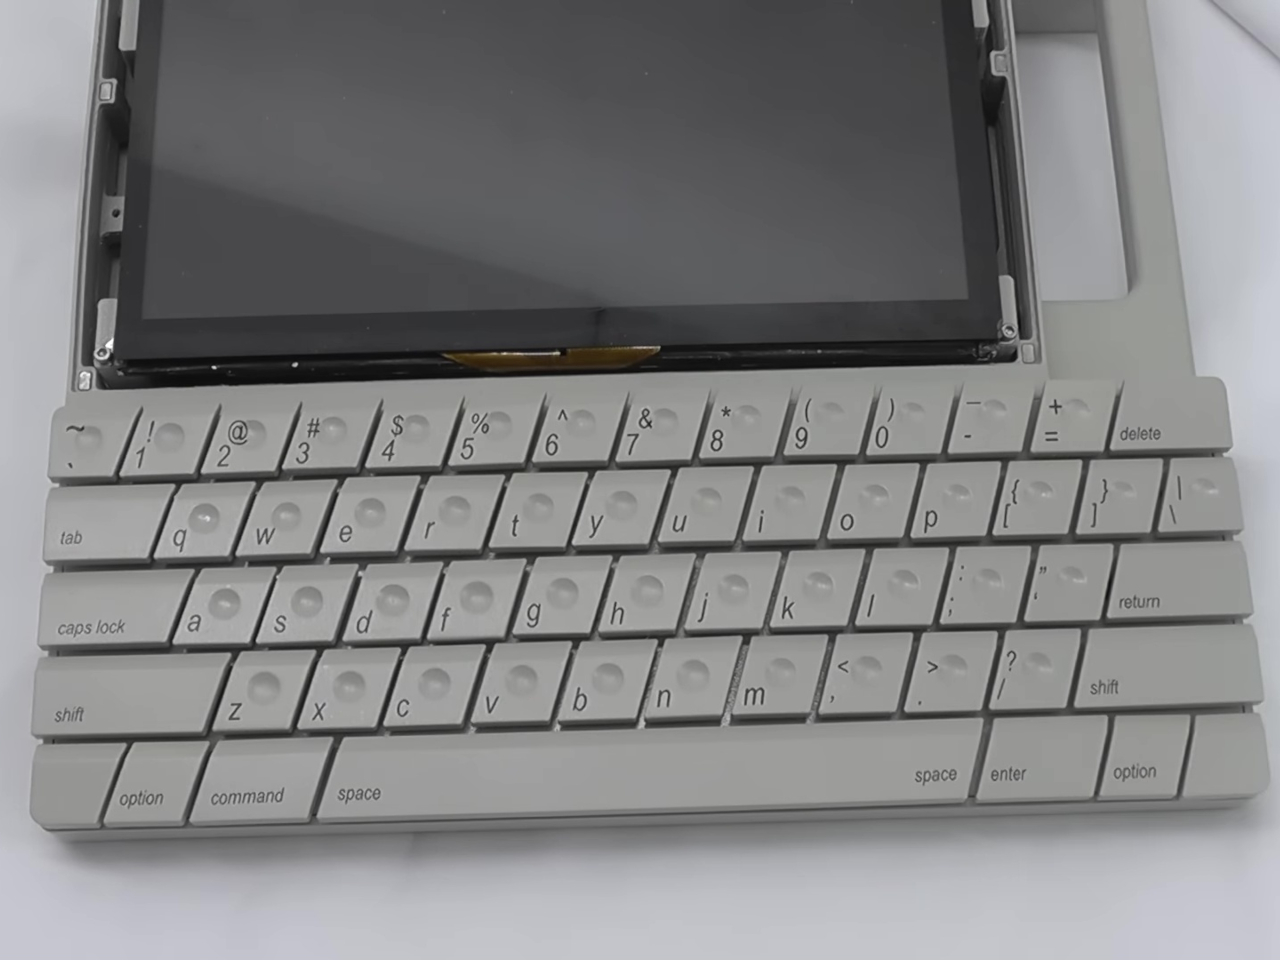
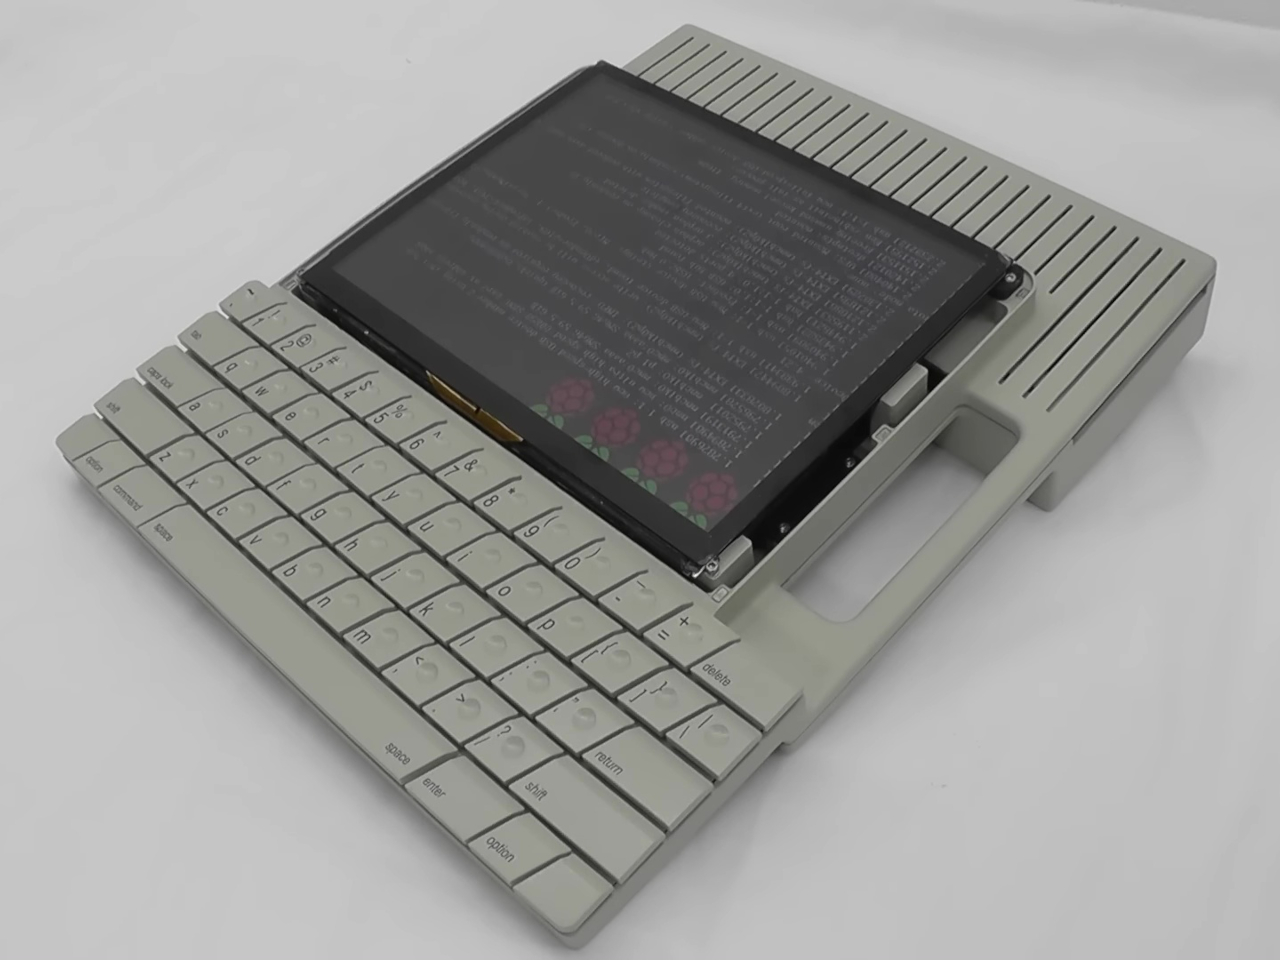
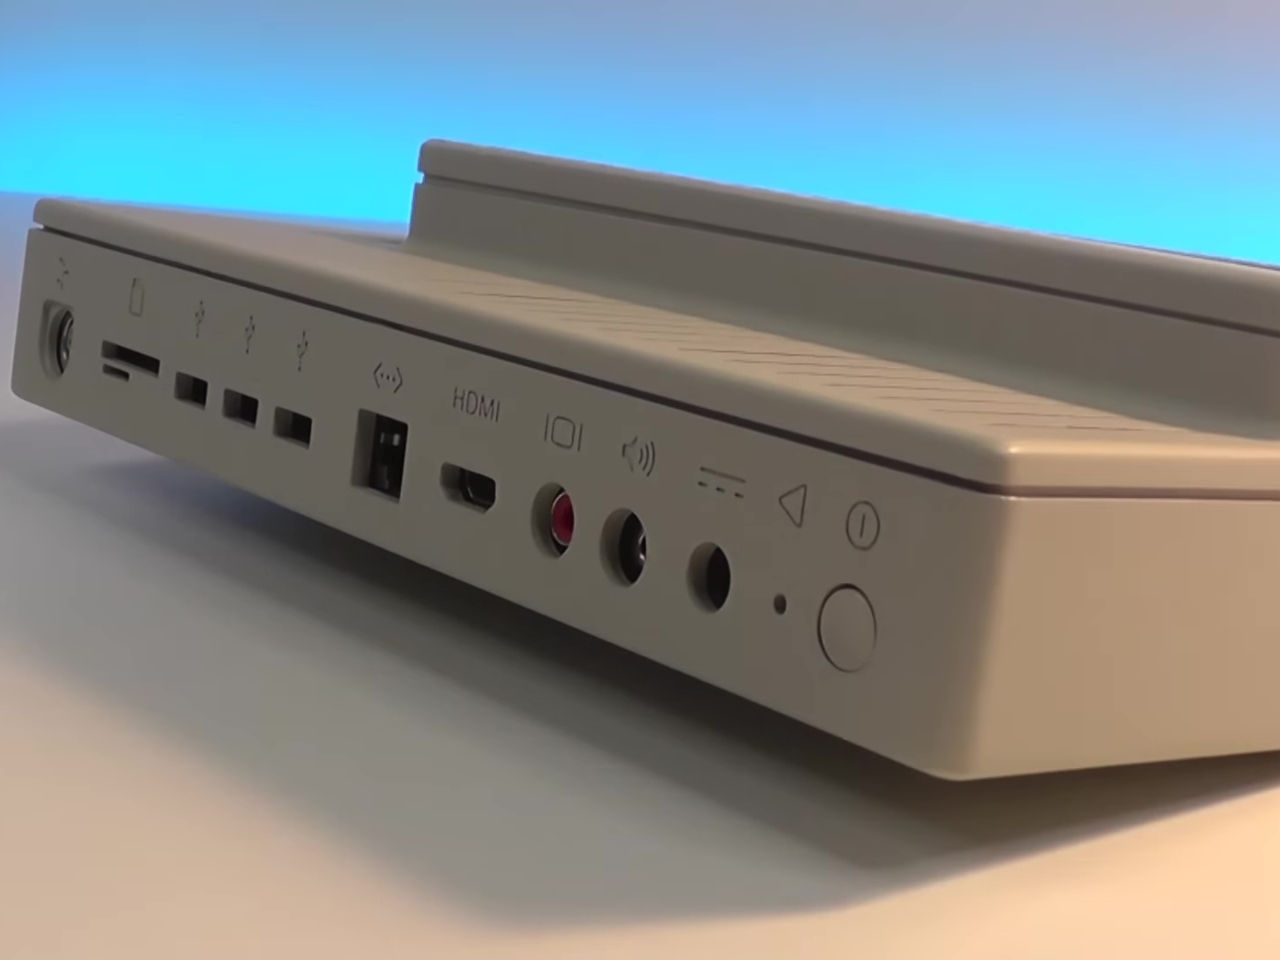
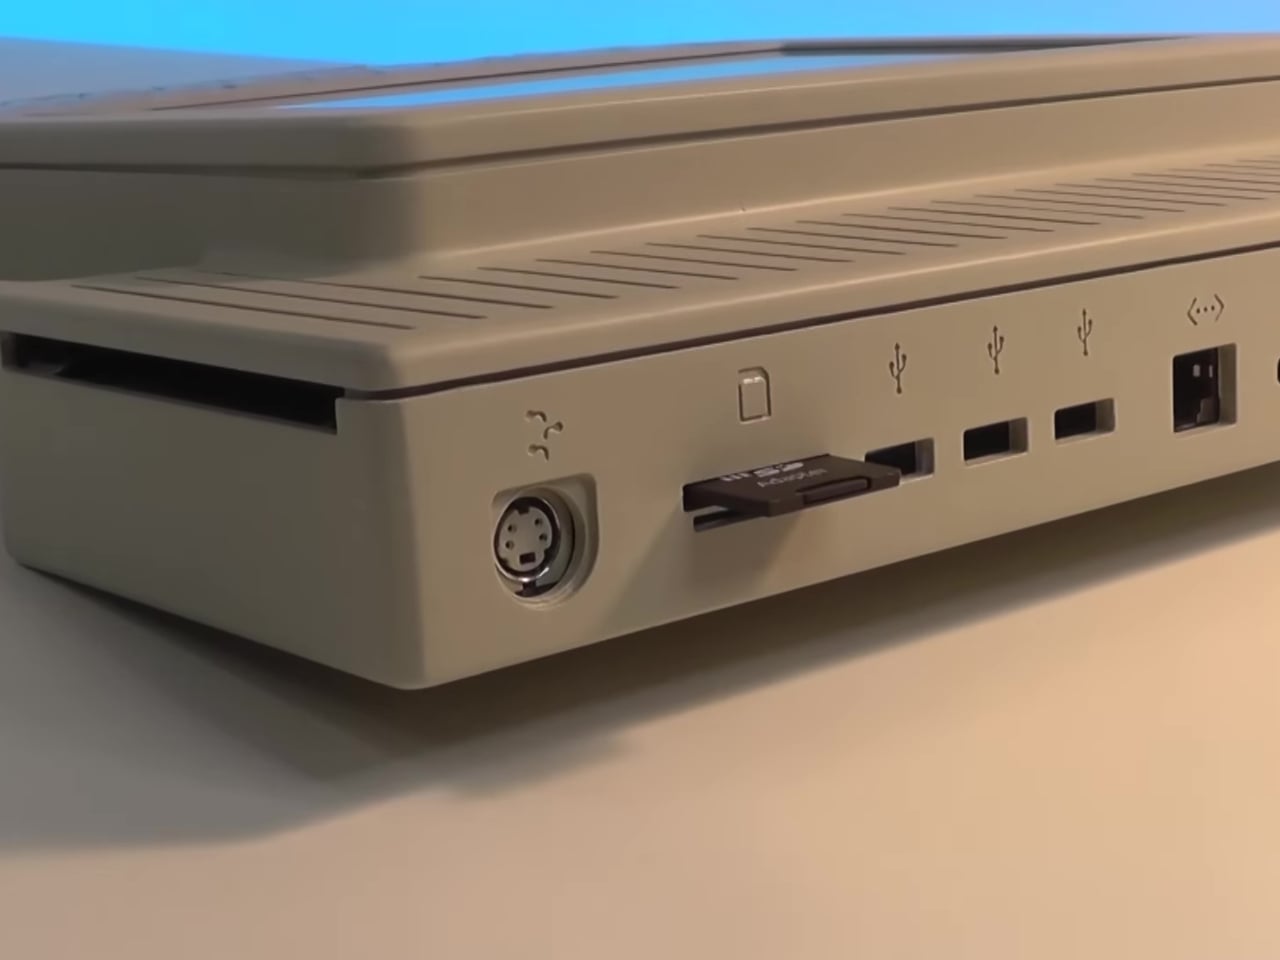
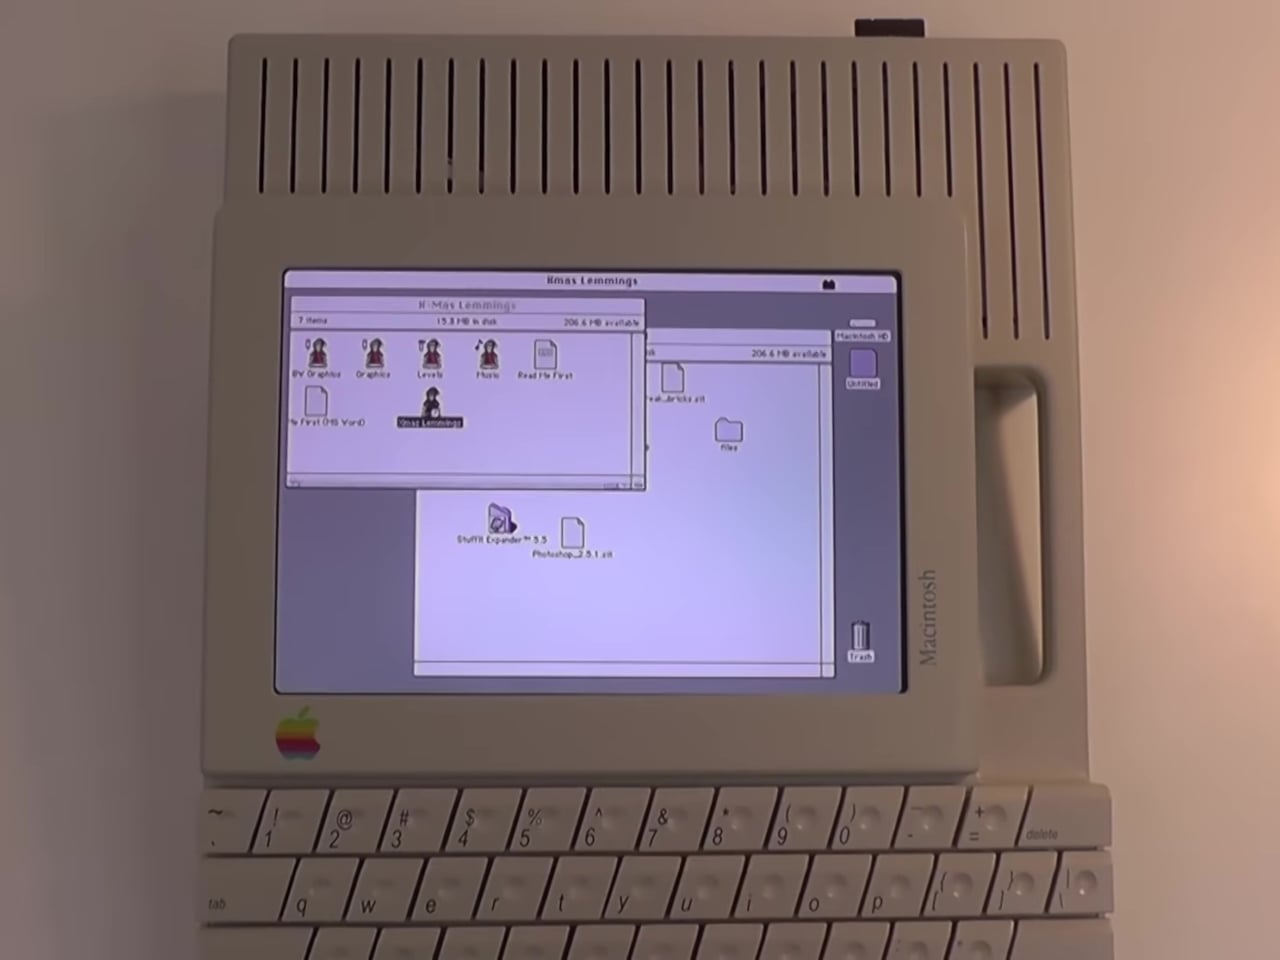
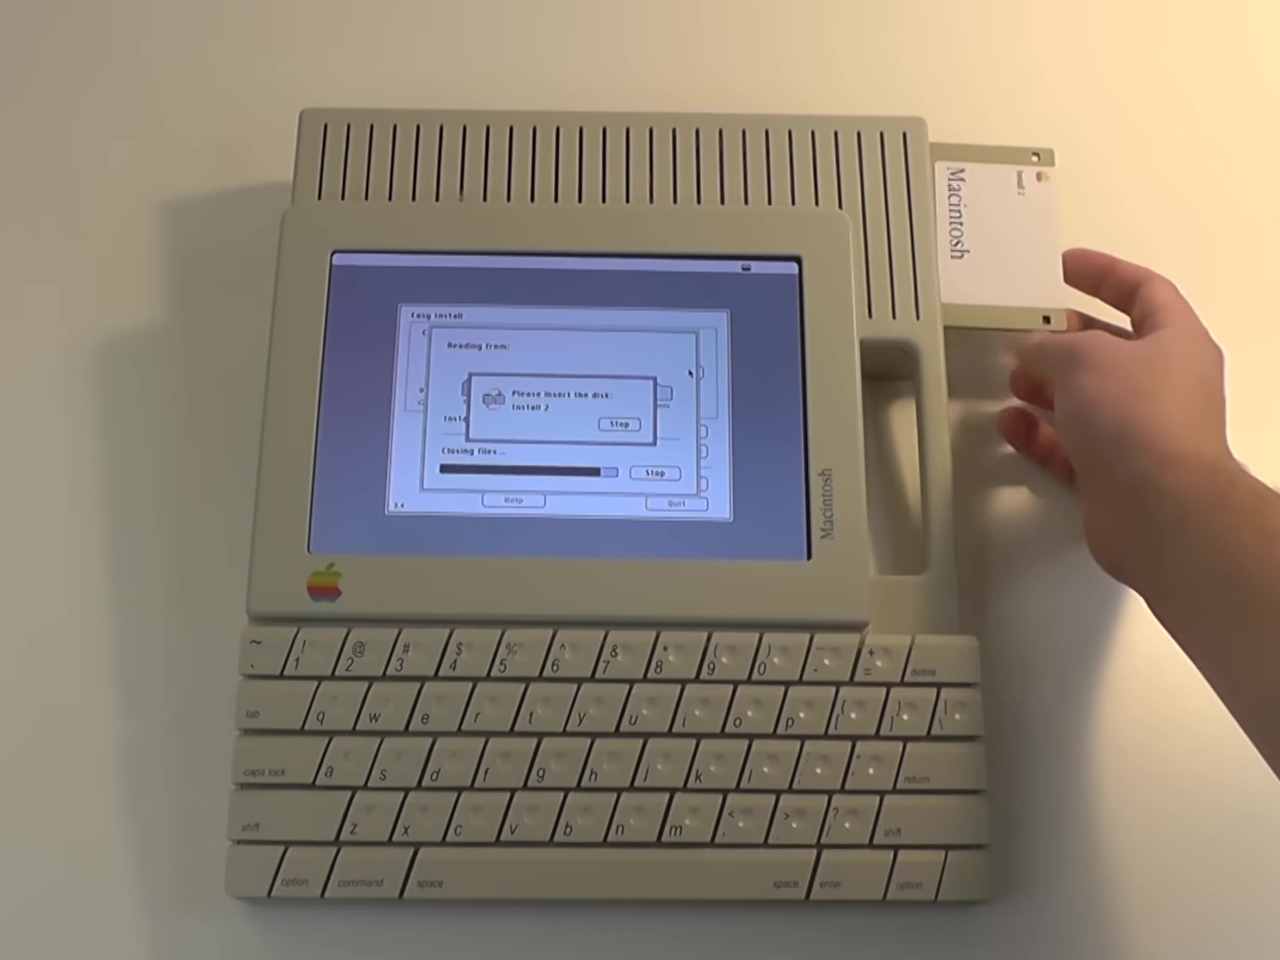
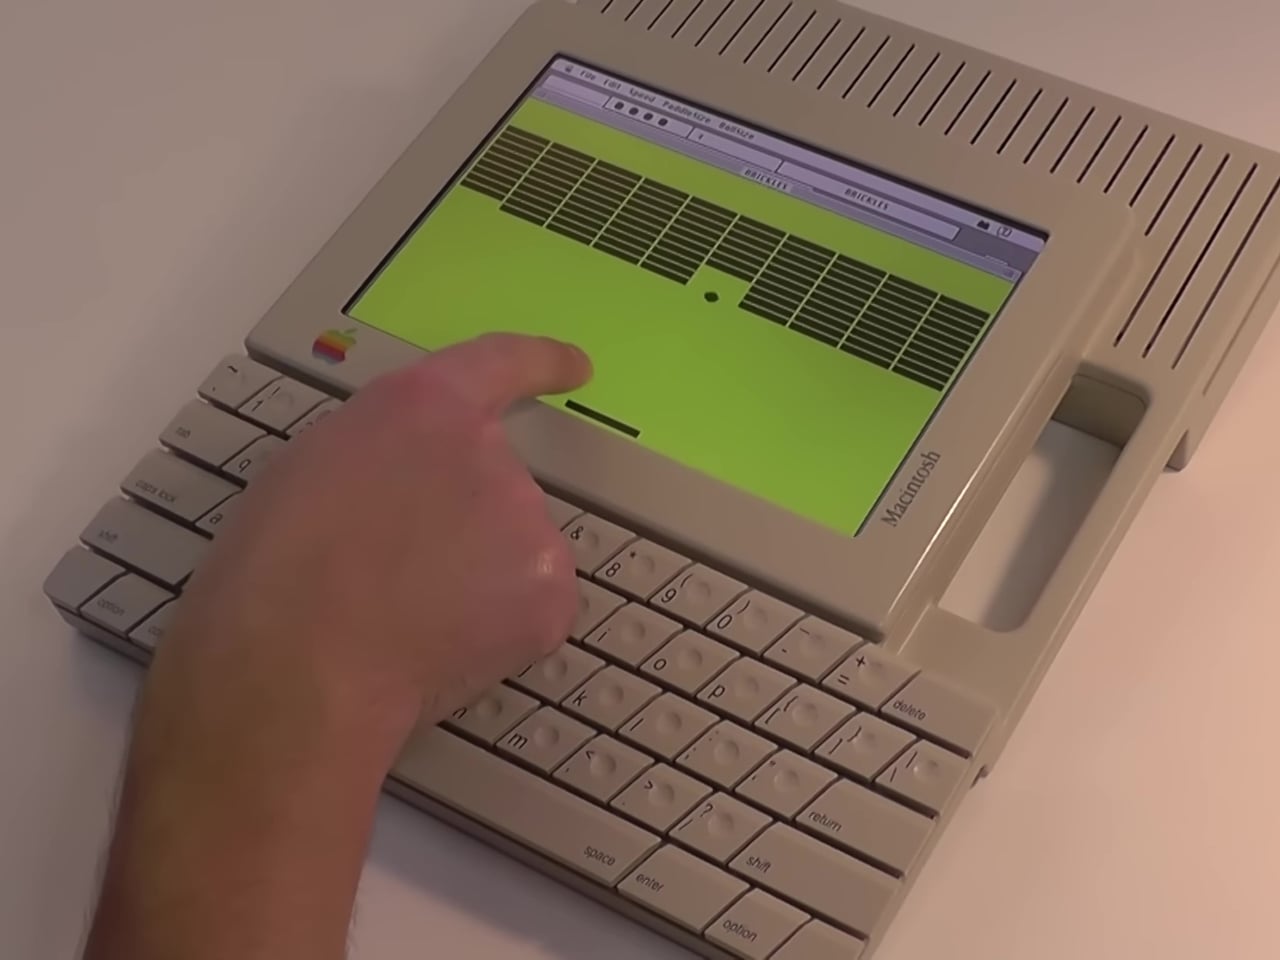
The bulk of the work for this real-life implementation of the FlatMac concept involves designing the custom-made keyboard, retrofitting hubs and power banks to fit the design, and even soldering new parts together. Fortunately, most of the parts can be bought off the shelf, but that doesn’t make the work easier. Ironically or perhaps fittingly, the display for this iPad predecessor was actually taken from a broken iPad. Even more ironic, the heart and brains of this contraption is also named after a fruit: the Raspberry Pi.
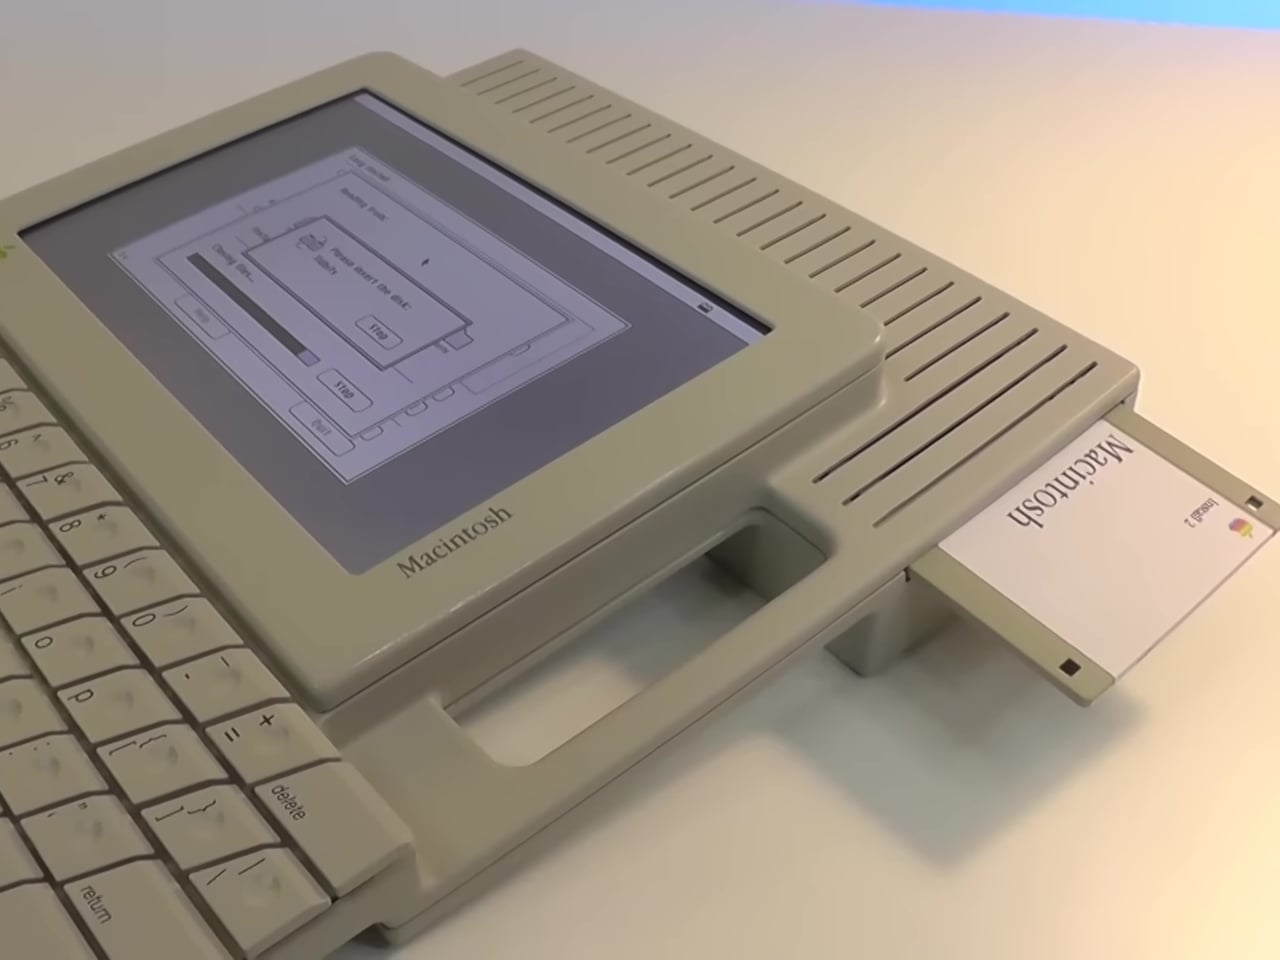
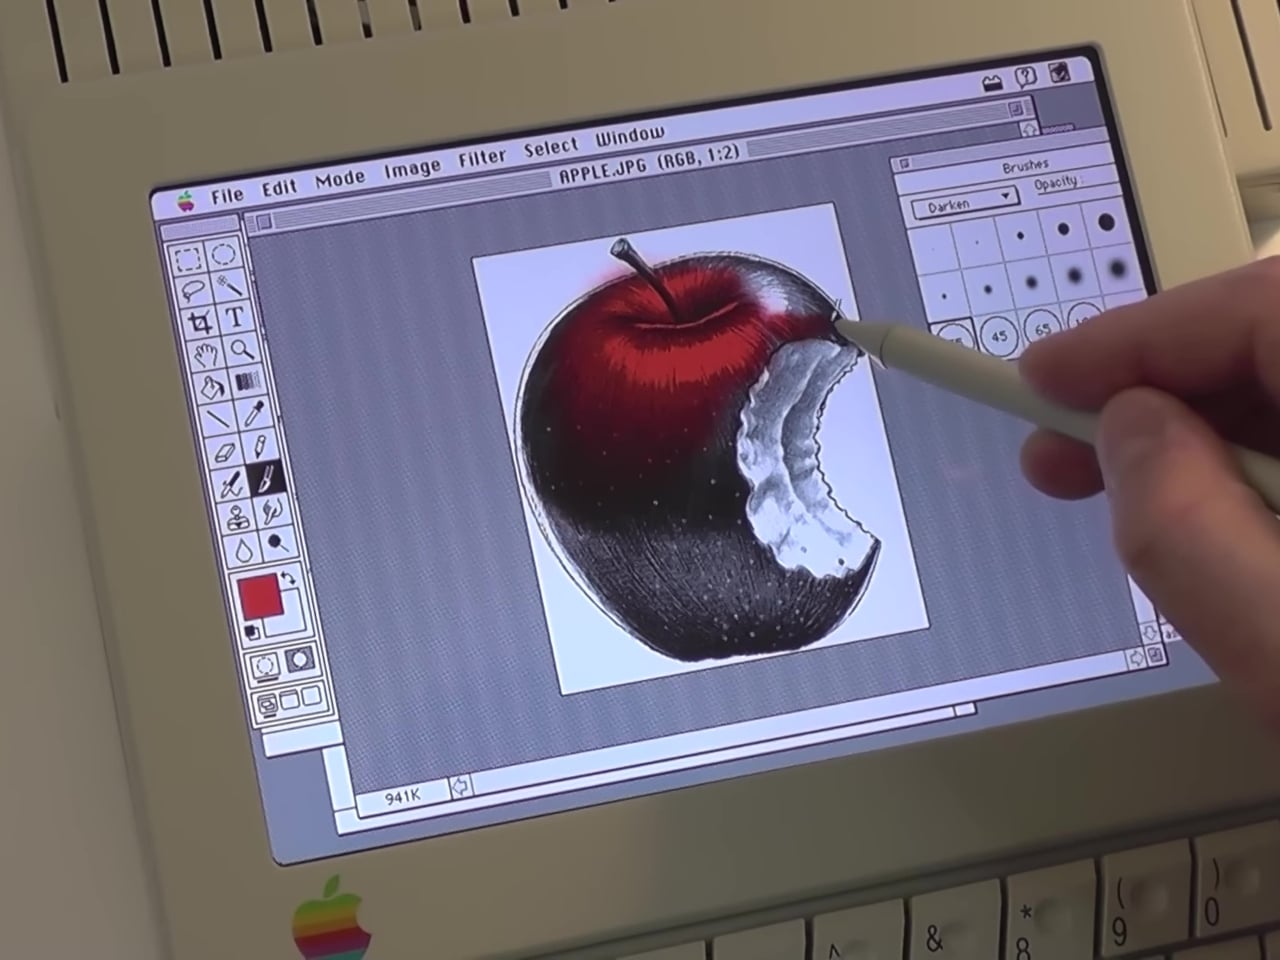
The end result is a truly impressive product that demonstrates not only the capabilities of modern technologies but also the vision of Esslingers’ original design. This FlatMac implementation even uses an actual floppy disk drive that can be used to install an old Macintosh OS via an emulator. It does support one modern feature that was never available in the 80s: a stylus like the Apple Pencil. It would have been a designer’s dream machine back then, though we can only judge that now thanks to hindsight.
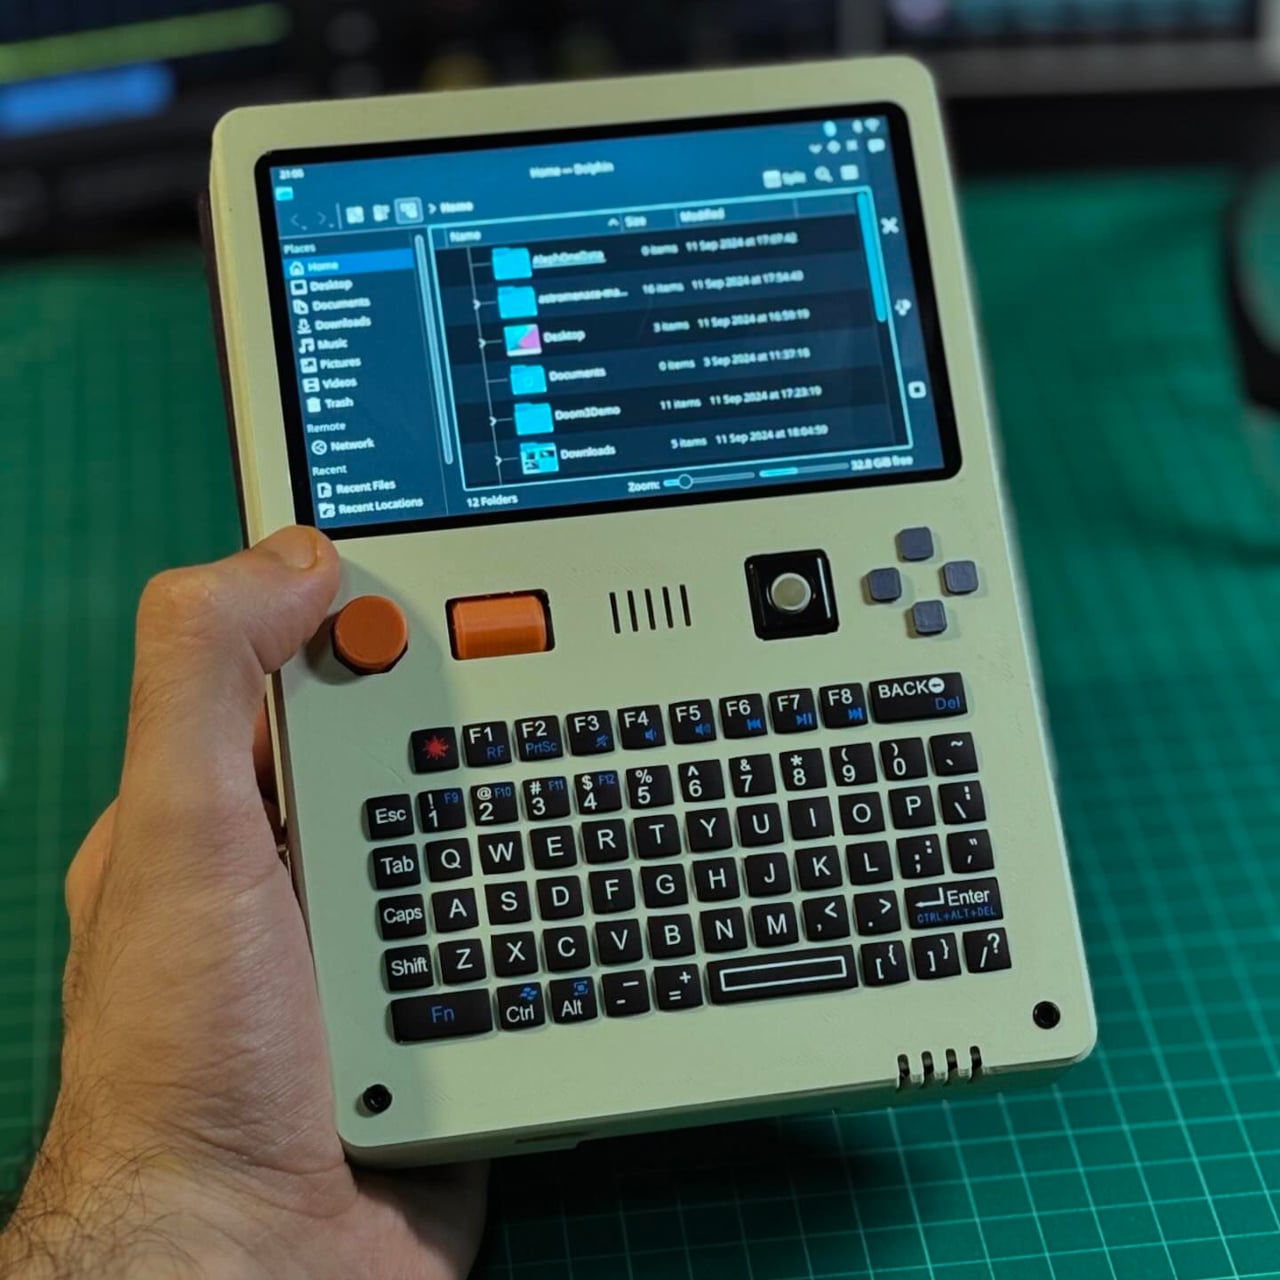
It’s pretty amazing how much computing power can be crammed into a small space these days. After all, our smartphones are very capable computers themselves, but we also have handheld gaming PCs and single-board computers or SBCs that are no larger than (very thick) credit cards. The latter, popularized by the super-affordable Raspberry Pi, blasted wide open the doors to creative projects and gadgets, from mirrors that act as your smart home console to fictional cyberdeck computers brought to life. This latest design is one of the latter, offering a handheld computer with modern features and an aesthetic that seems to come from an alternate 80s timeline.
Despite its size, the Raspberry Pi is a complete computer, one that can run desktop operating systems, including a trimmed-down version of Windows. With just the right peripherals, it can be used as a normal computer, and some have even turned the SBC into a laptop or even a desktop, complete with liquid cooling. These, however, don’t take full advantage of the Raspberry Pi’s small and portable size, a form that’s perfect for a handheld computer.
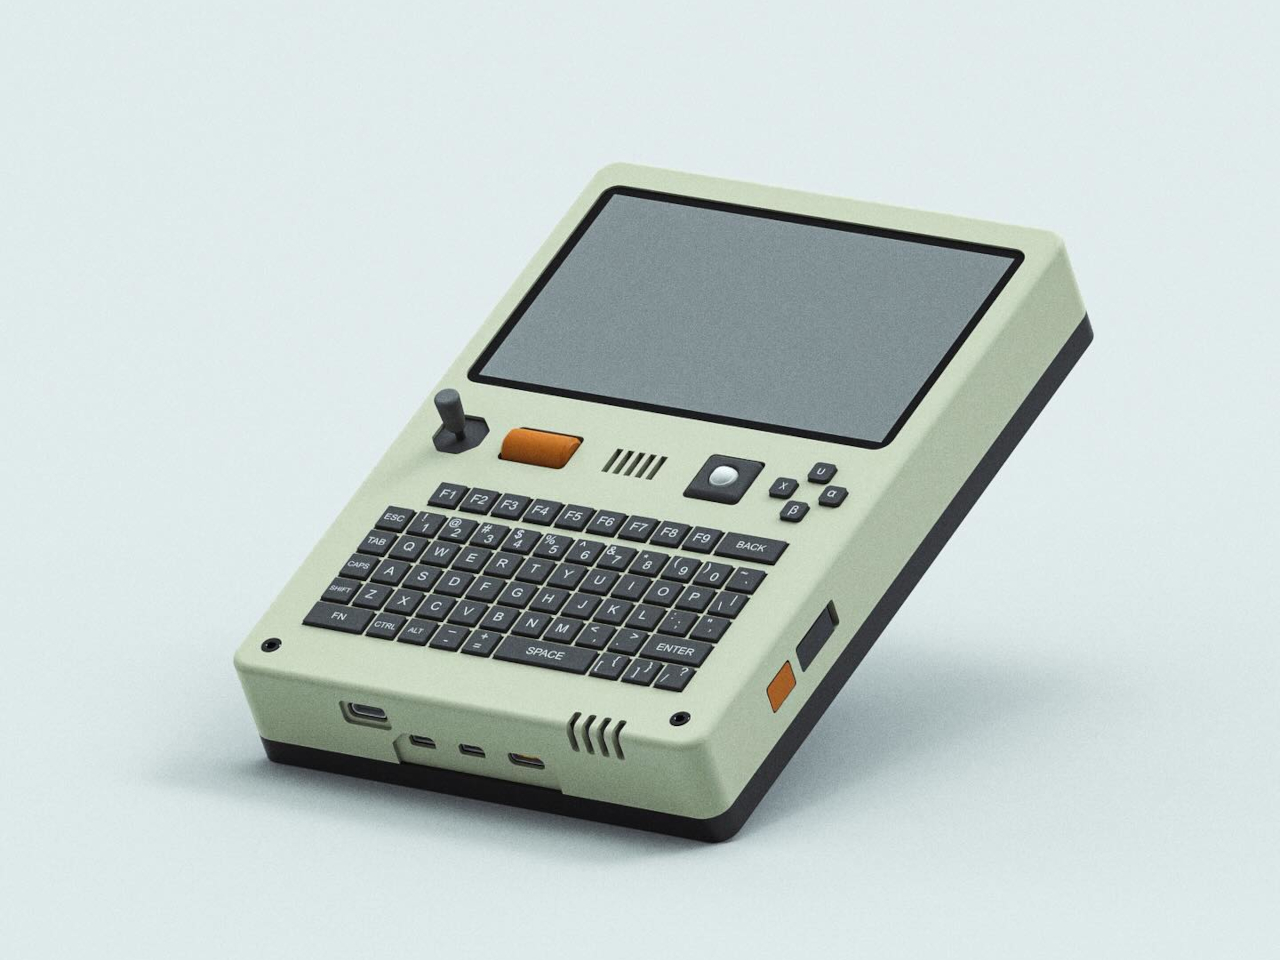
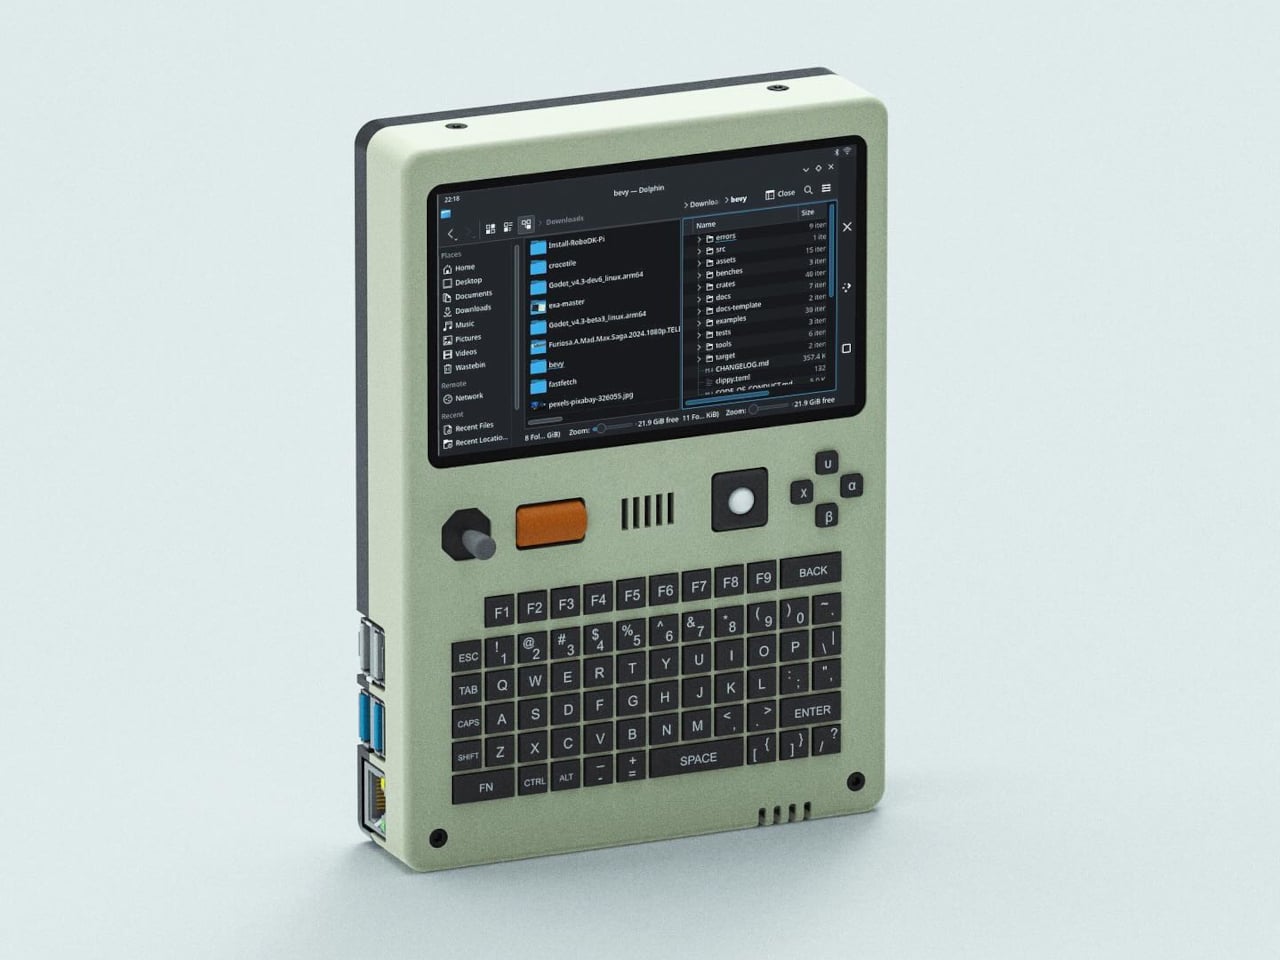
The Pilet 5 handheld console adds those essential missing parts to the barebones computer, turning it into a finished product that is usable the moment you turn it on. This form takes the shape of a rather chunky box with a 5-inch screen at the top and a QWERTY keyboard on the bottom half. This isn’t the first BlackBerry-like design powered by a Raspberry Pi and it definitely won’t be the last, but there are a few details that makes this project a bit interesting.
In addition to the keyboard, Pilet 5 has a four-direction D-pad as well as a tiny trackball on the right side of the device, while the opposite side has a joystick and a scroll wheel. These would definitely be more than enough to move the mouse, if the touchscreen still wasn’t enough, and they open up more use cases, like gaming for example. The aesthetic of the design is also less grungy and raw, unlike typical cyberpunk-inspired “cyberdecks.” The beige motif, gray buttons, and minimal colors give it a vibe similar to the consoles and computers from the late 80s and early 90s.
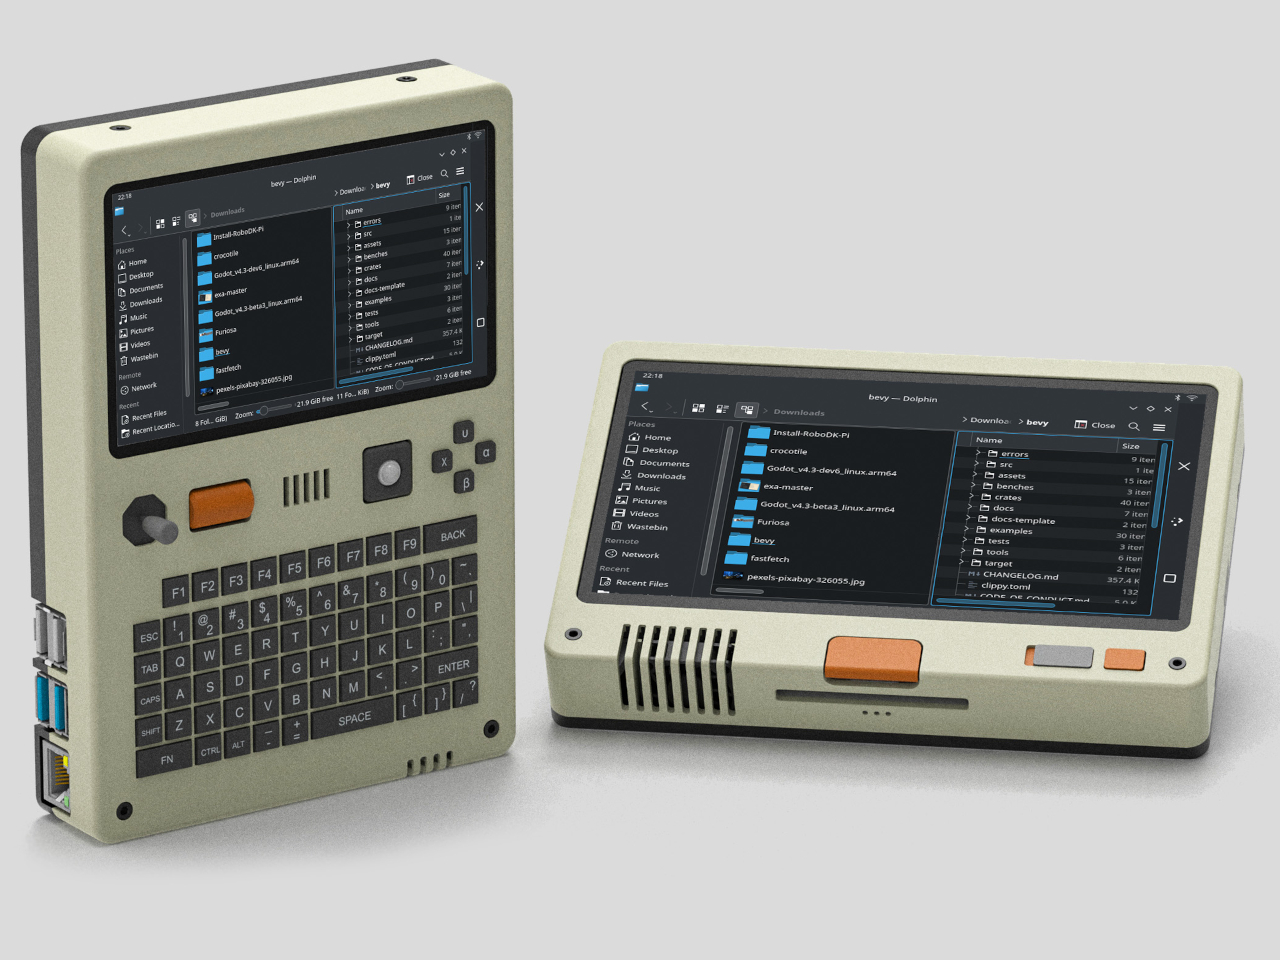
Just like the Pilet 7, formerly known as Consolo, the more compact Pilet 5 still promises a 7-hour battery life thanks to dual 8,000mAh batteries, just in a smaller and more complete form. That said, it does lose out on the appeal of a modular design that can adapt to almost any use case, which is what the Pilet 7 will bring to the table once it’s actually out.
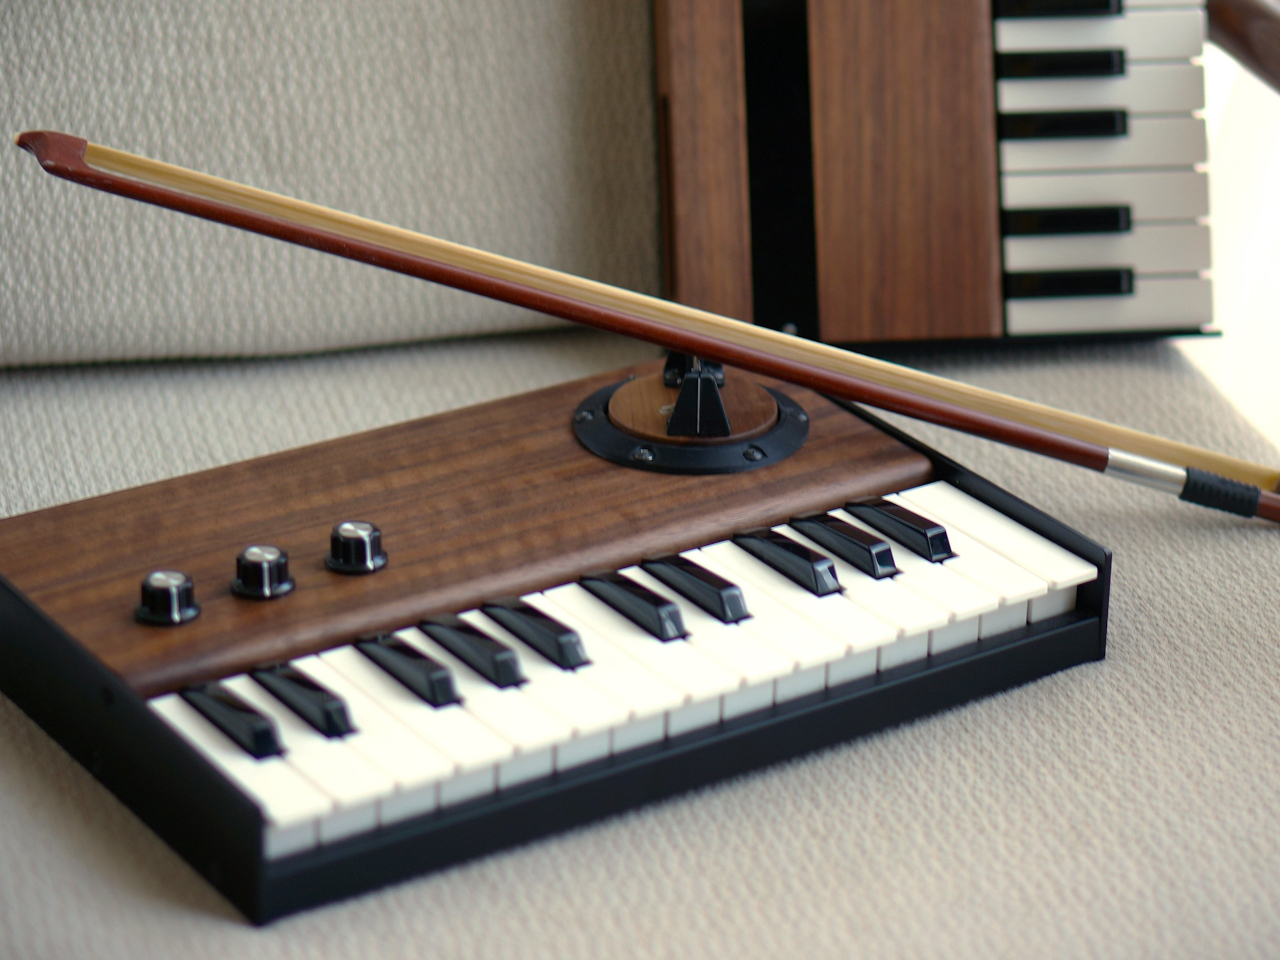
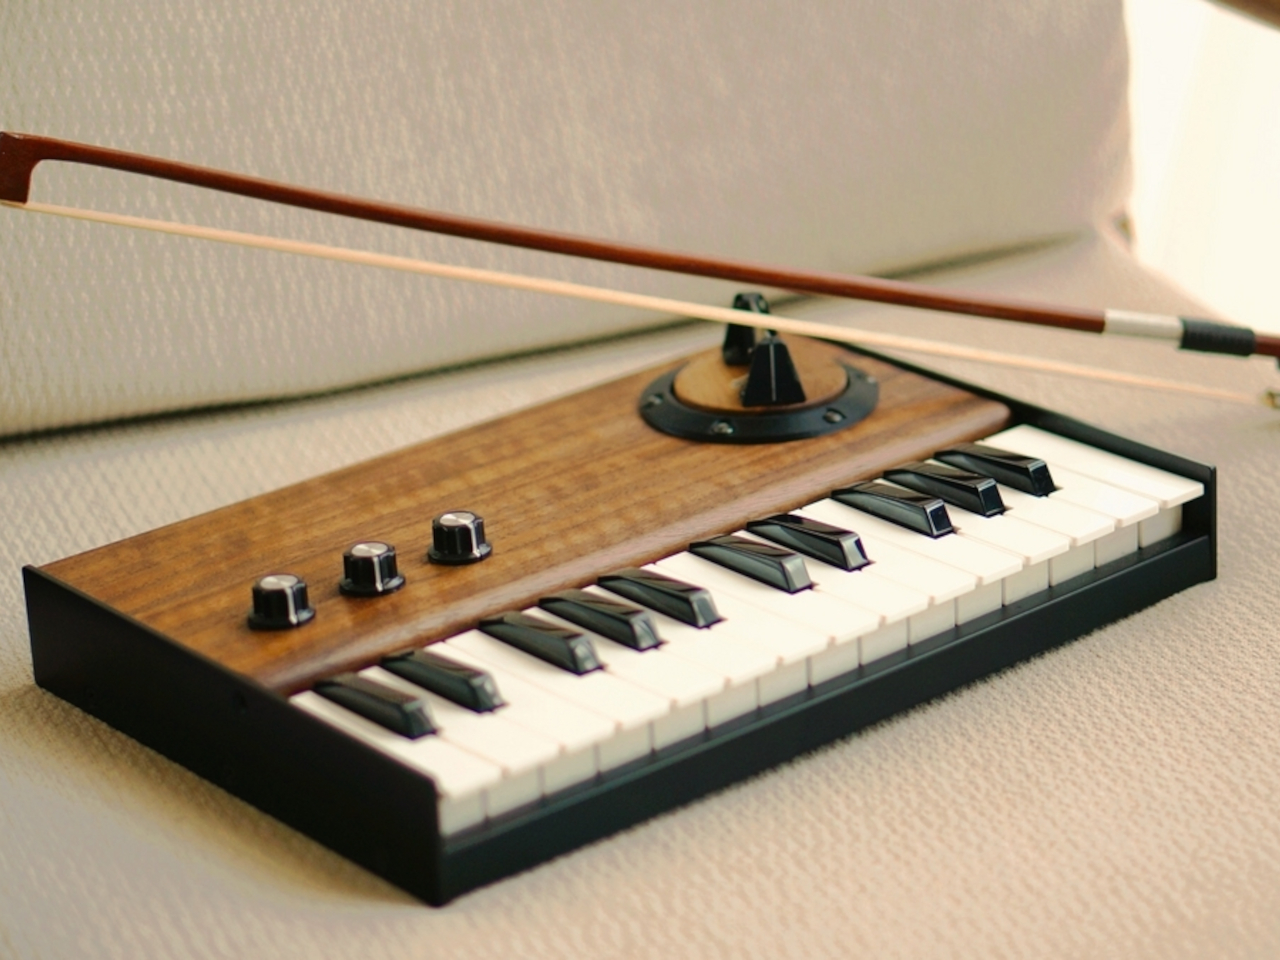
Of the many creative endeavors, music is probably one of the hardest to learn and practice. And of the well-known musical instruments, the violin is one of the hardest to play. But what if you can play the violin or some semblance of the instrument as easily as you could press down keys on a piano? And what if that produced the unique tonal quality of a violin while still hitting all the right notes perfectly? That’s the kind of musical experience that this DIY synthesizer offers, combining two classical instruments in a single form that might leave you confused with one hand playing the keyboard and the other playing the violin.
Electronic keyboards can try to mimic the sounds of different musical instruments, but they don’t always work. They can’t, for example, reproduce the unique vibrating quality of the violin family, which at the very least would require some physical medium to produce that kind of sound. Conversely, violins are hard to master because you need to also move the bow at a very precise location to hit the right pitch, and that location isn’t marked like on a guitar.
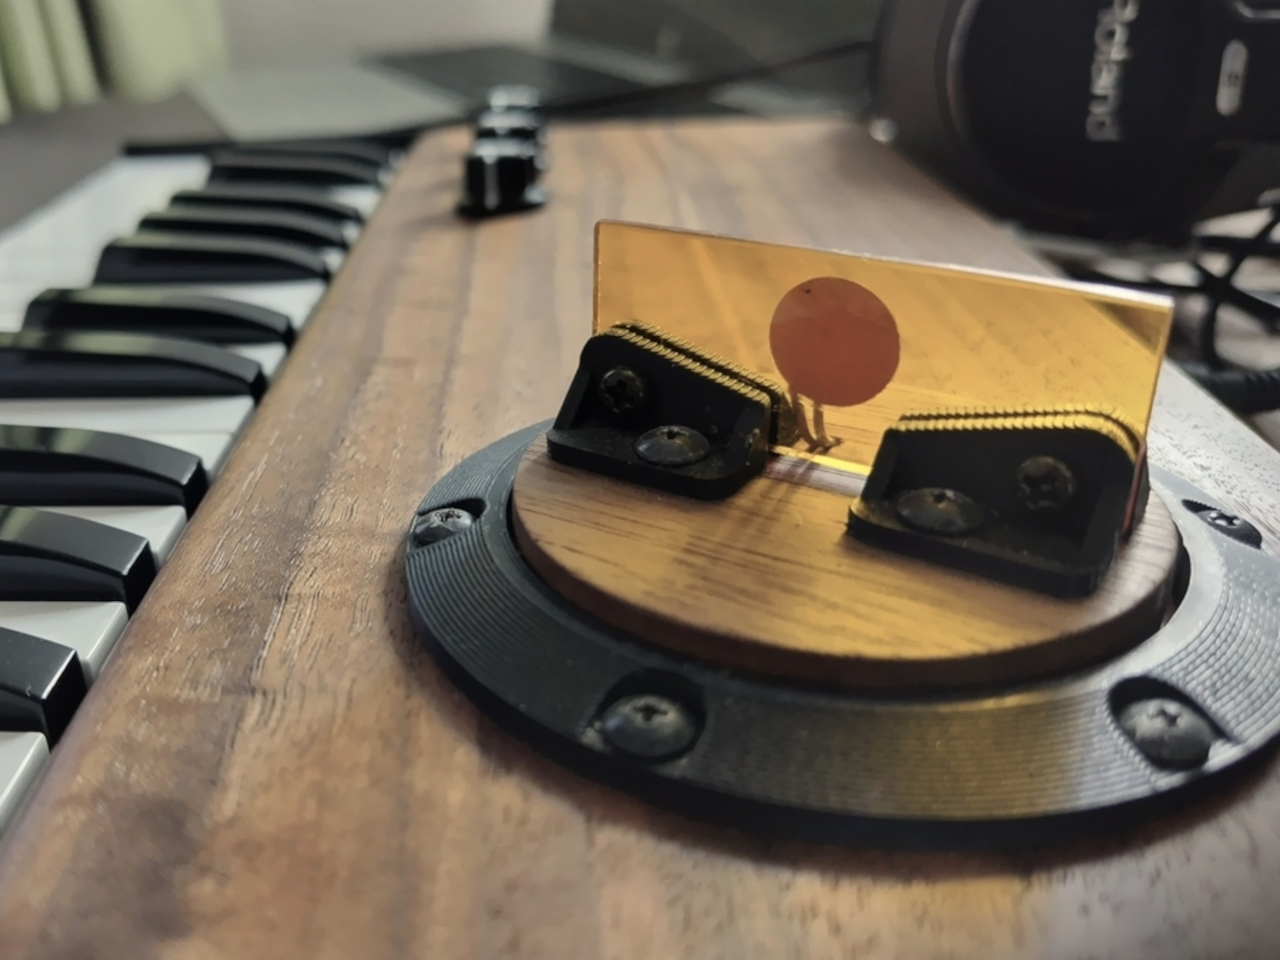
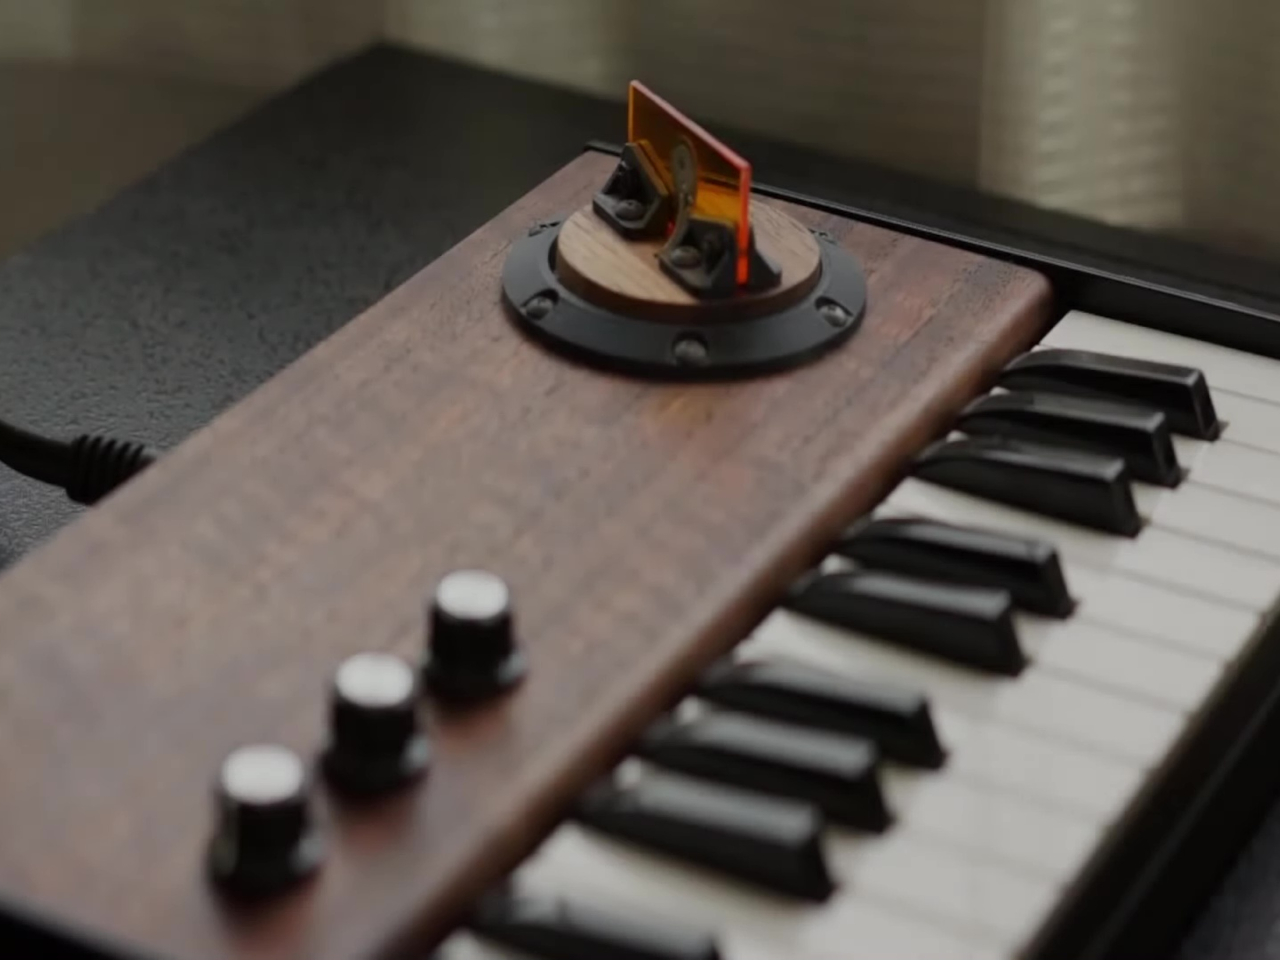
Key-bowed, which is a very creative name, tries to combine the strengths of both the keyboard and the violin with very few of the flaws. It’s actually an idea decades in the making, but it’s finally possible to pull it off thanks to modern technologies and hardware. The synthesizer combines a Roland K-25m keyboard, an Arduino Uno R4 minima controller, and a self-made bowing sensor with a vertical acrylic plate. Of course, the assembly also requires some programming know-how, especially when dealing with sound waves.
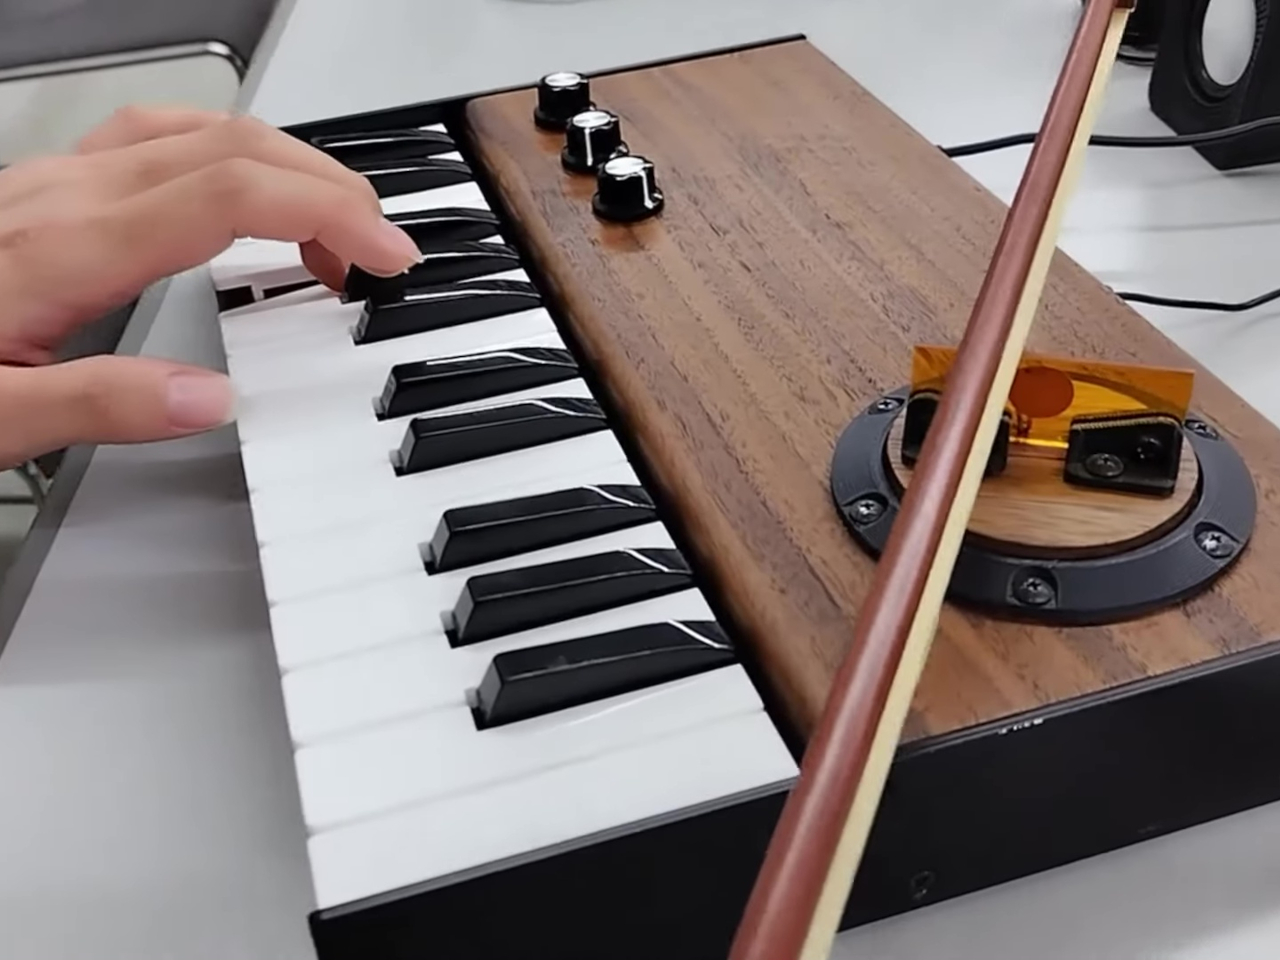
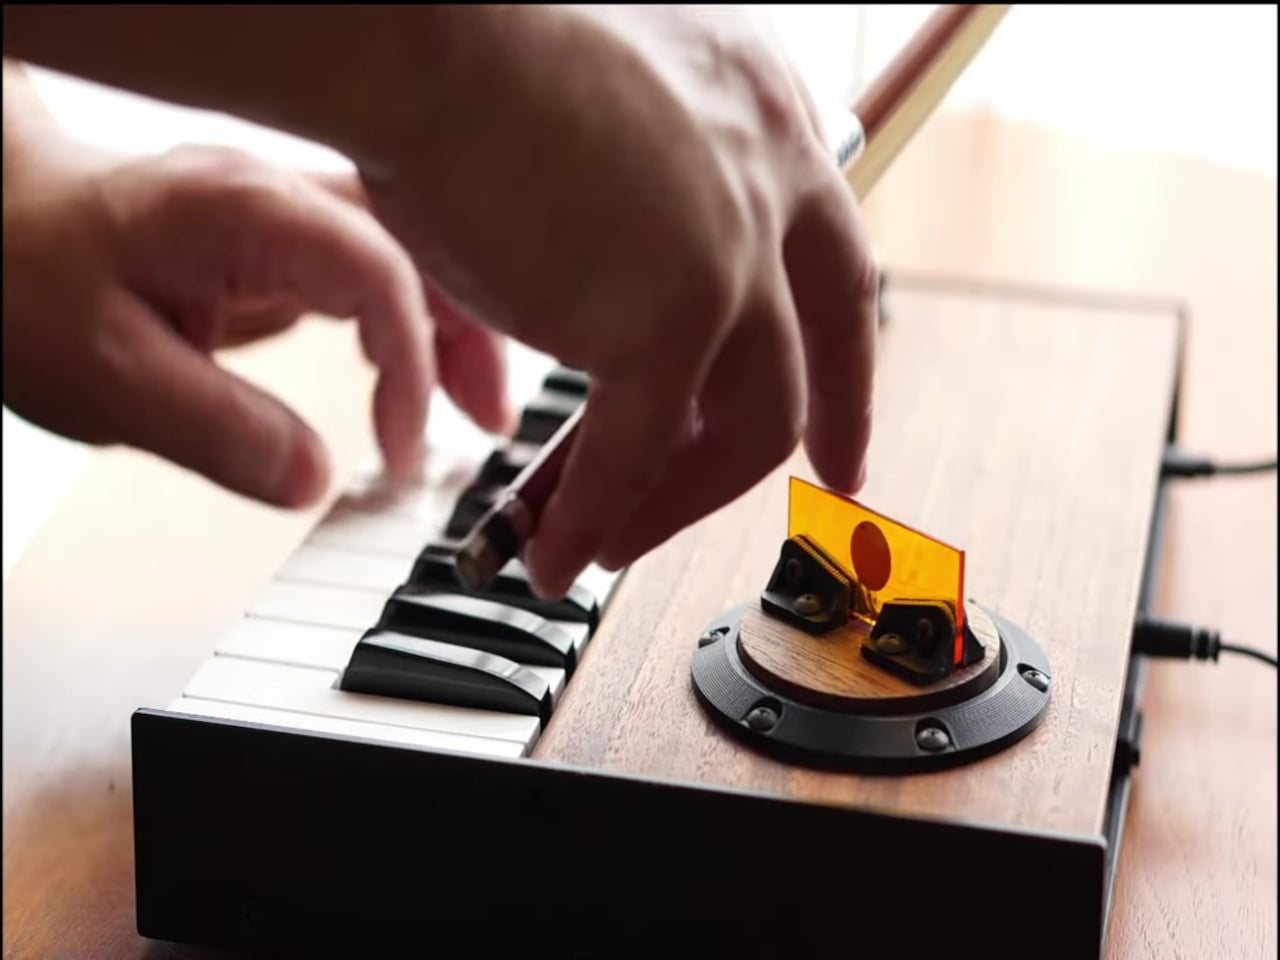
Despite the complexity of the build, using the Key-bowed looks pretty simple, at least for the musically inclined. You simply hit the keys with one hand to produce music like on a regular keyboard or piano, and then you use the other hand to move the bow across the acrylic plate as you would with a violin. The vibrations on the plate are detected by the sensor and then transformed into waves that modify the note that’s produced, resulting in a very realistic recreation of a violin sound, with perfect pitch, and without the screeches. You can even pluck the plate and make it sound like you’re really plucking a string.
240702181648552
Key-bowed is definitely a work of genius that makes playing music both fun and enchanting. It still requires you to have some basic music knowledge, of course, but it makes the execution less daunting, especially if you’ve always dreamed of playing the violin. Of course, there are limits to the music you can play, since you’re technically producing notes with only one hand, and the design is made for those who hold the violin bow with their right hand. Nonetheless, it still creates a captivating experience, and hopefully, it can become a commercial product that will let everyone enjoy that experience as well.
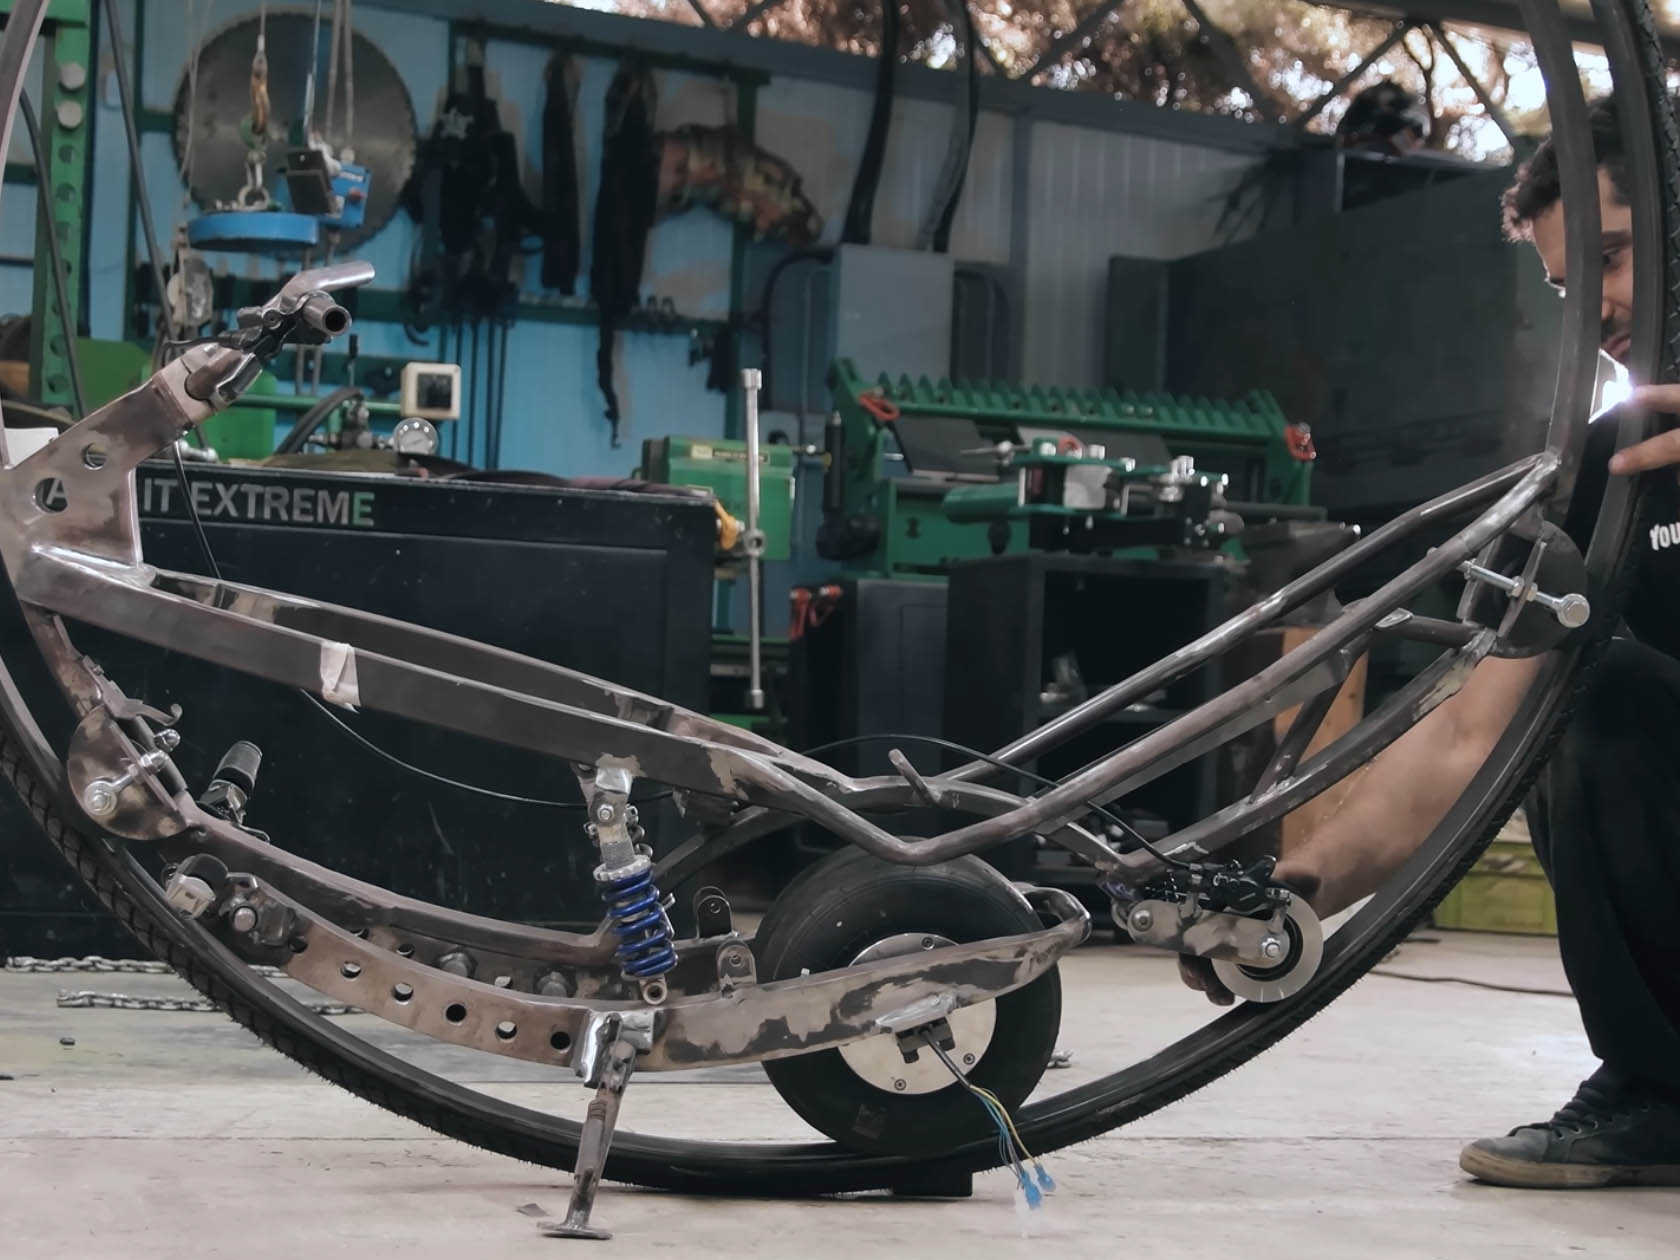
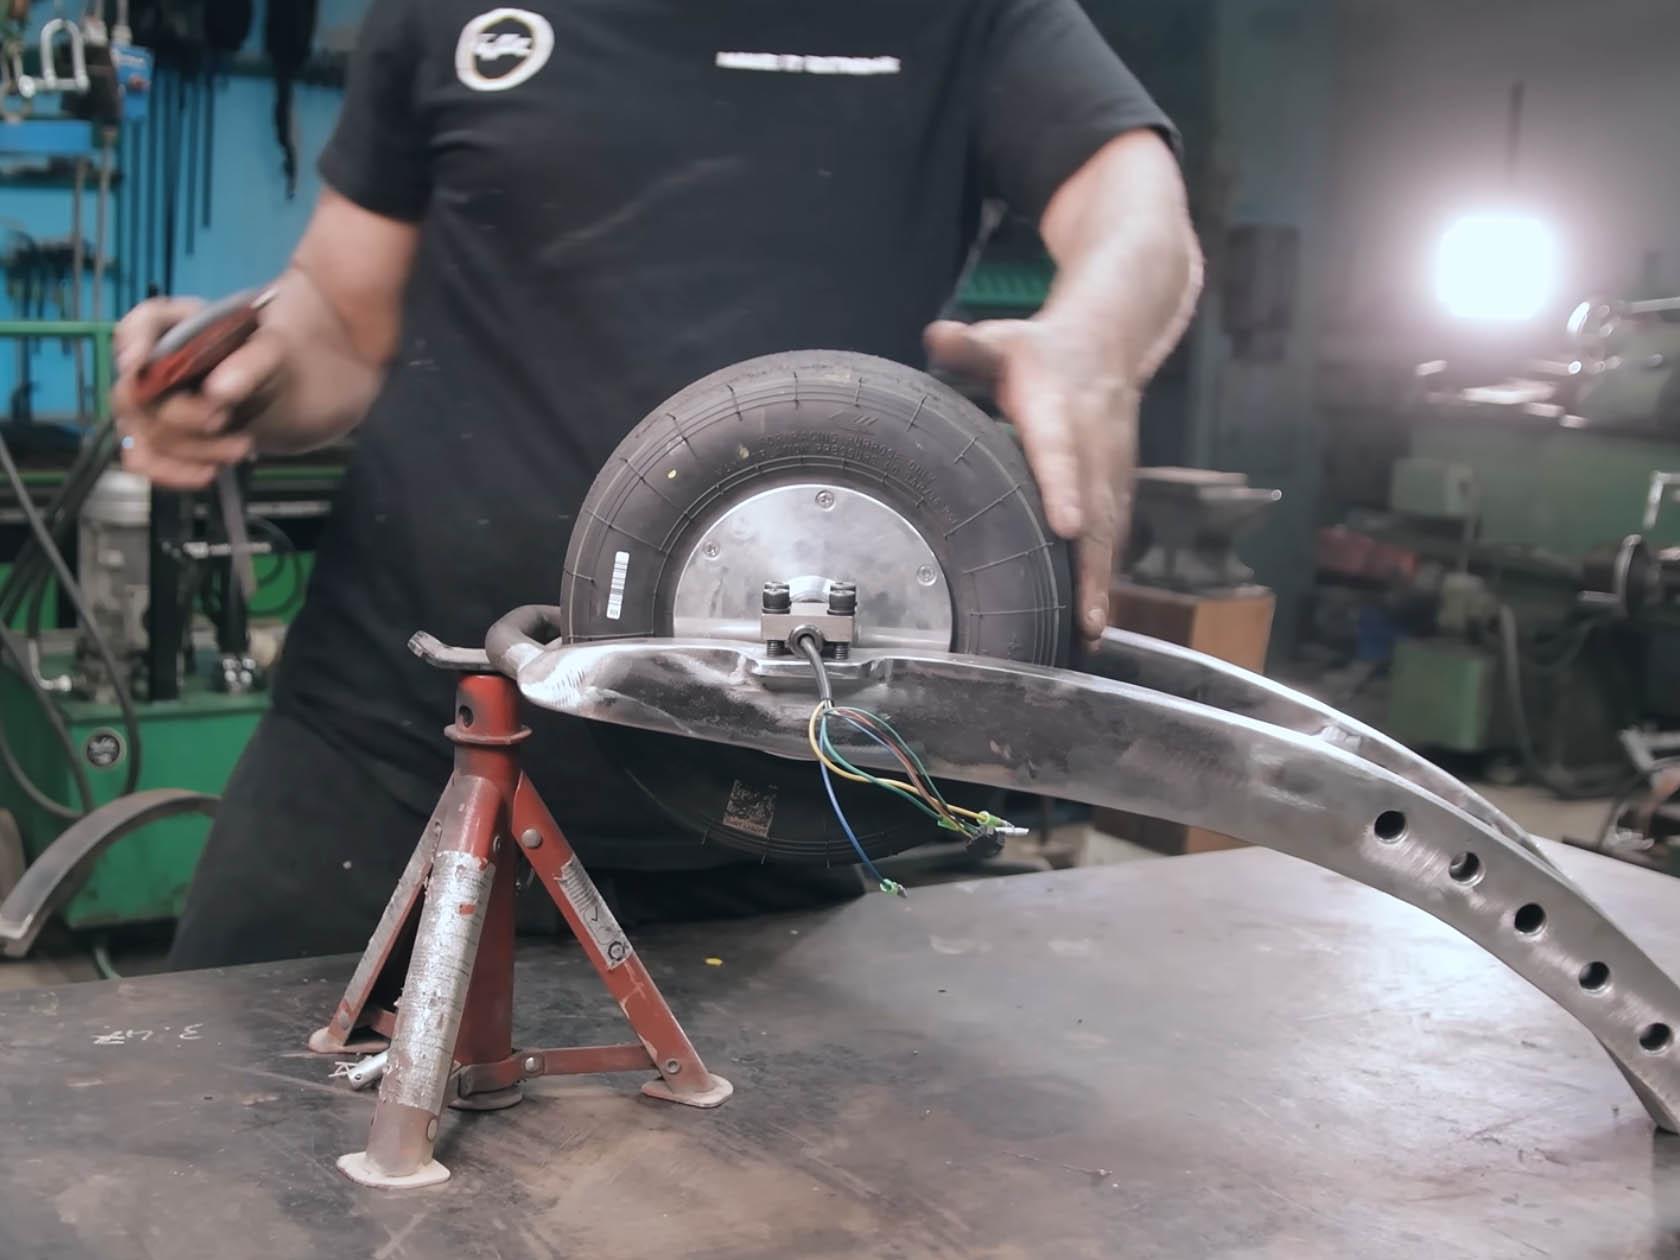
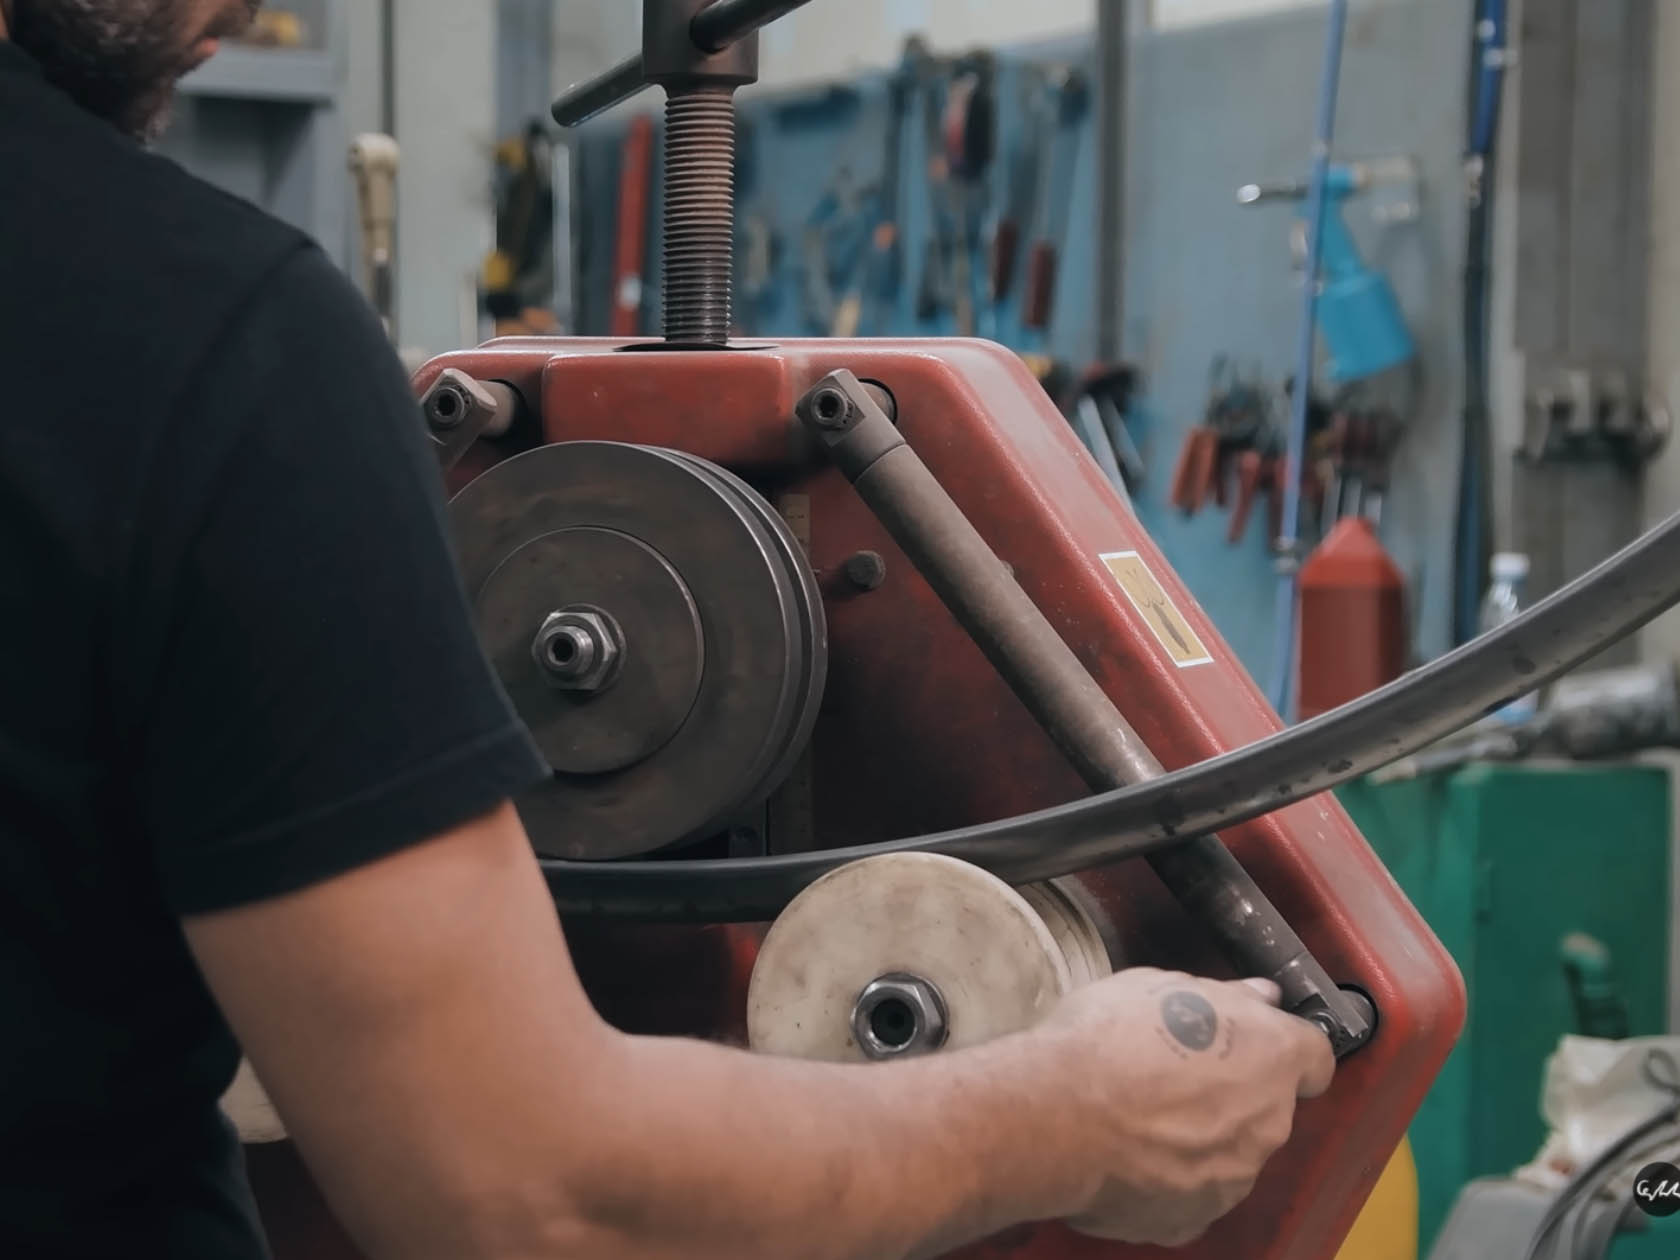
Creating extreme stuff from junk is a special skill that YouTube channel ‘Make It Extreme’ possesses. Their Monotrack bike made from a single recycled car tire was something of a shocker and they’ve upped the ante with another custom build. Called the Electric Monowheel this is a Herculine version that positions the rider inside the wheel.
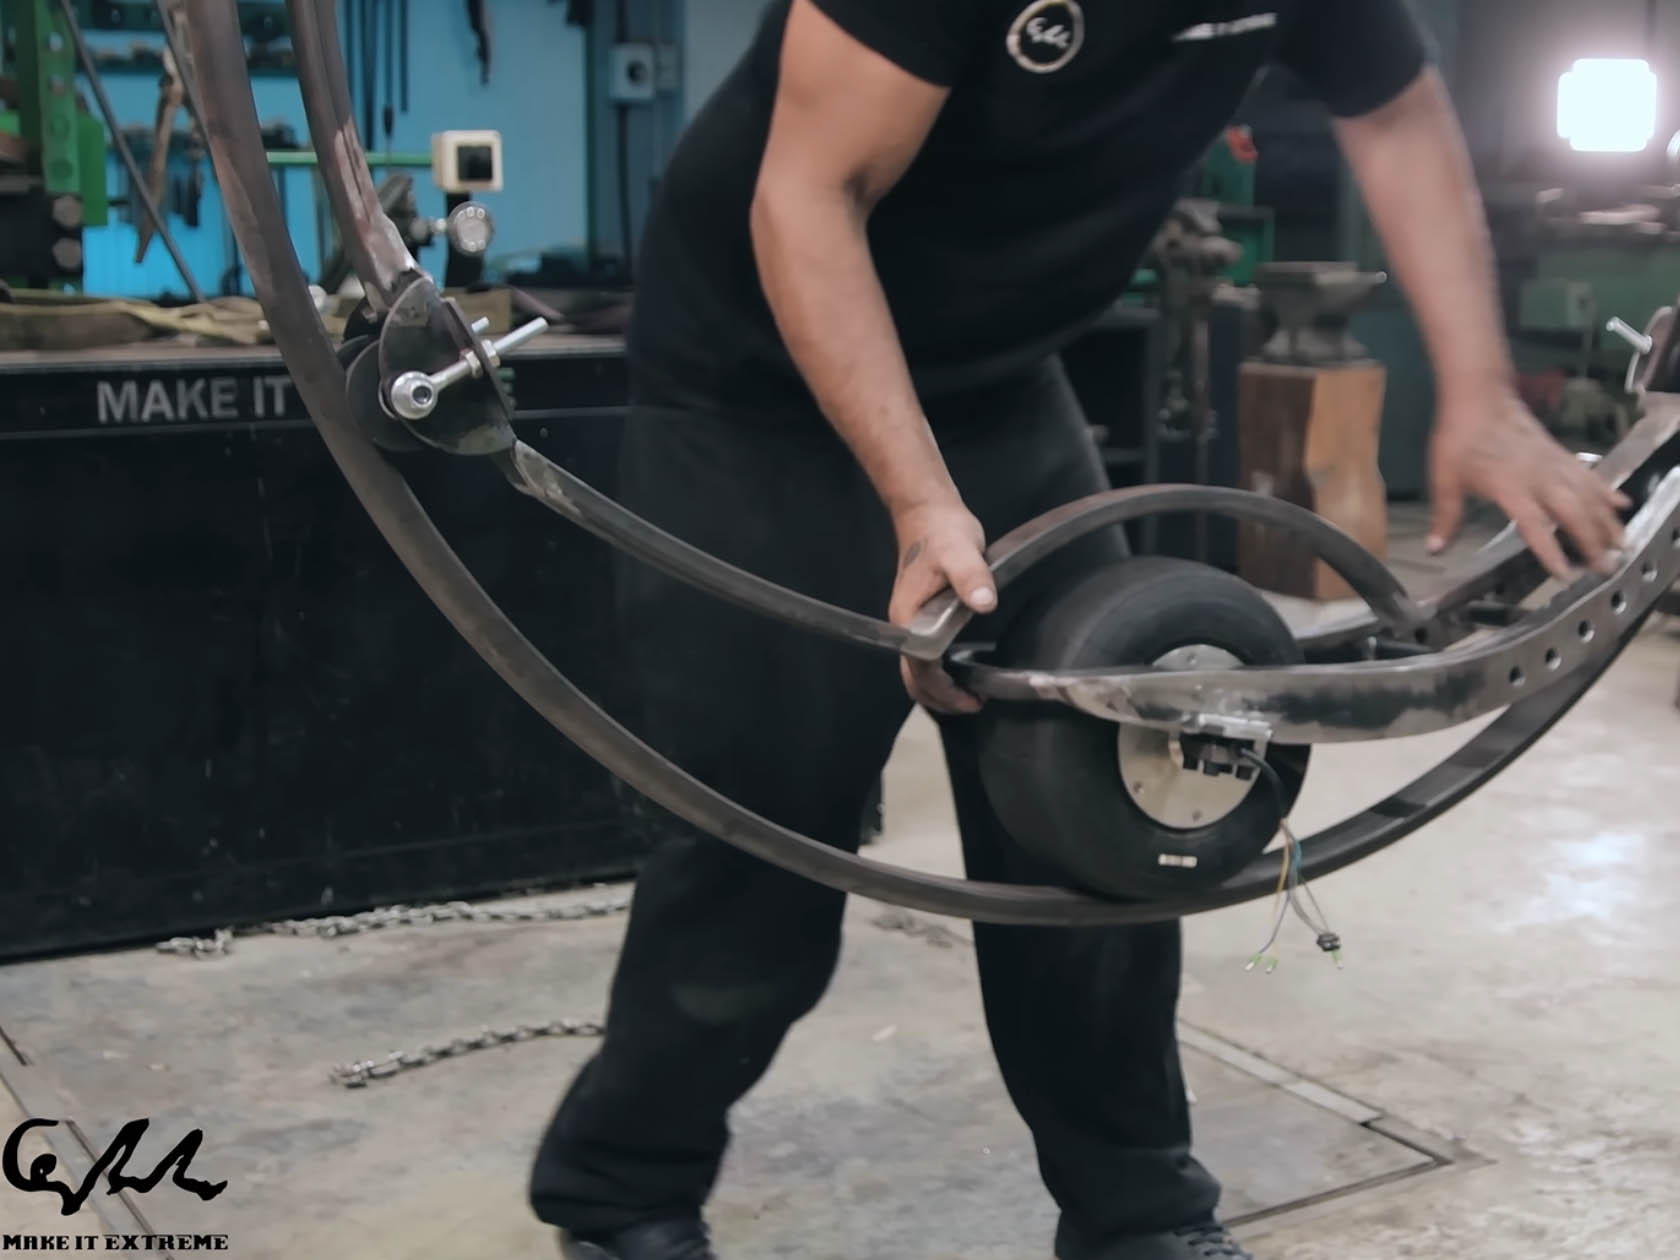
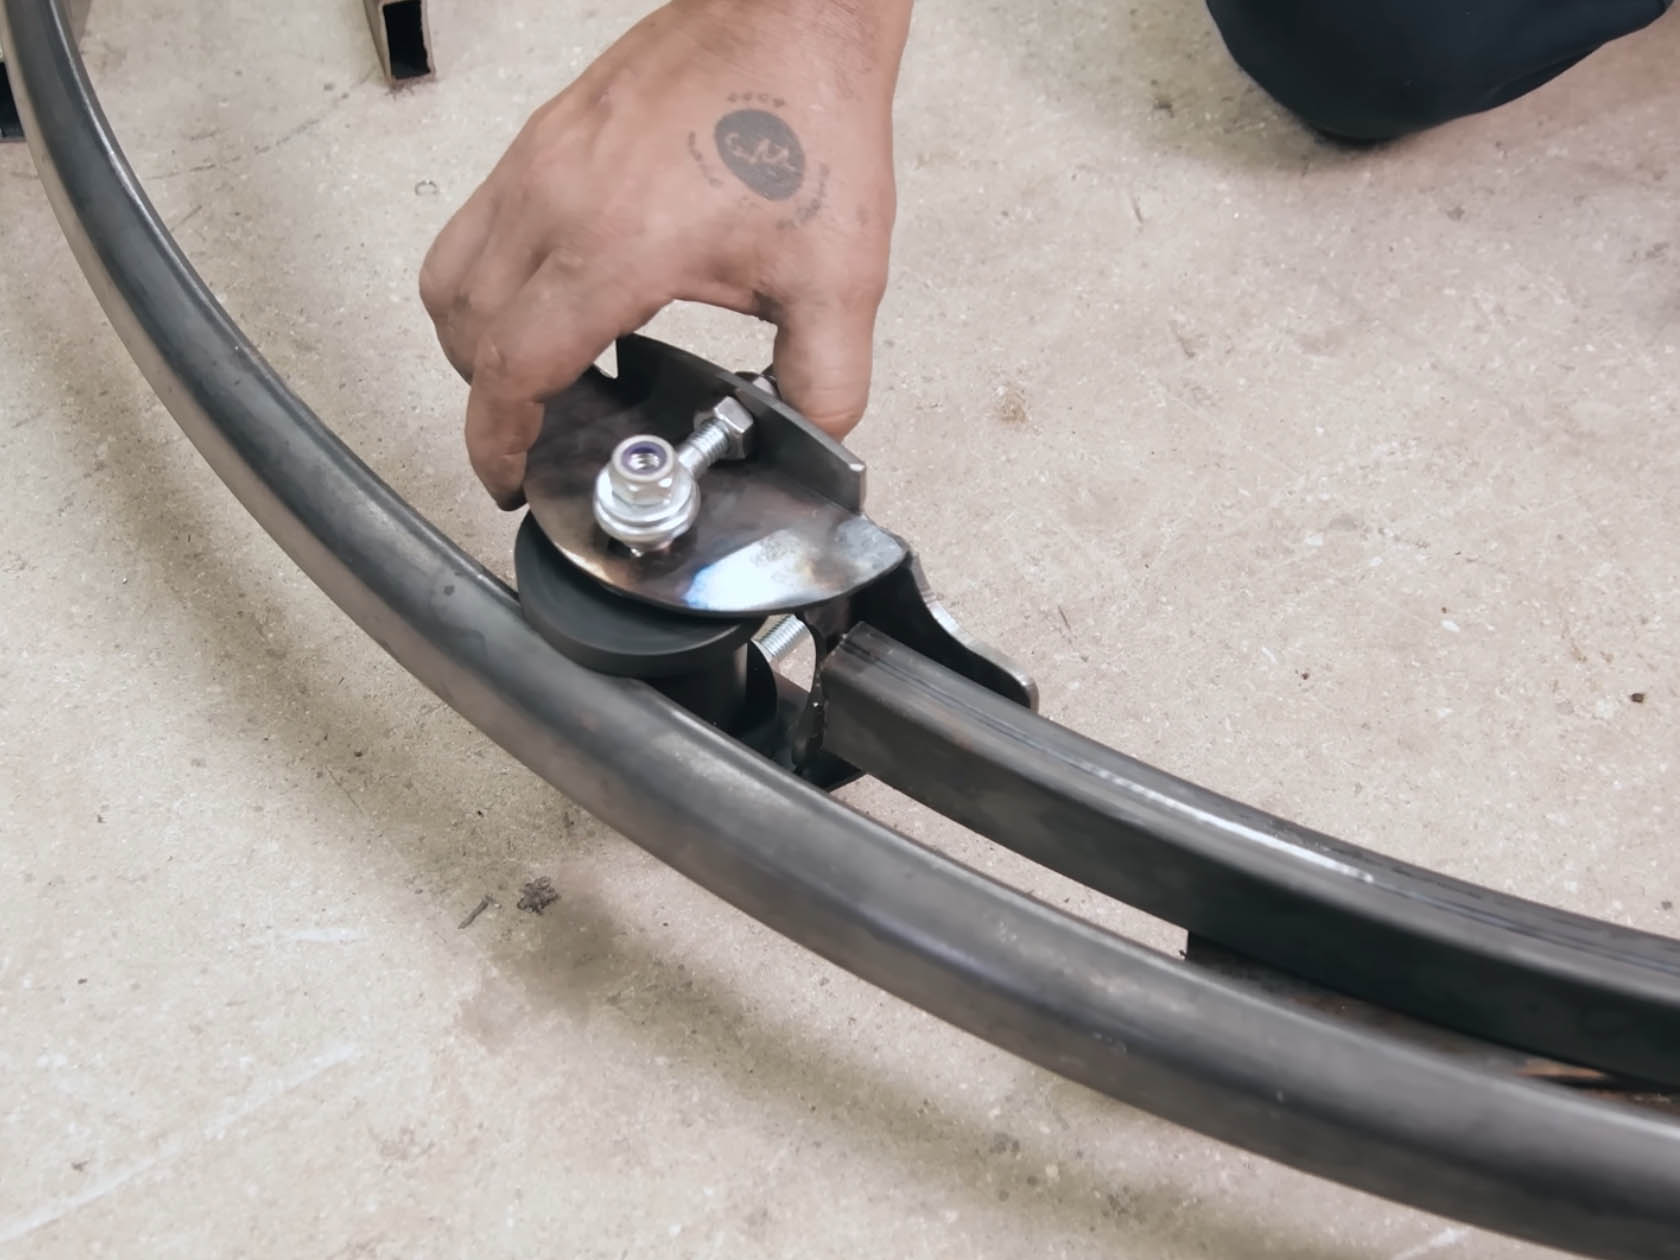
The obvious challenge in making this big wheel was actually creating a perfectly round wheel measuring 9.1 inches in diameter. Due to the large shape, the metallic wheel acts as a base for the rubber tires salvaged out of a motorcycle and go-kart. These three recycled tires are connected to make the final giant wheel.
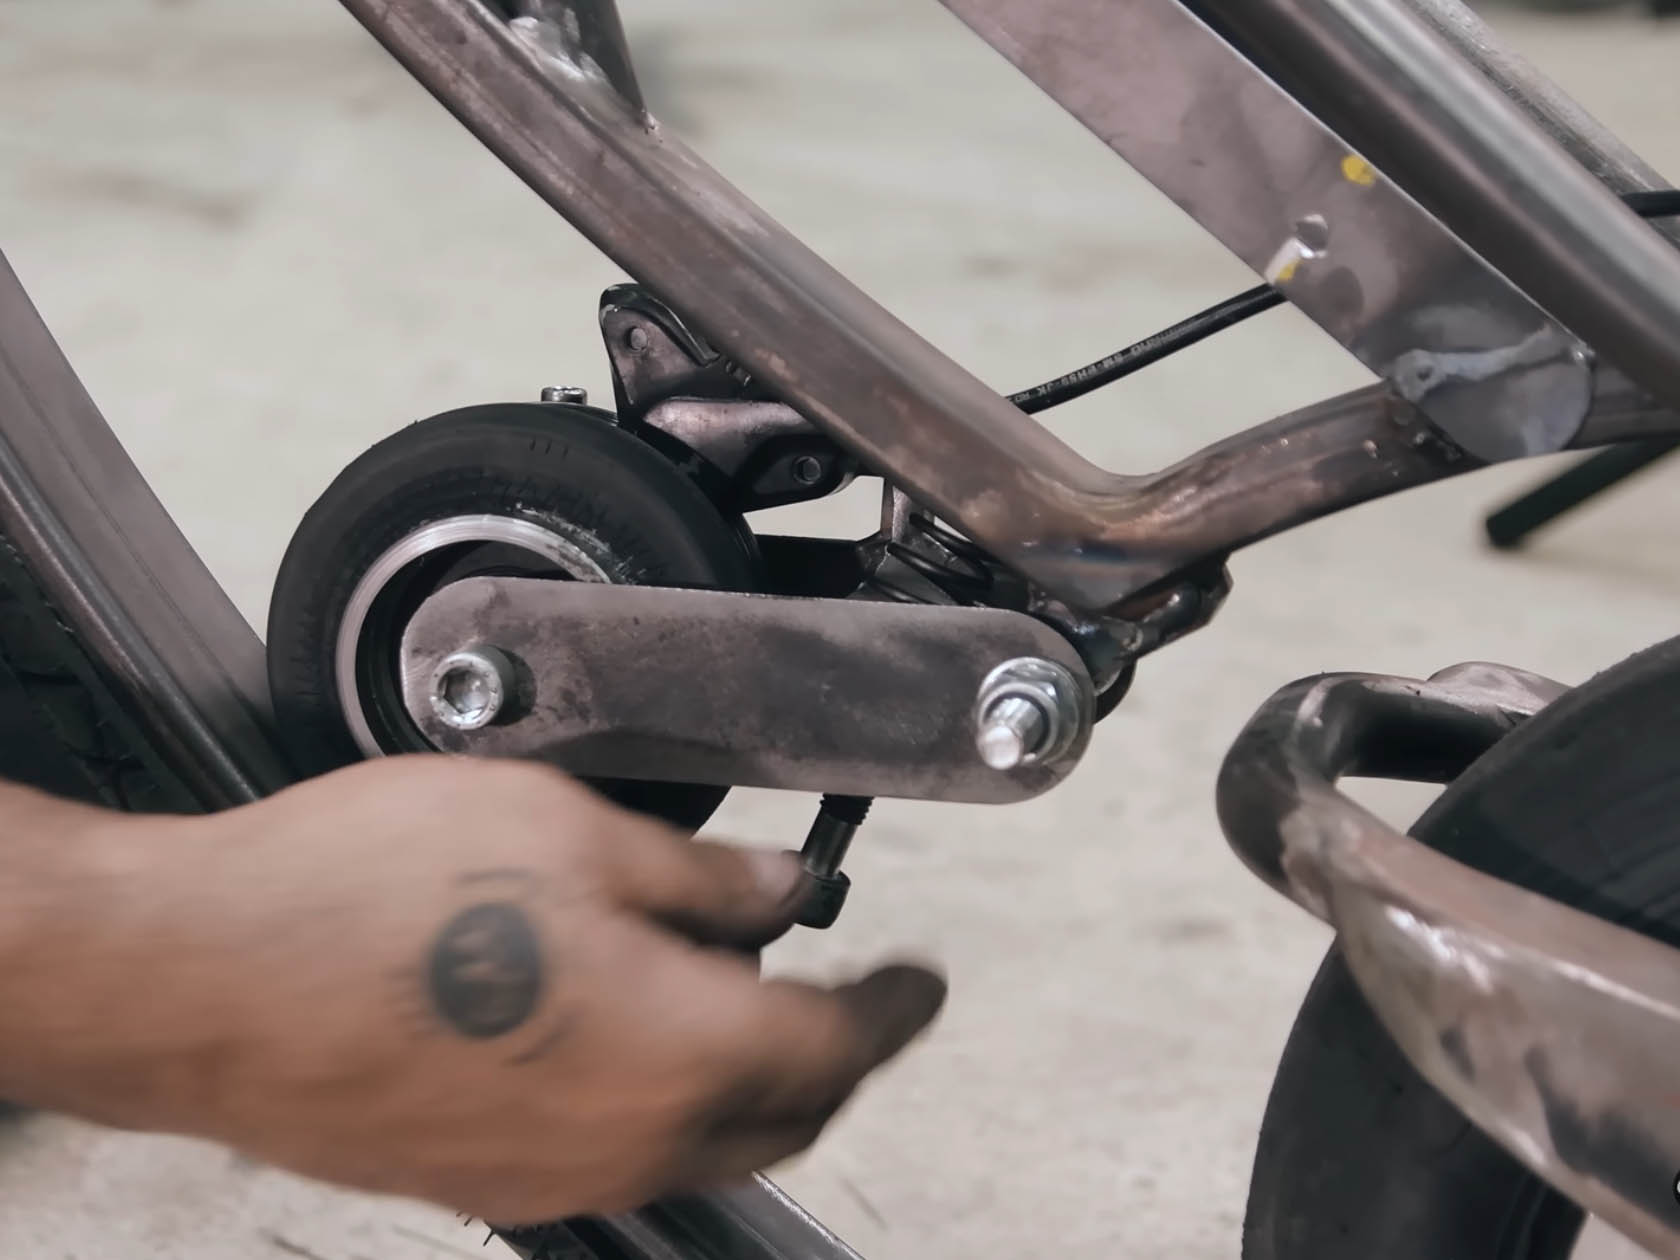
The chassis of this unique ride is the centric circle that stays stable even when the outside wheel is in motion. The trick here is to attach three rollers and a plastic encasing on which the wheel spins. To put it simply, just take for reference a hamster wheel. The power for this monowheel is derived from a go-kart’s electric motors attached to the tire. This explains the use of go-kart tires that are non-slip and provide transmission to the wheels without any wheel spin. The steering input is translated instantly to the movement of the wheel and so is the throttle input via the two controllers.
The current build has a better torque of the electromotion that is attributed to the faster-reacting motor. This is a major improvement over the earlier version. According to the makers, the vehicle feels very amazing to drive even though it is a bit dangerous if you don’t know how to handle it. There’s some good news for DIYers who are interested in this project as Make It Extreme is in the process of preparing the detailed plans of the monowheel motorcycle. That means you’ll have all the groundwork served on the platter for you to build on.
The devices and gear we own today are vastly different from the ones our grandparents owned. Back in the day, products could be pulled apart, tinkered with, and repaired without much of a fuss. Radios lasted decades, toasters from that era still work today, but the devices of today are a little too complicated to repair or tinker with. In fact, the companies that make these devices don’t even want you looking under the hood – try tinkering with a Tesla car and the company can remotely disable your entire vehicle for tampering. Mess with an Apple phone and its warranty gets voided. If you bought a Spotify Car Thing, regardless of your efforts, the company is planning on bricking the device globally at the end of this year.
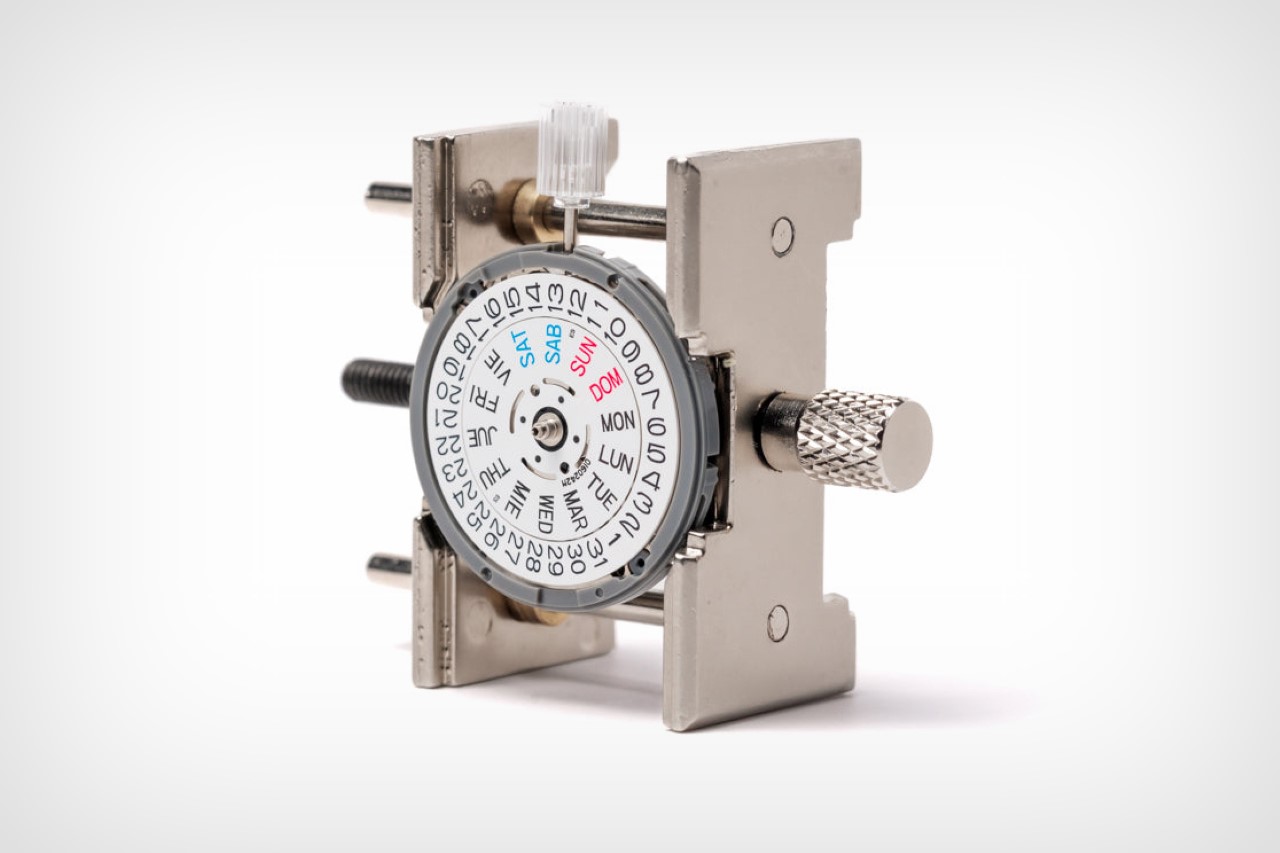
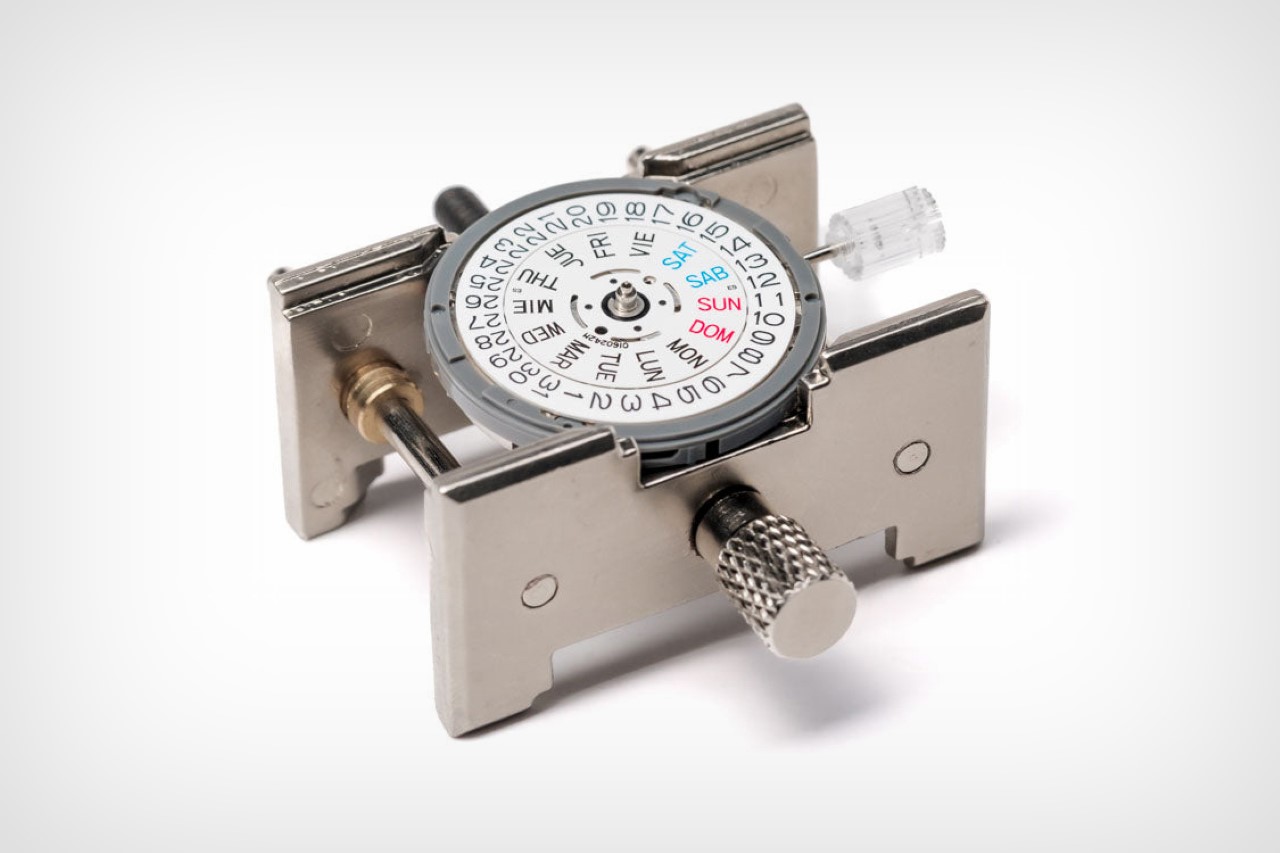
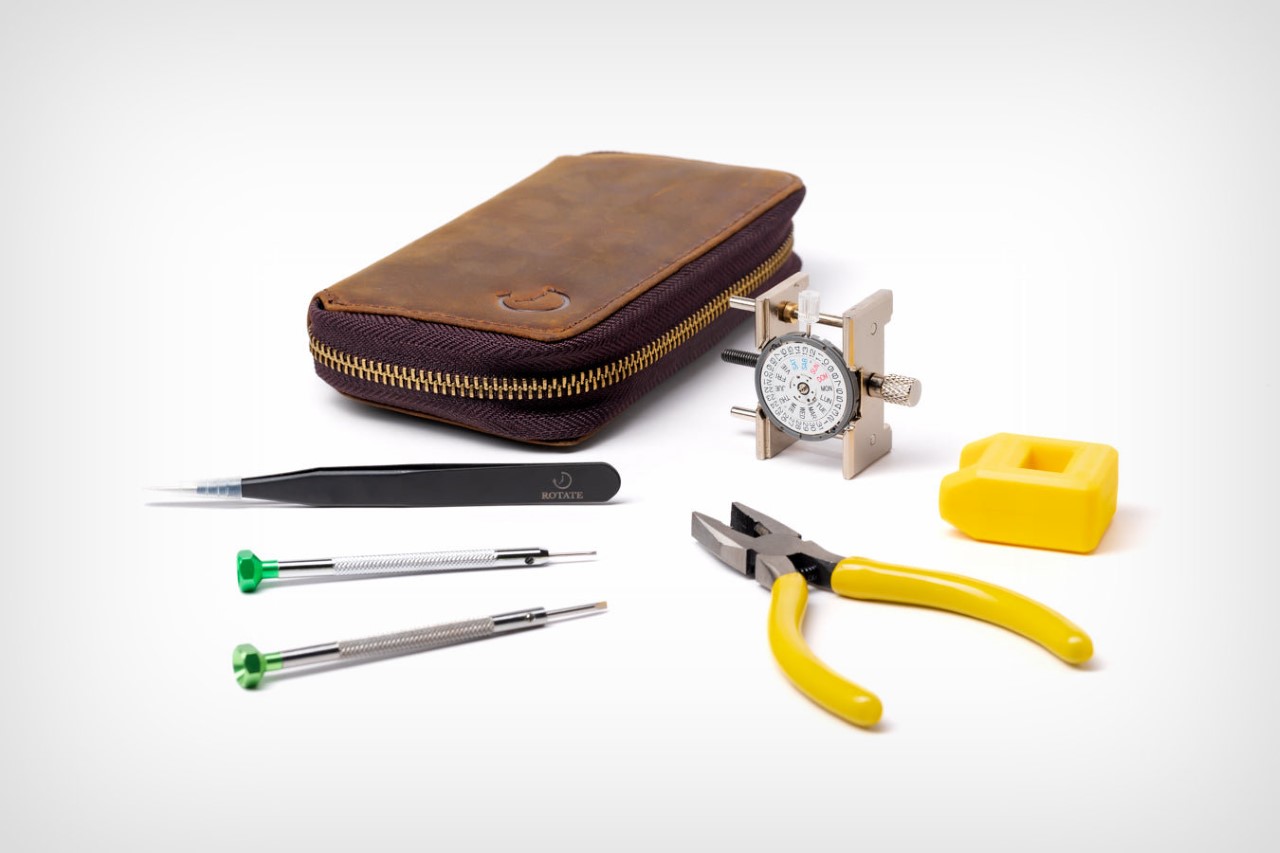
The reality is that we aren’t intimately familiar with the stuff we own today, and it’s time we changed that. The folks at Rotate Watches believe the only way to change this is to make tinkering more accessible. This beginner-friendly 50+ piece kit lets you build your own working, automatic watch movement from scratch. Modeled on the Seiko NH36, this kit has everything you need to be an amateur horologist. A guide helps take you through the various processes, and at the end, not only do you have a working watch that you can keep on your table to tell the date and time, but you also inherit an innate understanding of how timepieces work… and that’s just priceless, isn’t it?!
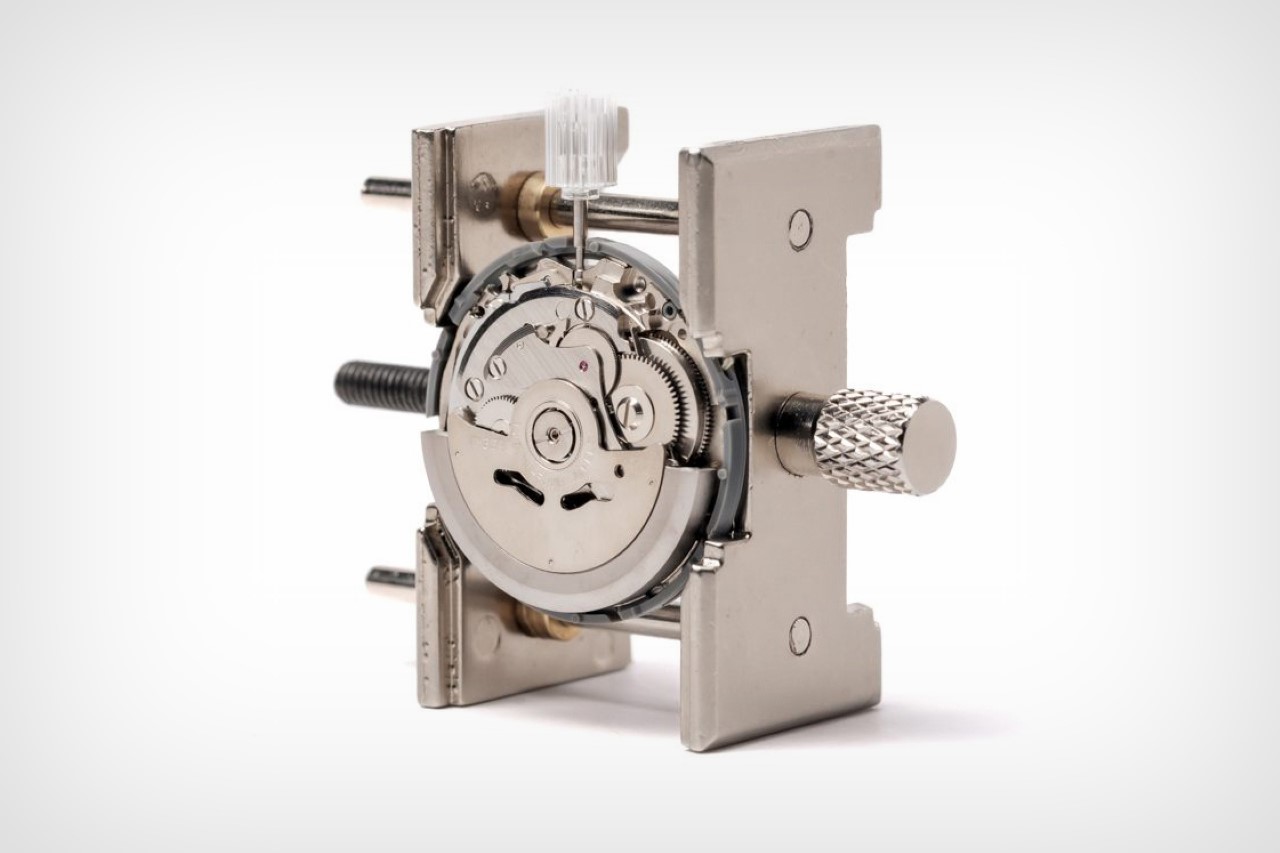
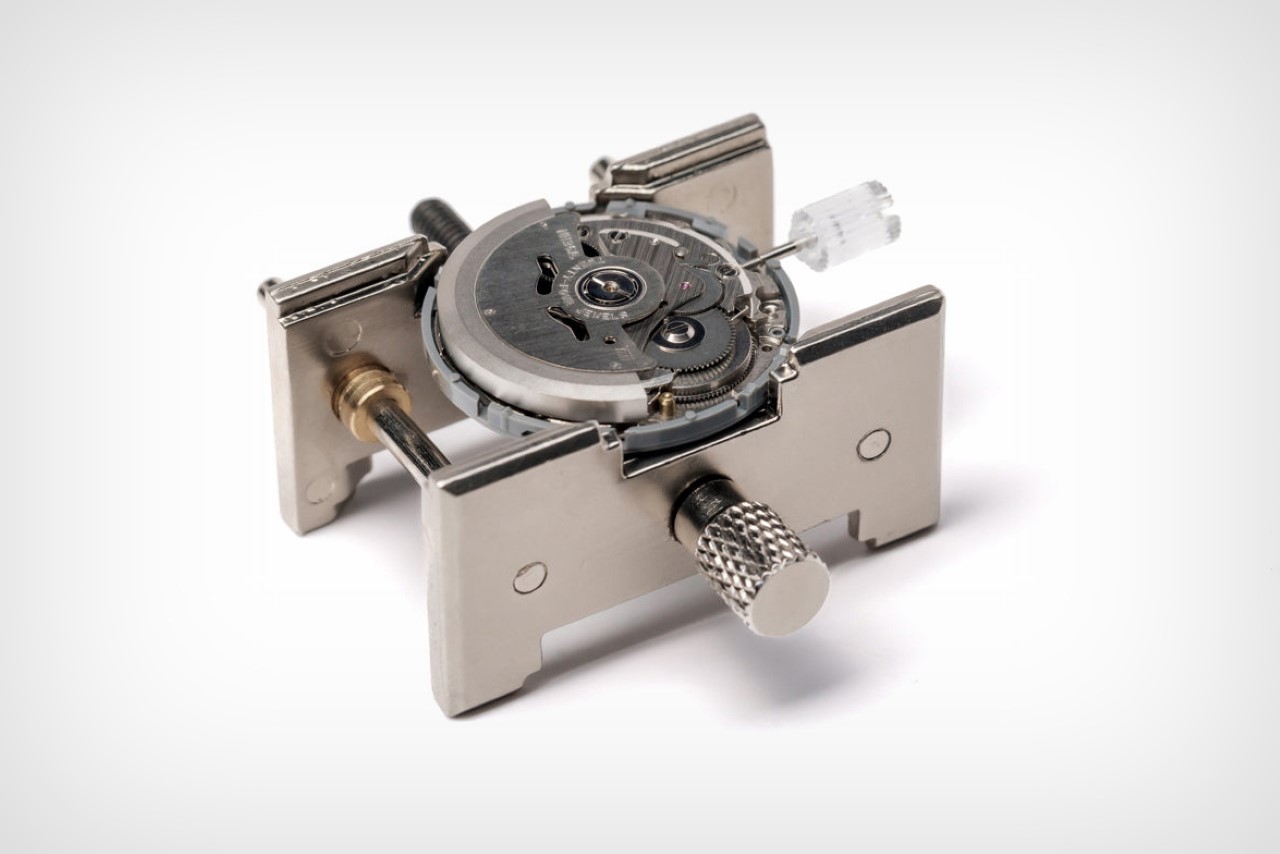
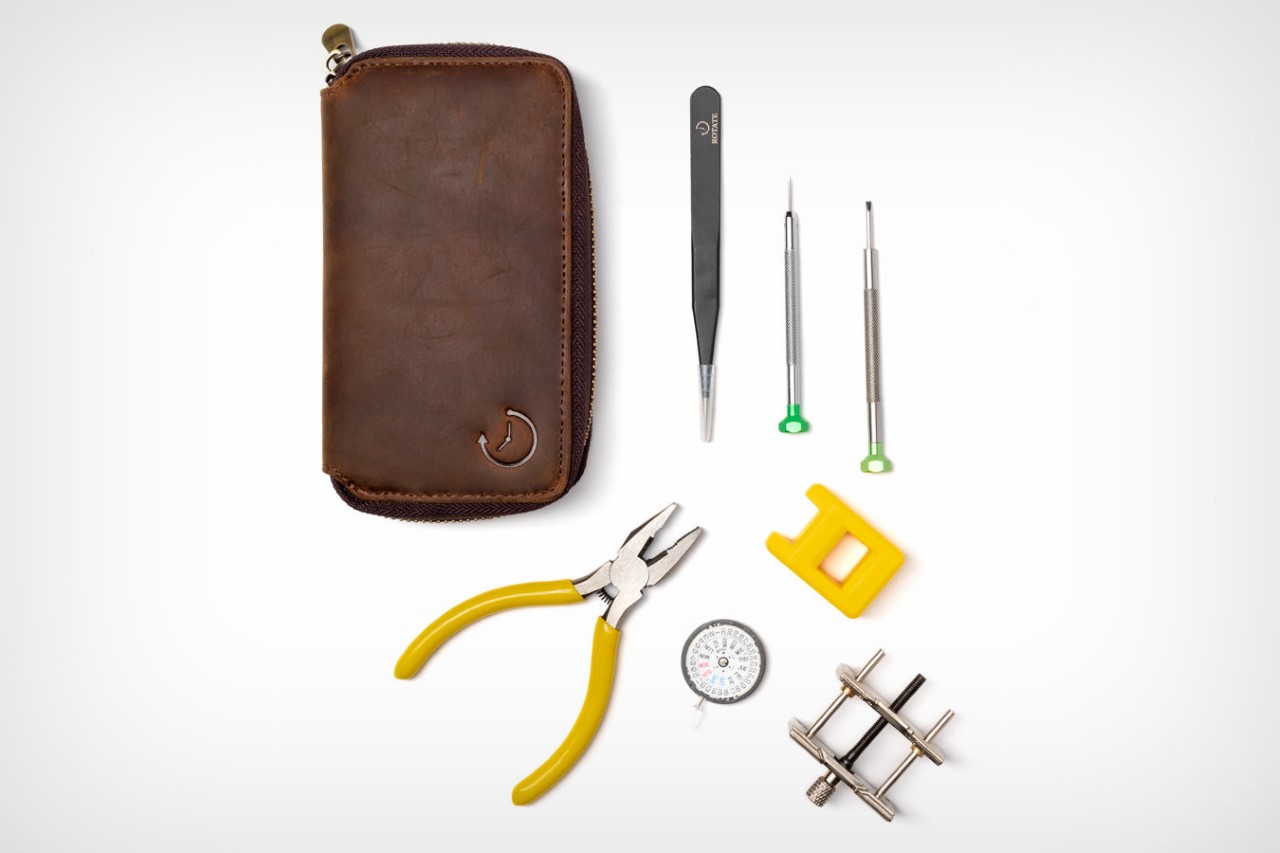
The Seiko NH36 is a popular and reliable automatic movement known for its accuracy and durability. With a diameter of 29.36mm and a height of 5.32mm, it’s a compact powerhouse featuring 24 jewels for reduced friction and a smooth operation. This kit includes the movement itself, along with a set of specialized tools to handle the delicate watch parts. Screwdrivers, tweezers, finger cots, and pliers are all included, ensuring you have everything you need to handle the intricate components.
One of the highlights of this kit is the beginner-friendly guide. Rotate, the company behind the kit, understands that watchmaking can be intimidating for newcomers. Their detailed instructions break down the disassembly and assembly process into clear steps, accompanied by numbered pictures for easy reference. The guide goes beyond just the mechanics, explaining the purpose of each piece and offering helpful tips and tricks throughout the process. For those who prefer a greater challenge, Rotate also offers the option to receive the movement disassembled. This allows experienced hobbyists to dive right into the reassembly process, testing their watchmaking skills.